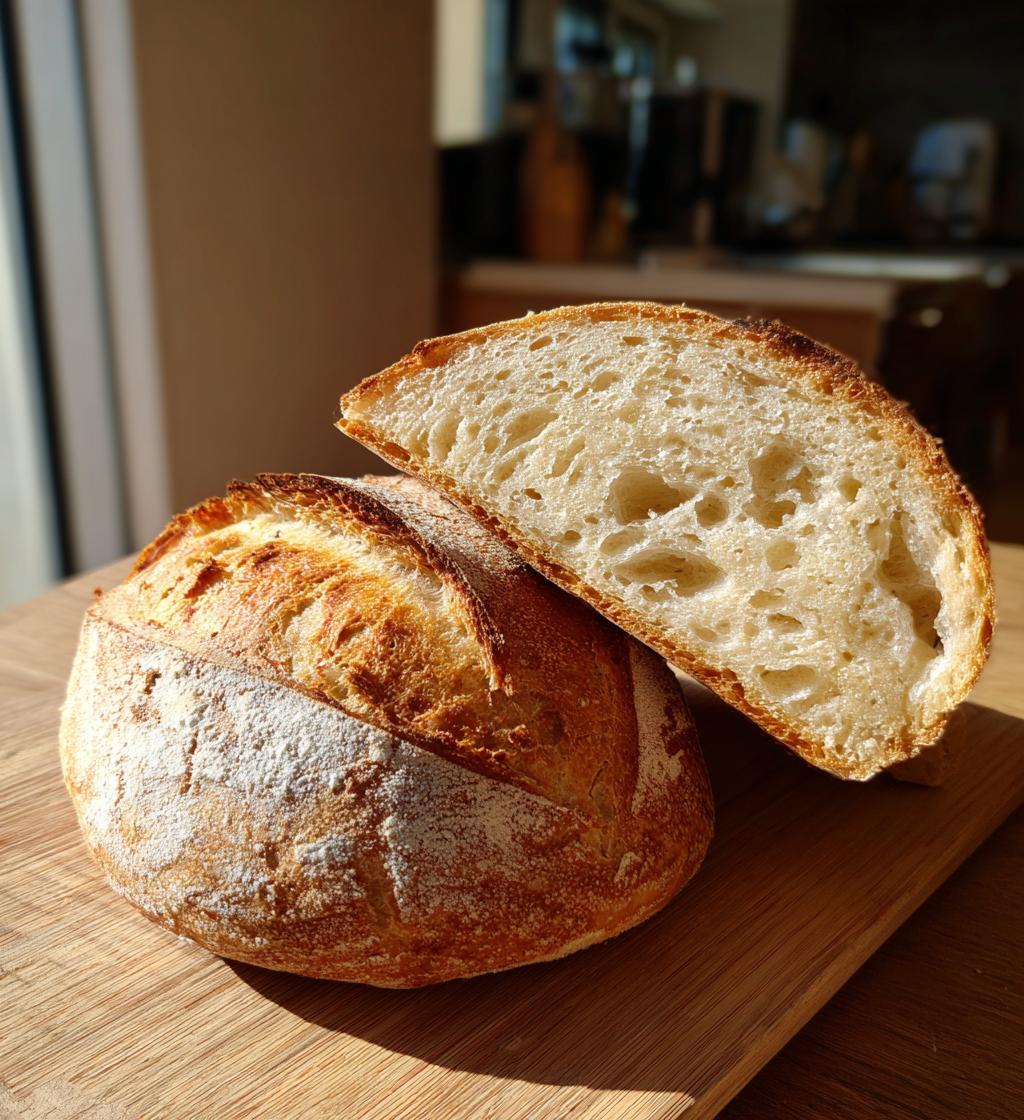
Ah, sourdough bread! There’s just something magical about it, isn’t there? The way it rises, the tangy aroma that fills your kitchen, and that chewy, crusty exterior—it’s a bread lover’s dream! I first fell in love with sourdough during a baking class, and let me tell you, it was a game changer. This isn’t just any bread; it’s a living, breathing creation that’s been around for centuries. Did you know that sourdough is one of the oldest forms of leavened bread? It’s true! Its natural fermentation process not only adds a unique flavor but also makes it easier to digest. Plus, the health benefits of sourdough are impressive; it’s lower on the glycemic index than regular bread, and those probiotics are a bonus for your gut health! Making sourdough at home is not just about the end result; it’s a journey filled with trial, error, and pure joy. So, grab your ingredients, and let’s get started on this delicious adventure!
Ah, sourdough bread! There’s just something magical about it, isn’t there? The way it rises, the tangy aroma that fills your kitchen, and that chewy, crusty exterior—it’s a bread lover’s dream! I first fell in love with sourdough during a baking class, and let me tell you, it was a game changer. This isn’t just any bread; it’s a living, breathing creation that’s been around for centuries. Did you know that sourdough is one of the oldest forms of leavened bread? It’s true! Its natural fermentation process not only adds a unique flavor but also makes it easier to digest. Plus, the health benefits of sourdough are impressive; it’s lower on the glycemic index than regular bread, and those probiotics are a bonus for your gut health! Making sourdough at home is not just about the end result; it’s a journey filled with trial, error, and pure joy. So, grab your ingredients, and let’s get started on this delicious adventure!
Ingredients List
To make the most delightful sourdough bread, you’ll want to gather these simple yet essential ingredients. Trust me; they’re the building blocks for that perfect loaf!
- 500g bread flour: This is your star ingredient! Bread flour has a higher protein content, which helps develop that lovely gluten structure for a chewy texture.
- 350ml water: Lukewarm water is best; it helps activate the sourdough starter without killing the yeast. Plus, it makes mixing easier!
- 100g sourdough starter: This is the magic potion that gives your bread that signature tang! Make sure it’s bubbly and active for the best results.
- 10g salt: Salt not only enhances flavor but also strengthens the dough. Don’t skip this step; it’s crucial for a well-balanced taste!
With these ingredients in hand, you’re all set to embark on your sourdough baking adventure. Let’s get mixing!
How to Prepare Sourdough Bread
Now that you’ve got your ingredients ready, let’s dive into the exciting process of making sourdough bread! Don’t worry; I’ll guide you through each step, and before you know it, you’ll have a gorgeous loaf ready to enjoy.
Mixing the Dough
Start by grabbing a large mixing bowl. Combine the 500g of bread flour and 350ml of lukewarm water. It’s super important to mix these two together until they’re just combined—no need for perfection here! You want to ensure the flour is fully hydrated. This initial mix is where the foundation of your sourdough begins, so embrace the sticky texture—it’s a good sign!
Kneading the Dough
Once your dough is mixed, it’s time to knead. Dust your countertop with a little flour and turn the dough out. Knead it for about 8-10 minutes until it becomes smooth and elastic. You’ll know you’re there when it feels soft and springs back when pressed. If it’s too sticky, sprinkle a touch more flour, but be careful not to add too much; we want that lovely chewy texture!
First Rise
After kneading, place your dough in a lightly greased bowl, cover it with a damp cloth, and let it rise at room temperature for about 4 hours. This is where the magic happens! Every hour, give it a gentle fold (just stretch and fold the dough over itself) to develop that beautiful gluten structure. This step is crucial for a well-risen loaf!
Shaping and Proofing
Once your dough has risen, it’s time to shape it. Turn it out onto a lightly floured surface and gently press it down to release some air. Shape it into a round or oval loaf, tucking the edges underneath to create tension on the surface. Now, transfer it to a proofing basket or bowl lined with a floured cloth. Let it proof for another 2 hours at room temperature, or pop it in the fridge overnight for a slower fermentation. This overnight option enhances the flavor—trust me!
Baking the Sourdough
Preheat your oven to 230°C (450°F) with a Dutch oven inside. This is key for achieving that perfect crust! Once heated, carefully transfer your dough into the hot Dutch oven. Use a sharp knife or a lame to score the top—this allows steam to escape and helps your bread rise beautifully. Bake with the lid on for 30 minutes, then remove the lid and bake for another 15 minutes until it’s golden brown and crusty. Oh, the smell will be irresistible! Once done, let it cool on a wire rack before slicing. Enjoy every crumb of your homemade sourdough bread!
Why You’ll Love This Recipe
This sourdough bread recipe is a true gem, and here’s why you’re going to fall head over heels for it:
- Irresistible Flavor: The natural fermentation gives sourdough its signature tangy flavor, making each bite a delightful experience.
- Healthier Choice: With a lower glycemic index and packed with probiotics, sourdough is easier on the stomach and better for digestion.
- Artisan Quality: You’ll impress friends and family with your homemade artisan bread that rivals any bakery!
- Versatile Enjoyment: Whether slathered with butter, made into sandwiches, or served alongside soup, sourdough fits any occasion.
- Customizable: You can easily add herbs, seeds, or even cheese to create your own unique flavor profiles!
Trust me, once you taste your own homemade sourdough, you’ll never want store-bought bread again!
Tips for Success
Making sourdough bread can be a delightful adventure, but there are a few tips I’ve learned along the way that can help you avoid common pitfalls and ensure your loaf turns out perfectly every time!
Use a Digital Scale for Accuracy
Trust me, weighing your ingredients makes a world of difference! Baking is a science, and precise measurements are key to achieving that perfect loaf. A digital scale ensures you’re using exactly the right amounts, especially for flour and water.
Keep Your Starter Healthy
Your sourdough starter is your best friend in this journey! Make sure it’s bubbly and active before you start. Feed it regularly and let it sit at room temperature for a few hours before using it in your dough. A vigorous starter means a better rise and more flavor in your bread!
Pay Attention to Temperature
Temperature plays a big role in sourdough bread-making. Ideally, aim for a warm environment (around 24-27°C or 75-80°F) for your dough to rise. If your kitchen is too cold, consider placing your dough in a turned-off oven with the light on to create a cozy atmosphere.
Be Patient with the First Rise
Don’t rush the first rise! It usually takes about 4 hours, but if your dough needs a bit more time, let it go. You’re looking for it to double in size and feel puffy to the touch. This patience pays off in flavor and texture!
Practice Your Scoring Technique
Scoring your dough isn’t just for looks; it helps control how your bread expands in the oven. Use a sharp knife or a lame to make a shallow cut across the top. Try to make it swift and confident—it’ll help your bread bloom beautifully!
Let It Cool Before Slicing
I know it’s tempting to dive right in, but letting your sourdough cool completely on a wire rack is crucial. This allows the steam to escape, ensuring a nice, firm crust and preventing gummy insides. Trust me; the wait is worth it!
With these tips in your back pocket, you’re all set to conquer the world of sourdough baking. Happy baking!
Nutritional Information
As you embark on your sourdough bread journey, it’s always good to know what you’re putting into your body! Here’s the estimated nutritional breakdown for one slice of this delightful homemade sourdough bread:
- Calories: 150
- Fat: 1g
- Saturated Fat: 0g
- Trans Fat: 0g
- Unsaturated Fat: 0g
- Carbohydrates: 30g
- Fiber: 2g
- Protein: 5g
- Sugar: 0g
- Sodium: 200mg
- Cholesterol: 0mg
Keep in mind that these values are estimates and can vary based on the specific ingredients and portion sizes you use. But overall, sourdough bread makes for a nutritious, wholesome option that’s both satisfying and delicious!
FAQ Section
Got questions about sourdough bread? You’re not alone! Here are some of the most common queries I hear, along with answers that’ll help you become a sourdough pro in no time!
What can I do if my sourdough doesn’t rise?
If your sourdough bread isn’t rising, the first thing to check is your starter. It should be bubbly and active! If it’s not, give it a good feeding and let it sit at room temperature for a few hours. Also, ensure that your dough is kept in a warm environment during the first rise—cold temperatures can slow things down.
How do I know when my sourdough bread is done baking?
The best way to check if your sourdough bread is done is to tap the bottom of the loaf—if it sounds hollow, it’s ready! You can also use a thermometer; the internal temperature should be around 90°C (200°F). Don’t skip the cooling time afterward, as the bread continues to cook slightly from residual heat!
Can I add mix-ins to my sourdough bread?
Absolutely! Sourdough is super versatile. You can add seeds, herbs, cheese, or even dried fruits to give your bread a unique twist. Just be mindful not to overload it; too many mix-ins can affect the dough’s structure. I love adding a handful of sunflower seeds for a delightful crunch!
How should I store leftover sourdough bread?
The best way to store your sourdough bread is in a paper bag at room temperature. This helps maintain the crust’s crispiness while keeping the inside soft. If you need to keep it for longer, you can wrap it tightly in plastic wrap and freeze it. Just make sure to slice it before freezing for easy access!
Is sourdough bread gluten-free?
Unfortunately, traditional sourdough bread is not gluten-free, as it’s made with wheat flour. However, you can make a gluten-free version using gluten-free flour blends and a gluten-free sourdough starter. Just keep in mind that the texture and flavor will vary from traditional sourdough!
Storage & Reheating Instructions
Now that you’ve baked your delicious sourdough bread, you might be wondering how to keep it fresh and tasty for as long as possible. Don’t worry, I’ve got you covered with some simple storage and reheating tips!
Storing Leftover Sourdough Bread
The best way to store your leftover sourdough bread is in a paper bag at room temperature. This method keeps the crust nice and crispy while preventing the inside from getting too dry. Avoid storing it in plastic, as that can make the crust soggy. If you find you won’t finish the loaf within a few days, consider slicing it and wrapping it tightly in plastic wrap or aluminum foil before popping it in the freezer. This way, you can enjoy your sourdough whenever you crave it!
Reheating Sourdough Bread
When it comes to reheating your sourdough bread, you want to bring back that fresh-out-of-the-oven vibe. Here’s how I like to do it:
- Oven Method: Preheat your oven to 180°C (350°F). Wrap your bread in aluminum foil to help retain moisture, then place it directly on the oven rack. Heat for about 10-15 minutes. If you prefer a crustier exterior, remove the foil for the last few minutes of reheating.
- Toaster Method: For individual slices, a toaster is a quick and easy option! Just pop a slice in and toast it until it’s warm and crispy. Perfect for that morning toast or a quick sandwich!
- Skillet Method: If you’re feeling adventurous, heat a skillet over medium heat, add a little butter (or olive oil), and toast the bread on each side for a couple of minutes. This adds a lovely flavor and texture!
With these storage and reheating tips, your sourdough bread will stay delicious for days, and you’ll always have that fresh-baked goodness at your fingertips. Enjoy every last bite!
Print
Sourdough Bread: 5 Simple Steps to Craft Perfect Loaves
- Total Time: 5 hours 15 minutes
- Yield: 1 loaf 1x
- Diet: Vegetarian
Description
Sourdough bread is a type of bread made from naturally fermented dough. It has a distinct tangy flavor and a chewy texture.
Ingredients
- 500g bread flour
- 350ml water
- 100g sourdough starter
- 10g salt
Instructions
- Mix the flour and water in a bowl until combined.
- Add the sourdough starter and salt. Knead until smooth.
- Let the dough rise for 4 hours at room temperature, folding every hour.
- Shape the dough and place it in a proofing basket.
- Let it proof for 2 hours at room temperature or overnight in the fridge.
- Preheat the oven to 230°C (450°F) with a Dutch oven inside.
- Transfer the dough to the hot Dutch oven and score the top.
- Bake for 30 minutes with the lid on, then 15 minutes with the lid off.
- Cool on a wire rack before slicing.
Notes
- Use bread flour for best results.
- Adjust hydration based on the flour type.
- Store leftovers in a paper bag.
- Prep Time: 30 minutes
- Cook Time: 45 minutes
- Category: Baking
- Method: Baking
- Cuisine: American
Nutrition
- Serving Size: 1 slice
- Calories: 150
- Sugar: 0g
- Sodium: 200mg
- Fat: 1g
- Saturated Fat: 0g
- Unsaturated Fat: 0g
- Trans Fat: 0g
- Carbohydrates: 30g
- Fiber: 2g
- Protein: 5g
- Cholesterol: 0mg
Keywords: sourdough bread, homemade bread, artisan bread


