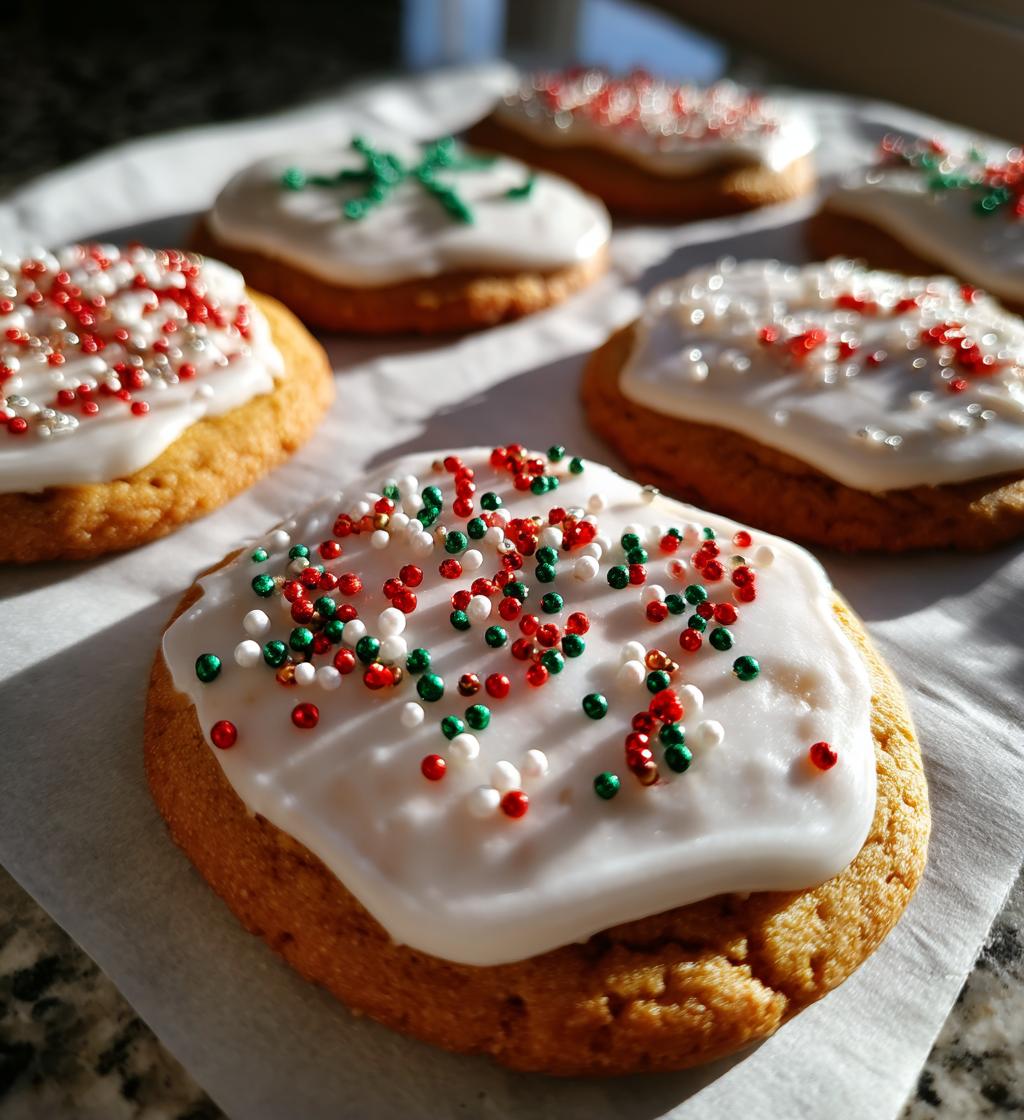
There’s something magical about pulling a batch of simple Christmas cookies decorated with colorful icing and sprinkles out of the oven. The smell of vanilla and butter fills the kitchen, and suddenly, it feels like the holidays. These cookies have been my go-to for years—whether I’m whipping them up with my kids on a snowy afternoon or packing them into tins for neighbors. They’re foolproof, festive, and absolutely delicious. The best part? You don’t need any fancy skills to make them look gorgeous. Just a little icing, some holiday spirit, and maybe a sprinkle or two (or ten).
Why You’ll Love These Simple Christmas Cookies Decorated
Trust me, these cookies are about to become your holiday baking MVP. Here’s why:
- Quick & easy – You probably have all the ingredients in your pantry right now!
- Perfectly festive – Nothing says “Christmas” like icing-covered cookies with sprinkles
- Kid-approved – Little hands love rolling dough and decorating (licking spoons optional but encouraged)
- Endlessly customizable – Go wild with food coloring or keep it classic with white icing
- Stress-free decorating – No artistic skills needed – wonky stars and lopsided trees taste just as good!
I’ve made these every December since my niece was old enough to hold a cookie cutter. Now it’s our tradition – flour everywhere, icing smudges on noses, and the best memories.
Simple Christmas Cookies Decorated Ingredients
Gather these simple ingredients – I promise you won’t need to make any fancy grocery runs for this one! The magic of these cookies comes from basic pantry staples done just right:
- 2 1/4 cups all-purpose flour – spooned and leveled (no packing!)
- 1/2 teaspoon baking powder – make sure it’s fresh for the perfect lift
- 1/4 teaspoon salt – just enough to balance the sweetness
- 3/4 cup unsalted butter, softened – leave it out for an hour or until your finger leaves a gentle dent
- 3/4 cup granulated sugar – regular white sugar works great here
- 1 large egg – straight from the fridge is fine, it’ll warm up while mixing
- 1 teaspoon vanilla extract – the good stuff makes all the difference!
For decorating (the fun part!):
- 1 cup powdered sugar – sifted if it’s lumpy
- 2 tablespoons milk – whole milk gives the creamiest icing
- Food coloring (optional) – gel colors work best for vibrant hues
- Sprinkles (optional) – I always use the holiday mix from the baking aisle
See? Nothing fussy – just simple ingredients that transform into something magical. Now let’s get mixing!
Equipment You’ll Need
Don’t stress – you likely have most of this already! Here’s what I grab every time:
- Mixing bowls – one for dry, one for wet ingredients
- Cookie cutters – my battered holiday set has seen 15 Christmases and counting
- Baking sheets – lined with parchment if you’re smart (less cleanup!)
- Rolling pin – or an empty wine bottle in a pinch (been there!)
For fancy decorators:
- Piping bags – or ziplocks with the corner snipped off
- Toothpicks – for swirls and fine details
Now let’s make some cookie magic!
How to Make Simple Christmas Cookies Decorated
Alright, let’s dive into the fun part! I’ve made these cookies so many times I could probably do it in my sleep, but I’ll walk you through every step so yours turn out perfect on the first try. Promise!
Making the Cookie Dough
First things first – preheat that oven to 375°F (190°C). While it’s heating up, let’s make magic happen in your mixing bowl. Whisk together the flour, baking powder, and salt in one bowl – this is your dry team. In another bowl, beat the softened butter and sugar until they’re fluffy and pale. This is where the magic starts! Add the egg and vanilla, mixing just until combined. Now slowly add your dry ingredients – don’t go crazy mixing here! Stop as soon as the flour disappears. Overmixing makes tough cookies, and we want tender, buttery bites of joy.
Baking the Cookies
Roll your dough out to about 1/4-inch thickness on a lightly floured surface. Too thin and they’ll burn, too thick and they won’t crisp up nicely. Use those holiday cookie cutters to make shapes – dip them in flour if they’re sticking. Bake for 8-10 minutes on parchment-lined sheets until the edges just barely start turning golden. They’ll look underdone in the middle – that’s perfect! Let them cool completely on the baking sheets before decorating. I know it’s hard to wait, but warm cookies make runny icing – trust me on this!
Decorating the Cookies
Time for the best part – the decorating! Mix your powdered sugar and milk until smooth. Want colored icing? Add a drop or two of gel food coloring. The icing should be thick enough to hold its shape but thin enough to spread easily – think honey consistency. Use a spoon to drizzle, or get fancy with a piping bag (or a ziplock with the corner snipped off). Pro tip: do a base layer of icing first, let it dry for 15 minutes, then add details. And don’t forget the sprinkles – apply them while the icing is wet so they stick. Now step back and admire your edible holiday masterpieces!
Tips for Perfect Simple Christmas Cookies Decorated
After years of Christmas cookie disasters (we don’t talk about The Great Icing Flood of 2018), I’ve learned a few tricks that guarantee perfect results every time:
- Chill your dough – 30 minutes in the fridge prevents spreading and keeps shapes crisp
- Roll between parchment – No flour mess and perfectly even thickness
- Test your icing – Too thick? Add milk drop by drop. Too thin? More powdered sugar
- Less is more with sprinkles – Tapping them from a spoon gives better coverage than dumping
- Store in single layers – Wax paper between cookies keeps decorations intact
My biggest tip? Have fun with it! Perfectly symmetrical snowflakes are overrated anyway.
Ingredient Substitutions & Variations
Got dietary restrictions or just feeling creative? No problem! Here are my favorite ways to mix things up with these Christmas cookies:
- Gluten-free? Use a 1:1 gluten-free flour blend (my sister swears by Bob’s Red Mill). The texture comes out slightly more crumbly but still delicious.
- Vegan version: Swap butter for coconut oil and use a flax egg (1 tbsp ground flax + 3 tbsp water). The cookies spread more but taste amazing.
- Flavor boosts: Try 1/2 tsp peppermint extract instead of vanilla for candy cane vibes, or add orange zest to the dough for a citrusy twist.
- Royal icing fans: Mix powdered sugar with egg whites instead of milk for glossy, hard-set decorations (great for stacking in tins).
Just remember – every swap changes the texture slightly, so do a test batch first. But honestly? Some of my best cookies came from happy accidents!
Storing and Freezing
Here’s the good news – these cookies stay fresh for days if you store them right! Keep decorated cookies in an airtight container at room temperature for up to 5 days (if they last that long!). Want to get ahead? Freeze undecorated dough for 3 months – just wrap it tight in plastic. Frozen cookies thaw beautifully overnight in the fridge – ready to decorate whenever the holiday mood strikes!
Nutritional Information
Just so you know – each cookie comes out to about 120 calories. These estimates can change based on your specific ingredients and how generous you get with those sprinkles!
FAQs About Simple Christmas Cookies Decorated
Q1. Can I use royal icing instead of the simple powdered sugar glaze?
Absolutely! Royal icing (made with egg whites or meringue powder) gives a smooth, hard finish perfect for detailed designs. Just remember it dries much faster than our simple milk glaze, so work quickly. I love using royal icing when I’m making cookies to gift – they stack beautifully in tins!
Q2. How do I prevent my cookies from spreading too much?
Oh, I’ve battled the cookie spread monster many times! The trick is to chill your dough for at least 30 minutes before rolling and cutting. Also, make sure your butter is softened but not melted – you want it cool enough to hold its shape. If all else fails, try reducing the sugar by a tablespoon or two.
Q3. Can kids help decorate these cookies?
Are you kidding? Kids make the BEST decorators! Their wild, creative designs always put my perfect little trees to shame. For little hands, I put the icing in squeeze bottles and let them go to town. Just lay down some wax paper first – things might get messy (and that’s half the fun!).
Q4. How far in advance can I make these decorated cookies?
The dough keeps beautifully in the fridge for 3 days or freezer for 3 months. Once decorated, they’ll stay fresh at room temperature for about 5 days in an airtight container. Pro tip: Wait to add sprinkles until right before serving – they tend to bleed color over time.
Q5. My icing keeps running off the cookies – help!
Been there! Your icing might be too thin. Start with just 1 tablespoon of milk per cup of powdered sugar, then add more drop by drop until it’s thick but still spreadable. If it’s already on the cookies, pop them in the fridge for 10 minutes to set the icing before adding more layers.
Share Your Creations
I’d love to see your cookie masterpieces! Tag me @MyKitchenAdventures on Instagram or leave a comment below with your decorating triumphs (or hilarious fails – we’ve all been there). Happy baking, friends – may your cookies be merry and bright!
Print
Magical Simple Christmas Cookies Decorated in 30 Minutes
- Total Time: 30 minutes
- Yield: 24 cookies 1x
- Diet: Vegetarian
Description
Easy-to-make Christmas cookies decorated with simple icing designs, perfect for holiday baking.
Ingredients
- 2 1/4 cups all-purpose flour
- 1/2 teaspoon baking powder
- 1/4 teaspoon salt
- 3/4 cup unsalted butter, softened
- 3/4 cup granulated sugar
- 1 large egg
- 1 teaspoon vanilla extract
- 1 cup powdered sugar (for icing)
- 2 tablespoons milk (for icing)
- Food coloring (optional)
- Sprinkles (optional)
Instructions
- Preheat oven to 375°F (190°C).
- In a bowl, whisk flour, baking powder, and salt.
- In another bowl, beat butter and sugar until fluffy.
- Add egg and vanilla to the butter mixture and mix well.
- Gradually add dry ingredients, mixing until dough forms.
- Roll dough to 1/4-inch thickness and cut into shapes.
- Place on a baking sheet and bake for 8-10 minutes.
- Let cool before decorating.
- Mix powdered sugar and milk for icing, add food coloring if desired.
- Decorate cookies with icing and sprinkles.
Notes
- Chill dough for 30 minutes for easier handling.
- Store in an airtight container for freshness.
- Use piping bags for detailed icing designs.
- Prep Time: 20 minutes
- Cook Time: 10 minutes
- Category: Dessert
- Method: Baking
- Cuisine: American
Nutrition
- Serving Size: 1 cookie
- Calories: 120
- Sugar: 8g
- Sodium: 30mg
- Fat: 5g
- Saturated Fat: 3g
- Unsaturated Fat: 2g
- Trans Fat: 0g
- Carbohydrates: 17g
- Fiber: 0g
- Protein: 1g
- Cholesterol: 20mg
Keywords: christmas cookies, easy cookies, holiday baking, decorated cookies


