Nothing says Christmas like the smell of freshly baked cookies filling the house! I still remember standing on a chair next to my mom as a kid, flour dusting my nose while we decorated our round Christmas cookies with colorful icing and sprinkles. Those simple moments became our favorite holiday tradition.
Now I carry on the ritual with my own family, and I’m convinced these round Christmas cookies decorated with festive designs are the perfect holiday treat. They’re easy enough for little hands to help with, delicious enough to disappear from the cookie tray, and beautiful enough to gift to neighbors and friends. The almond extract adds that special something that makes everyone ask, “What’s your secret?”
Why You’ll Love These Round Christmas Cookies Decorated
Oh, where do I even start? These cookies are pure holiday magic! First off, they’re so easy to make—even if you’re usually more of a “store-bought cookie” person, you can totally handle this recipe. The dough comes together in minutes, and rolling them into perfect little balls is practically foolproof.
But here’s what really makes them special:
- Perfect for gifting—wrap them in cute boxes or cellophane bags tied with ribbon
- Endless decorating fun—let your creativity run wild with icing and sprinkles
- That amazing almond-vanilla flavor—it’s what makes people ask for the recipe
- Great for all ages—kids love decorating them as much as eating them
Honestly, the hardest part is waiting for them to cool before decorating—I always sneak one warm cookie “for quality control!”
Ingredients for Round Christmas Cookies Decorated
Okay, let’s talk ingredients – because using the right stuff makes all the difference between “meh” cookies and “wow!” cookies. Here’s what you’ll need:
- 2 1/4 cups all-purpose flour – spooned and leveled, please! No packing it in
- 3/4 cup unsalted butter – softened (leave it out for 30 minutes, or microwave for 5-second bursts if you’re impatient like me)
- 3/4 cup granulated sugar – regular white sugar works perfectly
- 1 large egg – room temperature is ideal (just pop it in warm water for 5 minutes if you forgot to take it out)
- 1 tsp vanilla extract – the real stuff, not imitation!
- 1/2 tsp almond extract – this is the secret flavor booster (use lemon extract if you’re allergic to nuts)
- 1/2 tsp baking powder – fresh is best!
- 1/4 tsp salt – just a pinch to balance the sweetness
For decorating, raid your baking cabinet for sprinkles, colored sugars, and icing – I’ll show you my favorite decorating tricks later!
Equipment You’ll Need
Don’t worry – you don’t need fancy gadgets for these cookies! Here’s what I always grab from my kitchen:
- Mixing bowls – one for dry ingredients, one for wet
- Baking sheets – standard half-sheet pans work great
- Parchment paper – no sticking and easy cleanup
- Cookie scoop or spoon – for perfectly round cookies
- Piping bags or plastic bags – for decorating (snip the corner if you don’t have tips)
That’s it! Though I sometimes use festive cookie cutters if I’m feeling fancy.
How to Make Round Christmas Cookies Decorated
Alright, let’s get baking! I’ve made these cookies so many times I could probably do it in my sleep, but I’ll walk you through each step so yours turn out perfect too. Don’t worry – it’s way easier than it looks!
Preparing the Dough
First things first – preheat that oven to 350°F (175°C). While it’s heating up, let’s make magic happen. Grab two bowls – in the first, whisk together your flour, baking powder, and salt. In the second bowl, beat the softened butter and sugar until it’s light and fluffy (about 2 minutes with a mixer). Now add the egg, vanilla, and that secret weapon – almond extract. Mix until it’s all happy and combined.
Here’s the important part – gradually add your dry ingredients to the wet mixture. I do it in three batches, mixing just until combined after each. You’ll know it’s ready when the dough pulls away from the sides of the bowl and forms a soft ball. If it’s sticky, add a tablespoon more flour – but don’t overmix!
Shaping and Baking
Time to make those perfect little rounds! Scoop about 1 tablespoon of dough (I use a small cookie scoop for consistency) and roll it between your palms into a smooth ball. Place them about 2 inches apart on parchment-lined baking sheets – they’ll spread just a bit.
Bake for 10-12 minutes until the edges are just starting to turn golden. Here’s my trick – pull them out when they still look slightly underdone in the center. They’ll continue cooking on the hot tray as they cool. Trust me, this gives you that perfect soft texture!
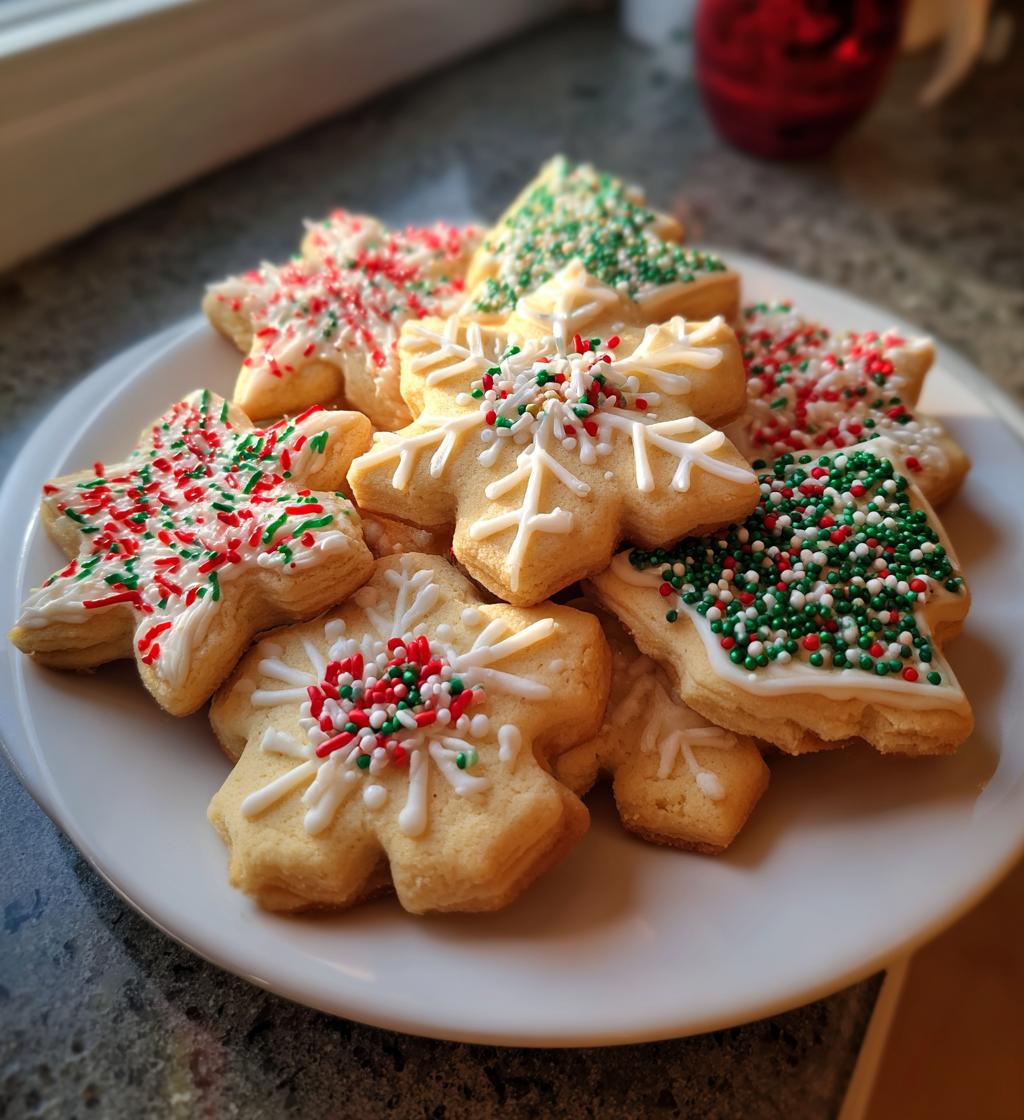
Decorating Your Cookies
The fun part! Let cookies cool completely – about 30 minutes – before decorating. While you wait, make your icing. I like mine thick enough to hold its shape but thin enough to pipe easily. For piping, fill a plastic bag with icing, snip a tiny corner, and go wild!
Some of my favorite designs:
- Simple white icing swirls with red and green sprinkles
- Snowflake patterns using white icing
- Half-dipped in melted chocolate with crushed candy canes
Pro tip: Add sprinkles immediately after icing – they won’t stick once the icing sets. Now step back and admire your edible masterpieces!
Tips for Perfect Round Christmas Cookies Decorated
After years of trial and error (and a few cookie disasters!), I’ve learned these tricks that guarantee picture-perfect cookies every time:
- Chill sticky dough – If your dough feels too soft, pop it in the fridge for 20 minutes. This prevents spreading and makes rolling easier.
- Mix with care – Stop mixing as soon as ingredients combine. Overworked dough makes tough cookies.
- Use gel food coloring – Liquid colors thin your icing. Gel gives vibrant hues without changing consistency.
- Rotate pans halfway – For even browning, switch tray positions in the oven at the 5-minute mark.
- Cool completely – Icing slides right off warm cookies. Patience pays off!
Remember – slightly underbaked cookies stay softest. They’ll firm up as they cool!
Variations for Round Christmas Cookies Decorated
Want to mix things up? Try these fun twists on our classic recipe! For a citrusy kick, add a tablespoon of orange or lemon zest to the dough – it pairs beautifully with the almond. Craving warmth? Mix in a teaspoon of cinnamon or pumpkin spice. Chocolate lovers can replace 1/4 cup flour with cocoa powder for rich cocoa cookies. And if you’re feeling fancy, press thumbprints in the dough balls before baking to fill with jam after they cool!
Storing and Serving Suggestions
Here’s how to keep your round Christmas cookies decorated beautifully fresh! Store them in an airtight container at room temperature – they’ll stay perfect for up to a week (if they last that long!). For longer storage, freeze undecorated cookies between parchment layers for up to 3 months. Thaw at room temperature before decorating.
My favorite way to serve? With steaming mugs of hot cocoa or spiced cider! They also make adorable additions to holiday dessert boards – arrange them with chocolate-dipped pretzels and candied nuts for a festive spread.
Nutritional Information
Just so you know – these numbers are estimates and might change depending on your exact ingredients and decorations. But for one of these delicious round Christmas cookies decorated simply (without heaps of icing), you’re looking at:
- Calories: 120 per cookie
- Fat: 6g (3.5g saturated)
- Carbohydrates: 15g
- Sugar: 8g
- Protein: 1.5g
Add more for icing and sprinkles – but hey, it’s Christmas! A little extra sweetness never hurt anyone.
Frequently Asked Questions
Q1. Can I make the cookie dough ahead of time?
Absolutely! In fact, I often do. The dough keeps beautifully in the fridge for up to 3 days wrapped tightly in plastic. You can even freeze it for a month! Just thaw in the fridge overnight when you’re ready to bake. The chilling actually helps the flavors develop – bonus!
Q2. How do I prevent my cookies from spreading too much?
Ah, the dreaded cookie pancake problem! First, make sure your butter is softened but not melted. Chilling the dough for 20-30 minutes before baking helps too. And always use parchment paper – it makes a world of difference. If you’re still having issues, try adding an extra tablespoon of flour to the dough.
Q3. What’s the best icing for decorating?
I swear by my simple royal icing – just powdered sugar, a splash of milk, and vanilla extract. The trick is getting the consistency right – you want it thick enough to hold its shape but thin enough to pipe smoothly. For beginners, I suggest dividing your icing into portions and thinning some for “flooding” (filling areas) while keeping some thick for details.
Q4. Can kids help decorate these cookies?
Oh my goodness, yes! This is our family’s favorite holiday activity. I set up “decorating stations” with piping bags (or ziplocks with the corner snipped off), bowls of sprinkles, and small cups of colored icing. Pro tip: cover your table with parchment paper first for easy cleanup! The kids’ creative designs often become our most cherished cookies.
Now I want to see your round Christmas cookies decorated with love! Try this recipe and share your festive creations with us – tag me on social media so I can ooh and ahh over your masterpieces!
Print
25 Irresistible Round Christmas Cookies Decorated with Love
- Total Time: 32 minutes
- Yield: 24 cookies 1x
- Diet: Vegetarian
Description
Delicious round Christmas cookies decorated with festive designs. Perfect for holiday gatherings and gift-giving.
Ingredients
- 2 1/4 cups all-purpose flour
- 1/2 teaspoon baking powder
- 1/4 teaspoon salt
- 3/4 cup unsalted butter, softened
- 3/4 cup granulated sugar
- 1 large egg
- 1 teaspoon vanilla extract
- 1/2 teaspoon almond extract
- Assorted sprinkles and icing for decoration
Instructions
- Preheat oven to 350°F (175°C). Line baking sheets with parchment paper.
- In a bowl, whisk flour, baking powder, and salt.
- In another bowl, beat butter and sugar until light and fluffy.
- Add egg, vanilla, and almond extract. Mix well.
- Gradually add dry ingredients to wet ingredients. Mix until combined.
- Roll dough into 1-inch balls and place on baking sheets.
- Bake for 10-12 minutes or until edges are lightly golden.
- Cool completely before decorating with icing and sprinkles.
Notes
- Store cookies in an airtight container for up to 1 week.
- For softer cookies, reduce baking time by 1-2 minutes.
- Use gel food coloring for vibrant icing colors.
- Prep Time: 20 minutes
- Cook Time: 12 minutes
- Category: Dessert
- Method: Baking
- Cuisine: American
Nutrition
- Serving Size: 1 cookie
- Calories: 120
- Sugar: 8g
- Sodium: 30mg
- Fat: 6g
- Saturated Fat: 3.5g
- Unsaturated Fat: 2g
- Trans Fat: 0g
- Carbohydrates: 15g
- Fiber: 0.5g
- Protein: 1.5g
- Cholesterol: 20mg
Keywords: Christmas cookies, decorated cookies, holiday baking, festive treats


