There’s nothing quite like the smell of rosemary sourdough bread baking in your kitchen – that earthy, herby aroma mixed with the tang of sourdough is pure magic. I fell in love with this recipe years ago when my neighbor gifted me a starter (now named “Rosie” in honor of this bread). The contrast between the crisp, crackly crust and the soft, airy interior makes every bite irresistible. What I love most is how the rosemary infuses every slice with its woodsy flavor, turning a simple loaf into something truly special. Trust me, once you’ve tried homemade rosemary sourdough, store-bought bread just won’t cut it anymore.
Why You’ll Love This Rosemary Sourdough Bread
This rosemary sourdough bread isn’t just another loaf—it’s a little masterpiece you get to create with your own hands. Here’s why it’ll become your new obsession:
- That artisanal bakery taste at home: The slow fermentation gives it that deep, complex sourdough flavor you’d pay top dollar for, with the rosemary adding a fragrant twist.
- No commercial yeast needed: Just your trusty starter doing its magic. I love how the natural fermentation makes the flavors develop beautifully overnight.
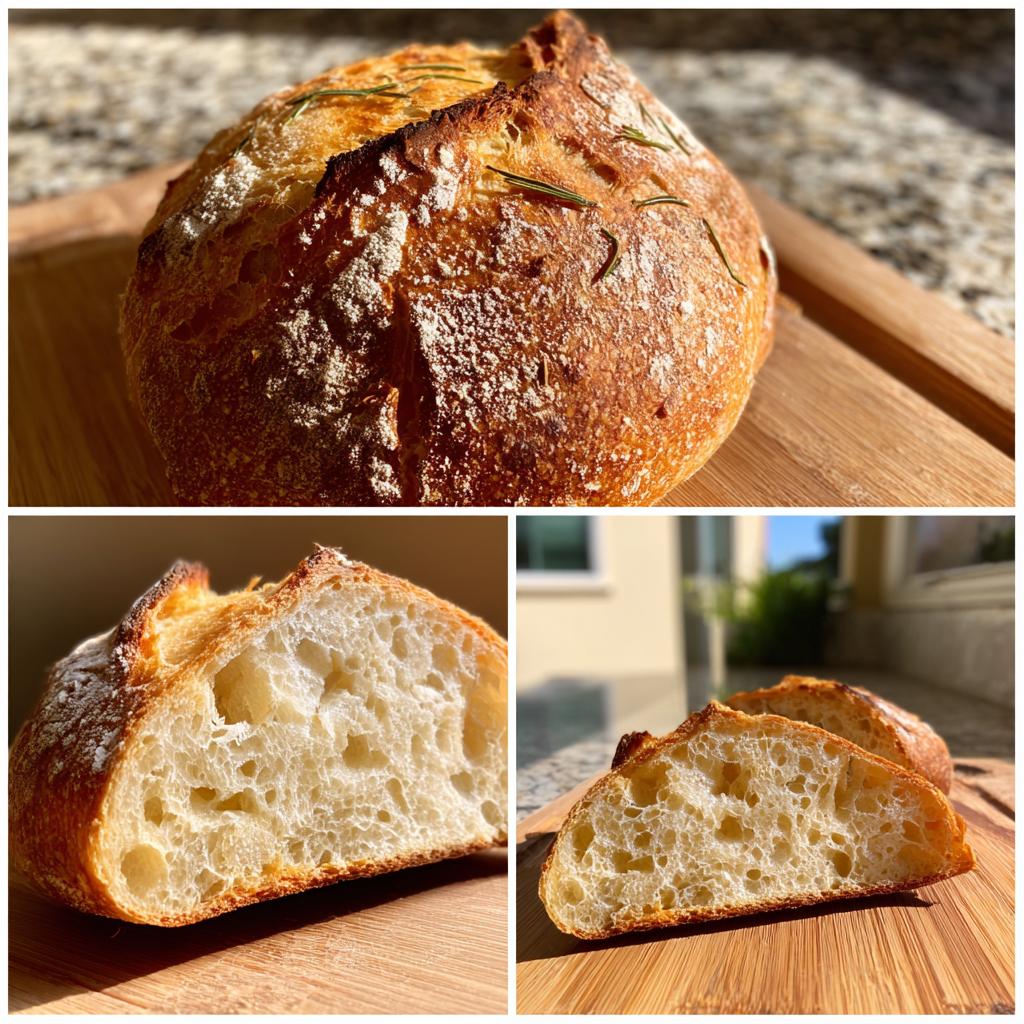
- The perfect texture: Crisp, crackly crust gives way to the most satisfyingly soft, holey crumb—you’ll keep tearing off “just one more piece.”
- Rosemary in every bite: Fresh rosemary infuses the whole loaf with its earthy aroma, turning simple toast into something extraordinary.
Honestly? The first time I pulled this golden beauty from the oven, I did a little happy dance. It’s that good.
Ingredients for Rosemary Sourdough Bread
Let’s talk ingredients – because with sourdough, every little detail matters. I’ve learned through trial and error (and many flat loaves!) that precision here makes all the difference. Here’s exactly what you’ll need:
- 500g bread flour: That extra protein content gives our loaf that perfect chew. All-purpose just won’t give you the same structure.
- 350g room-temperature water: I always check with my finger – it should feel just slightly cool, not cold. This helps the fermentation get going nicely.
- 100g active sourdough starter: Your starter should be bubbly and happy, ideally at its peak after feeding. Mine usually peaks about 4-6 hours after feeding.
- 10g salt: Fine sea salt dissolves best. Don’t skip it – it’s not just for flavor but helps control fermentation too!
- 2 tbsp fresh rosemary, chopped: Fresh is key here – dried rosemary turns into little twigs in your bread. Chop it fairly fine so it distributes evenly.
A quick tip from my messy experiences: measure everything by weight if you can. My first attempts using cups were… let’s just say inconsistent. Now I keep my kitchen scale handy for perfect results every time.
Equipment You’ll Need
Don’t worry – you don’t need fancy gadgets to make amazing rosemary sourdough bread! Over the years, I’ve pared my must-haves down to just a few trusty tools that make all the difference:
- A large mixing bowl: My favorite is a simple ceramic one – wide enough to get your hands in for mixing, with enough room for the dough to double in size.
- Dutch oven: This is my secret weapon for that perfect crust. The heavy lid traps steam to give you that professional bakery-style “oven spring.” I use a 5-quart one that fits a nice round loaf perfectly.
- Proofing basket (banneton): That beautiful spiral pattern on the crust? All thanks to my trusty cane banneton. The breathable material helps form the perfect skin on the dough during its final rise.
- Bench scraper: My dough-handling hero! It helps shape sticky dough without tearing, and I use it to clean my work surface too. The metal ones are best – plastic just doesn’t have the same heft.
That’s really it! You’ll see people using all sorts of gadgets, but honestly, these four items plus a good oven thermometer (to check your oven’s actual temperature – they lie!) are all I ever use. Oh, and clean hands – but those don’t cost anything!
How to Make Rosemary Sourdough Bread
Okay, here’s where the magic happens! I used to be so nervous about this part, but now I just follow these steps like a soothing kitchen rhythm. The key is to move with confidence – sourdough can sense fear! Just kidding (mostly). Here’s my foolproof method for turning those simple ingredients into a rosemary-scented masterpiece.
Mixing the Dough
First things first – grab that big bowl and whisk together your flour and water until there are no dry patches. It’ll look shaggy and messy – that’s perfect! Now add your bubbly starter and mix it all together with your hands until everything is fully combined. This is my favorite part – getting my hands in there and really feeling the dough come together. Once it’s mixed, cover it with a damp towel and let it rest for 30 minutes. This “autolyse” rest lets the flour fully hydrate and makes the gluten development so much easier later. You’ll notice the dough already looks smoother when you come back to it!
Adding Salt and Rosemary
After the rest, sprinkle your salt and chopped rosemary over the dough. Now comes the fun part – the “pinch and fold” method I learned from my baking mentor. Wet your hands slightly (this prevents sticking) and grab one edge of the dough, stretching it up and folding it over toward the center. Rotate your bowl a quarter turn and repeat – do this about 10-15 times until the salt and rosemary are fully incorporated. The dough might feel a bit slippery at first, but after a minute of folding, you’ll feel it start to smooth out and become more elastic. The rosemary will speckle throughout beautifully!
Bulk Fermentation
This is where patience pays off! Cover your bowl and let the dough rise at room temperature for 4-6 hours. The exact time depends on your kitchen’s temperature – in my warm kitchen (about 75°F), it’s usually ready in 4 hours. Every hour during this rise, perform a set of “stretch and folds” – gently lifting one side of the dough up and folding it over, repeating on all four sides. You’ll see the dough transform from sticky and loose to smooth, jiggly, and full of air bubbles. When it’s ready, it should look about doubled in size and hold an indent when you poke it gently.
Shaping and Final Proof
Lightly flour your work surface and turn the dough out. Using your bench scraper, gently shape it into a round by tucking the edges underneath. You want to create some surface tension without deflating all those beautiful bubbles! Place it seam-side up in your floured proofing basket. Now for the final rise – you can either let it proof at room temperature for 2-3 hours, or my favorite trick: cover it and pop it in the refrigerator overnight. The cold proof develops even more flavor and makes the dough easier to score. Either way, it’s ready when it looks puffy and springs back slowly when pressed.
Baking the Rosemary Sourdough Bread
About 30 minutes before baking, preheat your oven to 450°F with your Dutch oven inside – it needs to be screaming hot! Carefully remove the hot Dutch oven (those handles get crazy hot – use oven mitts!). Turn your proofed dough out onto parchment paper, score the top with a sharp blade (I make one deep slash or a simple cross pattern), and lower it into the hot pot. Cover and bake for 20 minutes – this creates steam for that amazing oven spring. Then remove the lid and bake another 25 minutes until the crust is deeply golden brown and sounds hollow when tapped. Try to wait until it’s completely cool before slicing – I know, it’s torture, but the texture is so much better!
Tips for Perfect Rosemary Sourdough Bread
After countless loaves (and more than a few flops!), I’ve learned these game-changing tips that’ll take your rosemary sourdough from good to “Can I have the recipe?” levels of amazing:
Watch your dough, not the clock: Fermentation time depends entirely on your kitchen’s temperature. My dough rises in 4 hours at 75°F, but in winter it might take 6. Look for bubbles on the surface and that perfect “jiggle” – it should wobble like jelly when you shake the bowl. The poke test never lies – if the indent springs back slowly, it’s ready!
Fresh rosemary makes all the difference: I learned this the hard way when I tried using dried rosemary in a pinch. Those little twigs poked through every slice! Fresh rosemary chops easily and infuses the bread with its oils better. My trick? Rub the leaves between your palms before chopping to release even more fragrance.
Crust too pale? My baker friend taught me to leave the loaf in 5 minutes longer after removing the Dutch oven lid. For extra crispness, prop the oven door open slightly with a wooden spoon during the last 10 minutes. Just watch it closely – that extra heat can go from golden to burnt faster than you’d think!
The “windowpane test” for perfect gluten development: Before shaping, take a small piece of dough and gently stretch it. If you can see light through it without tearing (like a windowpane), you’ve got perfect gluten structure. If not, give it a few more folds during bulk fermentation.
Don’t fear the fridge: That overnight cold proof isn’t just convenient – it gives the rosemary more time to flavor the dough and makes scoring easier. I’ve left mine for up to 18 hours with amazing results. The dough actually becomes less sticky when cold – perfect for beginners!
Variations and Substitutions
One of the things I love about this rosemary sourdough is how easily you can play with the flavors! Here are my favorite twists that still keep the soul of the original recipe:
Out of fresh rosemary? In a pinch, you can use 1 tablespoon of dried rosemary – just crush it between your fingers first to release the oils. The flavor won’t be quite as vibrant, but it’ll still give you that lovely herby note.
Garlic lover’s version: I sometimes add 2-3 minced garlic cloves along with the rosemary. The trick is to sauté them lightly first to mellow the raw bite – just let them cool before mixing into the dough. The garlic caramelizes beautifully during baking!
Olive oil swirl: For a more Italian-inspired loaf, drizzle in 2 tablespoons of good olive oil when adding the salt. This makes the crumb extra tender and adds a subtle fruitiness that pairs perfectly with the rosemary.
Cheesy twist: My husband begs me to add 1/2 cup grated aged cheddar or parmesan sometimes. The cheese melts into little pockets of salty goodness – just add it with the rosemary so it distributes evenly.
Remember, sourdough is forgiving – as long as you keep the flour-water-starter ratios the same, you can get creative with the add-ins. That’s half the fun!
Storing and Reheating Rosemary Sourdough Bread
Now, I know what you’re thinking – “Like there’ll be any left to store!” But just in case you miraculously resist eating the whole loaf in one sitting (we’ve all been there), here’s how to keep your rosemary sourdough tasting fresh and delicious:
Counter storage: The natural acidity in sourdough means it stays fresher longer than regular bread! I wrap mine in a clean kitchen towel and keep it cut-side down on the counter for up to 3 days. The crust will soften, but the flavor actually improves as the rosemary infuses more. Avoid plastic bags – they trap moisture and turn the crust rubbery.
Bringing back the crunch: To revive day-old bread, I spritz the crust lightly with water and pop it in a 375°F oven for 5-7 minutes. It comes out tasting freshly baked! For extra crispiness, place it directly on the oven rack rather than a baking sheet.
Freezing for later: This is my secret for always having sourdough on hand! Let the loaf cool completely, then slice it before freezing (trust me, trying to slice frozen bread is a nightmare). I wrap individual slices in parchment paper and store them in a freezer bag. They toast up perfectly straight from frozen – just add 30 seconds to your usual toasting time.
My favorite reheating trick: For that just-baked experience, take a frozen slice and run it briefly under cold water. Then toast it in a dry skillet over medium heat until crisp. The water creates steam that mimics the original baking process – it’s magic!
One last tip: that end piece makes the BEST croutons after a few days. Tear it into chunks, toss with olive oil and salt, and toast at 300°F until golden. They’re incredible on soups or salads!
Rosemary Sourdough Bread FAQs
I get questions about this rosemary sourdough all the time from friends who are just starting their baking journey. Here are the ones that come up most often, along with the hard-won wisdom from my own trial-and-error experiments!
Can I use dried rosemary instead of fresh?
You can, but fresh really is best here. If you must use dried, reduce it to 1 tablespoon and crush it between your fingers before adding. The flavor won’t be as vibrant, and those little dried needles can be a bit toothsome. (I learned this the hard way when I ran out of fresh rosemary mid-recipe – my family called it “the twig bread”!)
Why did my bread turn out so dense?
Oh honey, we’ve all been there! Usually, it’s one of three things:
1) Your starter wasn’t active enough (it should float in water before using),
2) You didn’t give it enough time to rise (cold kitchens need more patience!), or
3) You handled the dough too roughly during shaping and deflated all those beautiful bubbles. My first loaf could’ve doubled as a doorstop – now I know better!
Do I really need a Dutch oven?
While you can bake without one, that Dutch oven is the secret to the perfect crust and rise! The trapped steam creates that beautiful oven spring. No Dutch oven? Try placing a baking sheet on the rack below your bread and pouring 1 cup boiling water into it when you load the loaf – it’ll create some steam. Just know the crust won’t be quite as spectacular.
My dough is SO sticky – did I do something wrong?
Nope! Sourdough dough is supposed to be sticky – that’s how you know the hydration is right. Wet your hands when handling it, and trust the process. As the gluten develops during folds, it’ll become more manageable. My first few loaves looked like I’d wrestled with an octopus because I kept adding flour – resist the urge!
Can I make this without a sourdough starter?
Well… then it wouldn’t be sourdough, would it? But I get it – starters take commitment! You could try using 1/2 teaspoon instant yeast instead, but you’ll lose that distinctive tang. Better yet, let me send you some of my starter – sharing is what keeps the sourdough tradition alive!
Nutritional Information
Okay, let’s talk numbers – but remember, these are just estimates since every loaf turns out slightly different! I worked with a nutritionist friend to calculate these averages based on slicing my standard loaf into about 12 pieces (because who can stop at just one slice?). Here’s what you’re getting in each delicious bite:
- Calories: Around 120 per slice
- Carbohydrates: 25g (that beautiful flour doing its thing!)
- Protein: 4g (thank you, gluten development!)
- Fat: Less than 1g (it’s practically guilt-free!)
- Fiber: 1g (those whole grains working for you)
A quick disclaimer from my nutritionist pal: these values can vary based on exactly how much your loaf weighs, how thick you slice it, and whether your starter was particularly active that day. But honestly? When you’re enjoying bread this good, who’s counting? I just know it’s way better for me than anything wrapped in plastic at the store!
Print
Irresistible Rosemary Sourdough Bread Recipe in 5 Steps
- Total Time: 7 hours 15 minutes
- Yield: 1 loaf 1x
- Diet: Vegetarian
Description
A rustic rosemary sourdough bread with a crisp crust and soft interior, infused with fresh rosemary.
Ingredients
- 500g bread flour
- 350g water
- 100g active sourdough starter
- 10g salt
- 2 tbsp fresh rosemary, chopped
Instructions
- Mix flour, water, and sourdough starter in a bowl. Let rest for 30 minutes.
- Add salt and rosemary. Knead until smooth.
- Cover and let rise for 4-6 hours, folding every hour.
- Shape the dough into a round loaf. Place in a floured proofing basket.
- Let proof for 2-3 hours or overnight in the fridge.
- Preheat oven to 450°F (230°C) with a Dutch oven inside.
- Score the dough and bake covered for 20 minutes.
- Remove the lid and bake for another 25 minutes until golden brown.
- Cool on a wire rack before slicing.
Notes
- Use room-temperature water for best results.
- Adjust proofing time based on kitchen temperature.
- For extra flavor, add a sprinkle of sea salt before baking.
- Prep Time: 30 minutes
- Cook Time: 45 minutes
- Category: Bread
- Method: Baking
- Cuisine: European
Nutrition
- Serving Size: 1 slice (50g)
- Calories: 120
- Sugar: 0g
- Sodium: 200mg
- Fat: 0.5g
- Saturated Fat: 0g
- Unsaturated Fat: 0.5g
- Trans Fat: 0g
- Carbohydrates: 25g
- Fiber: 1g
- Protein: 4g
- Cholesterol: 0mg
Keywords: rosemary sourdough bread, homemade sourdough, artisan bread


