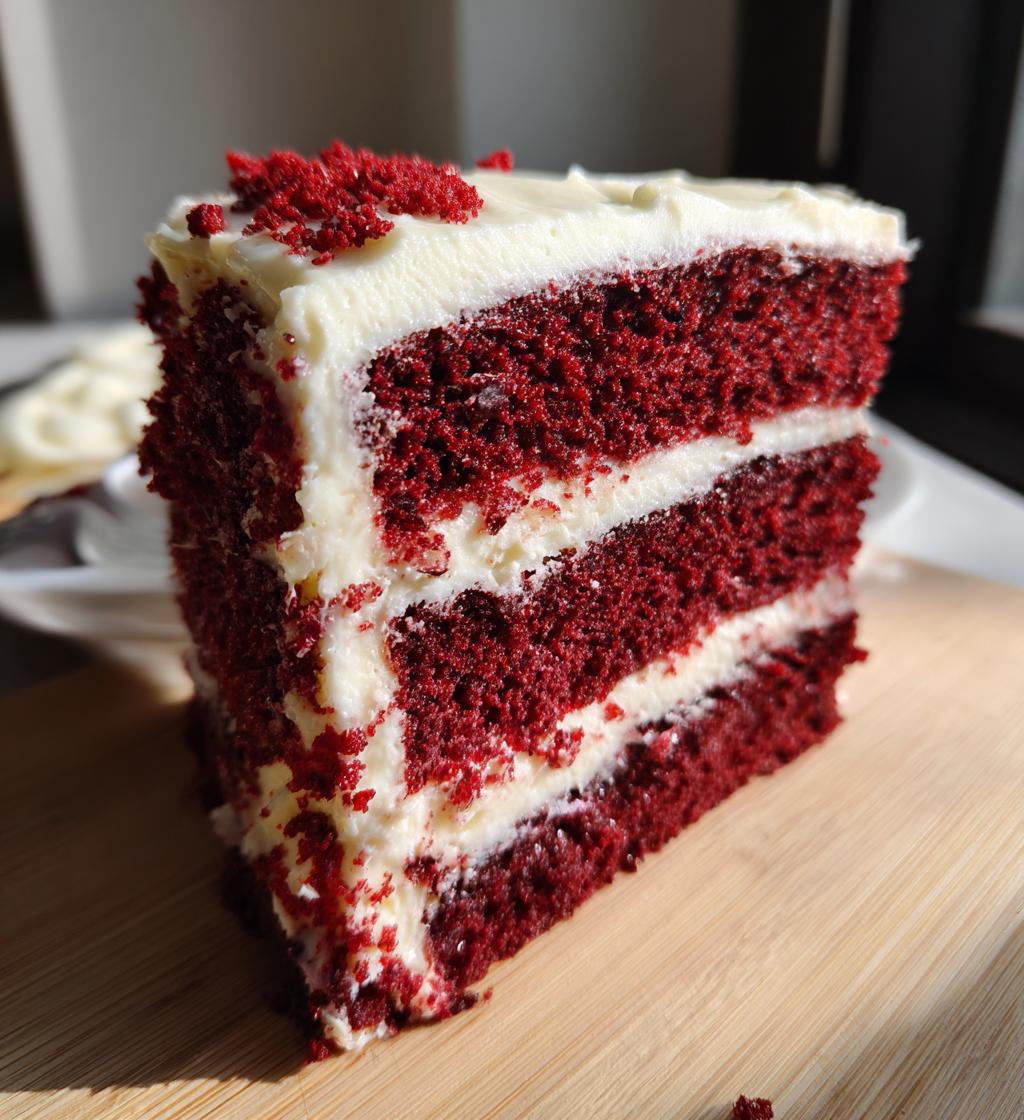
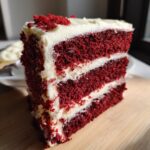
Oh, the joy of baking a special cake for Valentine’s Day! There’s something truly magical about whipping up a *red velvet valentines cake* that makes the heart flutter. The rich, velvety texture and stunning crimson hue are just perfect for celebrating love. I remember the first time I made this cake for my partner; the look on their face when they took that first bite was priceless! It’s such a delightful way to show affection, whether it’s for a romantic partner, family, or friends. The sweet aroma of cocoa and vanilla wafting through the kitchen is enough to make anyone feel special. Plus, the vibrant color is so eye-catching that it’s hard not to smile. Trust me, once you see how easy and rewarding it is to create this beautiful cake, it’ll become a staple for your Valentine’s celebrations for years to come. Let’s dive into making this delicious treat together!
Ingredients for Red Velvet Valentines Cake
Gathering the right ingredients is crucial to making a stunning and delicious red velvet valentines cake. Here’s what you’ll need:
- 2 1/2 cups all-purpose flour: This forms the base of your cake, giving it structure and a lovely crumb.
- 1 1/2 cups sugar: Adds sweetness and helps create that moist texture we all love.
- 1 teaspoon baking soda: This is your leavening agent, helping the cake rise to perfection.
- 1 teaspoon salt: Enhances all the flavors and balances the sweetness.
- 1 teaspoon cocoa powder: Just a touch to give the cake a hint of chocolate flavor without overpowering the red velvet essence.
- 1 1/2 cups vegetable oil: This keeps the cake moist and rich; trust me, it makes a difference!
- 1 cup buttermilk, room temperature: Adds moisture and that tangy flavor that complements the sweetness beautifully.
- 2 large eggs: These bind the ingredients together and help with the cake’s structure.
- 2 tablespoons red food coloring: The star of the show! This gives your cake that iconic red hue.
- 1 teaspoon vanilla extract: A must for adding depth and warmth to the flavor profile.
- 1 teaspoon white vinegar: This reacts with the baking soda to create a lighter texture while enhancing the cake’s flavor.
Make sure you have everything ready before you start baking, and let’s get that cake in the oven!
How to Prepare Red Velvet Valentines Cake
Preparing a red velvet valentines cake is a delightful adventure! Follow these step-by-step instructions, and you’ll have a stunning cake ready to impress your loved ones. Let’s get started!
Step-by-Step Instructions
First things first, preheat your oven to 350°F (175°C). This step is crucial because a well-preheated oven ensures even baking, giving your cake that lovely rise and fluffiness.
While the oven warms up, grab your two 9-inch round cake pans and grease them with butter or non-stick spray. Then, dust them with flour to prevent sticking. You don’t want to lose any of that gorgeous cake!
Next, in a large bowl, sift together the flour, sugar, baking soda, salt, and cocoa powder. Mixing these dry ingredients first helps ensure they’re well combined and prevents any clumping.
In another bowl, mix the vegetable oil, buttermilk, eggs, red food coloring, vanilla extract, and white vinegar. Whisk this mixture until it’s smooth and well blended. The vibrant red color will make you smile already!
Now, carefully combine the wet and dry ingredients. Pour the wet mixture into the dry ingredients and stir gently until everything is just combined. Be careful not to overmix; a few lumps are totally fine! You’ll want a smooth batter, but overmixing can lead to a dense cake.
Once your batter is ready, divide it evenly between the prepared pans. Give each pan a gentle shake to settle the batter.
Slide those pans into the preheated oven and bake for 25 to 30 minutes. Use the toothpick test to check doneness: insert a toothpick in the center of the cake, and if it comes out clean or with a few moist crumbs, it’s ready!
Once baked, let the cakes cool in the pans for about 10 minutes. After that, gently remove them from the pans and transfer them to a wire rack to cool completely before frosting. Patience is key here! You want to ensure your cream cheese frosting doesn’t melt on a warm cake.
And there you have it! Follow these steps, and you’ll have a beautifully baked red velvet valentines cake ready for frosting and decorating!
Nutritional Information
When it comes to enjoying a slice of red velvet valentines cake, it’s nice to be aware of what you’re indulging in. Here’s a quick look at the estimated nutritional values per slice:
- Calories: 350
- Fat: 18g
- Saturated Fat: 3g
- Carbohydrates: 45g
- Fiber: 1g
- Protein: 4g
- Sugar: 30g
- Sodium: 250mg
- Cholesterol: 40mg
Keep in mind that these values can vary based on specific ingredients and portion sizes. Enjoy your slice of love while keeping these numbers in mind!
Why You’ll Love This Recipe
This red velvet valentines cake is sure to steal your heart for many reasons:
- Rich Flavor: The combination of cocoa and vanilla creates a delightful taste that’s both indulgent and satisfying.
- Easy to Make: With straightforward steps and common ingredients, whipping up this cake is a breeze, even for beginner bakers!
- Perfect for Celebrations: Its stunning color and elegant presentation make it the ideal centerpiece for Valentine’s Day or any special occasion.
- Vegetarian-Friendly: This cake fits perfectly into vegetarian diets, allowing everyone to enjoy a slice of love.
- Moist and Tender: Thanks to the use of buttermilk and oil, every bite is melt-in-your-mouth delicious!
Trust me, once you make this cake, it’ll quickly become a favorite for all your celebrations!
Tips for Success with Red Velvet Valentines Cake
To ensure your red velvet valentines cake turns out perfectly, here are some of my best tips that I’ve gathered over the years:
- Use room temperature ingredients: It’s essential to have your buttermilk and eggs at room temperature. This helps create a smoother batter and ensures even baking. Trust me, it makes a difference!
- Don’t skip the vinegar: This ingredient might seem small, but it’s crucial for that light, fluffy texture. It reacts with the baking soda to create the perfect lift.
- Check your oven temperature: Ovens can be tricky! If you have an oven thermometer, use it to ensure your oven is calibrated correctly. Baking at the right temperature is key.
- Frost at the right time: Make sure your cakes are completely cool before frosting. This prevents the cream cheese frosting from melting and sliding off, leaving you with a beautifully decorated cake!
- Experiment with flavors: If you want to mix things up, try adding a pinch of cinnamon or almond extract to the batter for a unique twist!
With these tips in your baking arsenal, you’ll create a stunning and delicious cake that’s sure to impress!
Variations on Red Velvet Valentines Cake
If you’re feeling adventurous and want to mix things up with your red velvet valentines cake, I’ve got some fun ideas for you!
- Frosting Options: While cream cheese frosting is a classic, why not try a silky buttercream or a rich ganache for a unique twist? You can even add a hint of espresso to the frosting for a mocha flavor!
- Layer It Up: Consider making it a layered cake by adding a delicious filling between the layers, like raspberry jam or a chocolate mousse, for a surprise burst of flavor.
- Add Chocolate Chips: Fold in some mini chocolate chips into the batter for an extra chocolatey kick in every bite!
- Sprinkle Some Nuts: Chopped pecans or walnuts can add a nice crunch and complement the cake’s softness beautifully.
- Experiment with Colors: Use different food coloring to create a fun rainbow effect, perfect for birthdays or celebrations beyond Valentine’s Day!
These variations will keep your red velvet cake exciting and delicious for every occasion!
Storage & Reheating Instructions
Storing your leftover red velvet valentines cake properly is key to keeping it delicious for days! Once cooled completely, wrap each cake layer tightly in plastic wrap or place them in an airtight container to lock in moisture. This way, they’ll stay fresh for up to 3 days at room temperature or up to a week in the fridge.
If you need to reheat a slice, pop it in the microwave for about 10-15 seconds. This will warm it up nicely without making it dry. Just be careful not to overheat it! Enjoy your cake, and trust me, it’ll taste just as good as the day you baked it!
FAQ About Red Velvet Valentines Cake
If you’re diving into the world of baking a red velvet valentines cake, you might have a few questions! Here are some common queries:
- Q1: Can I use regular milk instead of buttermilk?
While you can use regular milk, buttermilk adds a lovely tang and moisture that enhances the cake’s texture. If you don’t have buttermilk, you can make a substitute by adding a tablespoon of vinegar to regular milk and letting it sit for a few minutes! - Q2: How do I achieve that vibrant red color?
Using gel food coloring instead of liquid food coloring is the best way to get that deep, rich red hue without altering the cake’s consistency. Just two tablespoons will do the trick! - Q3: Can I freeze the cake?
Absolutely! Just wrap the cooled cake layers tightly in plastic wrap and store them in an airtight container. They can be frozen for up to three months. Thaw them in the fridge overnight before frosting. - Q4: What’s the best way to frost the cake?
Make sure the cake is completely cool before frosting. Use a serrated knife to level the tops if necessary, and apply a thin layer of frosting all around first to seal in crumbs before adding a thicker layer. - Q5: Can I make this cake ahead of time?
Yes! You can bake the layers a day or two in advance and store them wrapped in the fridge. Just frost it on the day you plan to serve for the best freshness!
Red velvet valentines cake: 5 Secrets to Sweet Perfection
- Total Time: 50 minutes
- Yield: 12 servings 1x
- Diet: Vegetarian
Description
A rich and moist red velvet cake perfect for Valentine’s Day.
Ingredients
- 2 1/2 cups all-purpose flour
- 1 1/2 cups sugar
- 1 teaspoon baking soda
- 1 teaspoon salt
- 1 teaspoon cocoa powder
- 1 1/2 cups vegetable oil
- 1 cup buttermilk, room temperature
- 2 large eggs
- 2 tablespoons red food coloring
- 1 teaspoon vanilla extract
- 1 teaspoon white vinegar
Instructions
- Preheat your oven to 350°F (175°C).
- Grease and flour two 9-inch round cake pans.
- In a large bowl, sift together flour, sugar, baking soda, salt, and cocoa powder.
- In another bowl, mix oil, buttermilk, eggs, food coloring, vanilla, and vinegar.
- Combine wet and dry ingredients, mixing until smooth.
- Divide the batter evenly between the prepared pans.
- Bake for 25-30 minutes, or until a toothpick comes out clean.
- Let cakes cool for 10 minutes before removing from pans.
- Frost with cream cheese frosting once completely cool.
Notes
- Store leftovers in an airtight container.
- Use gel food coloring for a brighter red.
- Let the cake cool completely before frosting.
- Prep Time: 20 minutes
- Cook Time: 30 minutes
- Category: Dessert
- Method: Baking
- Cuisine: American
Nutrition
- Serving Size: 1 slice
- Calories: 350
- Sugar: 30g
- Sodium: 250mg
- Fat: 18g
- Saturated Fat: 3g
- Unsaturated Fat: 15g
- Trans Fat: 0g
- Carbohydrates: 45g
- Fiber: 1g
- Protein: 4g
- Cholesterol: 40mg
Keywords: Red velvet cake, Valentine's Day cake, dessert


