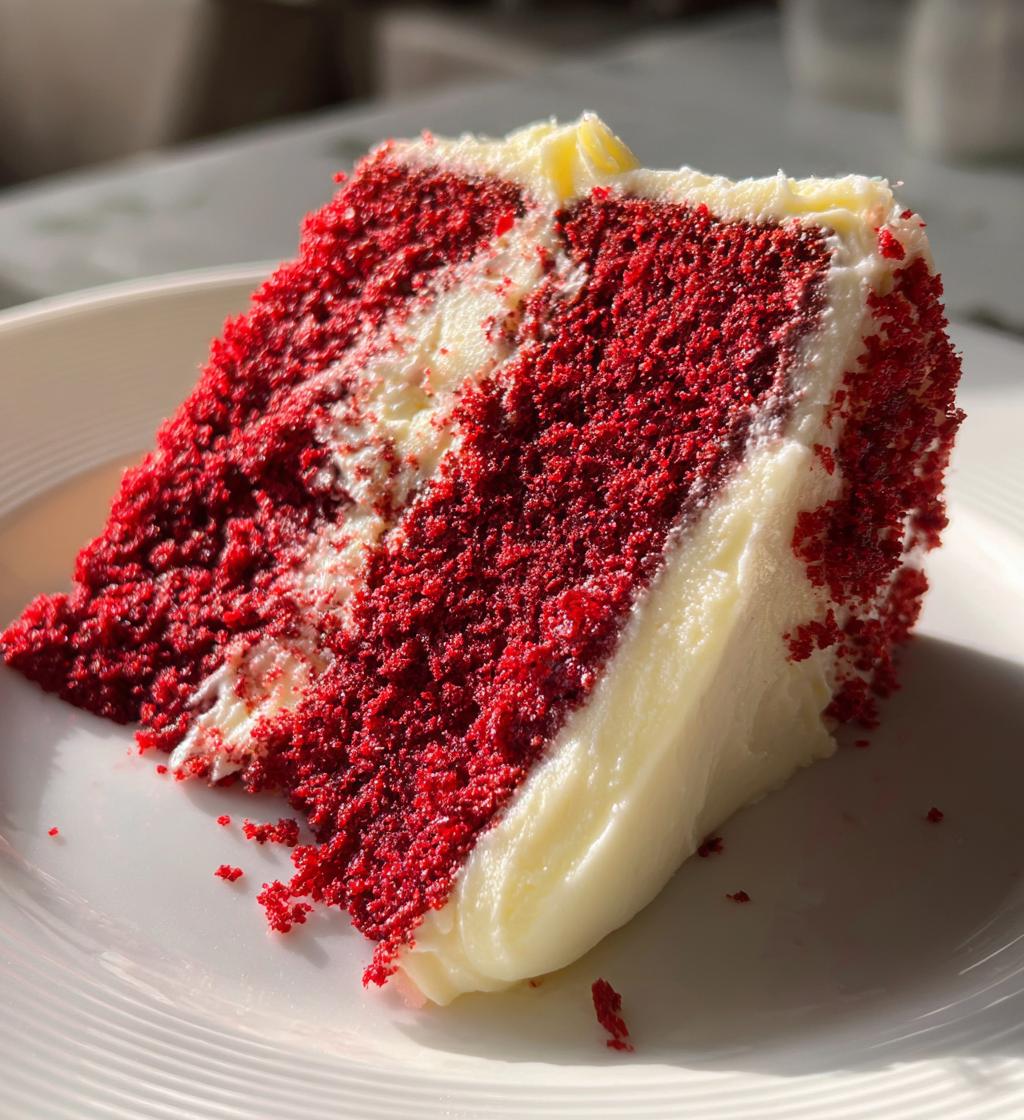
There’s something magical about a classic Red Velvet Cake with Vanilla Cream—the deep red crumb, the hint of cocoa, and that perfect tangy-sweet balance that makes every bite irresistible. I still remember the first time I baked one for my sister’s birthday, nervously peeking through the oven door, hoping that vibrant color would stay true. The moment we sliced into it—soft, moist, and paired with that silky vanilla cream—I knew it was a keeper. Whether it’s for a special occasion or just because, this cake never fails to bring smiles (and empty plates!).
Why You’ll Love This Red Velvet Cake with Vanilla Cream
Trust me, this isn’t just another cake recipe—it’s the kind of dessert that makes people ask for seconds (and the recipe!). Here’s why it’s a winner:
- That perfect crumb: Moist, tender, and just dense enough to hold up to the creamy frosting
- Flavor magic: The subtle cocoa and tangy buttermilk balance the sweetness beautifully
- Frosting dreams: The vanilla cream is so smooth, you’ll want to eat it with a spoon (I won’t judge!)
- Always a hit: Whether it’s a birthday or a random Tuesday, this cake disappears fast
Ingredients for Red Velvet Cake with Vanilla Cream
Gathering the right ingredients is half the battle with baking—trust me, I’ve learned this the hard way! Here’s everything you’ll need for that perfect red velvet cake with its dreamy vanilla cream topping. And yes, I’ve included all my little preparation notes that make all the difference (learned from many a “oops” moment in my kitchen!).
For the Cake:
- 2 1/2 cups all-purpose flour (spoon & leveled)
- 1 1/2 cups granulated sugar
- 1 teaspoon baking soda (yes, just 1 tsp—no more!)
- 1 teaspoon cocoa powder (the secret flavor booster)
- 1 teaspoon salt
- 2 large eggs (room temperature please—cold eggs don’t play nice)
- 1 1/2 cups vegetable oil (I use canola but any neutral oil works)
- 1 cup buttermilk (room temperature—this is non-negotiable for that perfect rise)
- 2 tablespoons liquid red food coloring (the good gel kind works best for vibrant color)
- 1 teaspoon pure vanilla extract
- 1 teaspoon white vinegar (sounds weird but makes the cake extra tender)
For the Vanilla Cream Frosting:
- 8 ounces cream cheese (softened—I leave mine out for 2 hours)
- 1/2 cup unsalted butter (softened to room temp—not melted!)
- 4 cups powdered sugar (sifted if you’re fancy, but I usually skip this step)
- 1 teaspoon pure vanilla extract (the real stuff makes all the difference)
See those notes about room temperature ingredients? I know it’s tempting to skip that step when you’re in a baking frenzy (been there!), but it really does make your batter smoother and your frosting creamier. And that vinegar? Don’t panic—it reacts with the baking soda to give you that perfect, velvety texture. Magic!
Equipment You’ll Need
Before we dive into mixing, let’s talk tools—because nothing kills a baking high like realizing you’re missing a key piece of equipment mid-recipe (ask me how I know). Here’s everything you’ll want to have ready for this red velvet masterpiece:
- Two 9-inch round cake pans: The classic choice for perfect layers. No fancy non-stick? No problem—just grease and flour them really well!
- Mixing bowls: One big one for dry ingredients, another for wet. I like to use my biggest glass bowl—those red batter splatters are easier to spot!
- Electric mixer: A hand mixer works great, though stand mixer lovers (like me) can use the paddle attachment. Grandma used a wooden spoon, but we’re living in the future, people.
- Wire rack: Crucial for cooling—no one wants a soggy-bottomed cake. If you’re in a pinch, oven racks work too (just lay a towel underneath).
- Offset spatula: My secret weapon for that swoopy, professional-looking frosting. A butter knife works in a pinch, but once you go offset, you never go back.
- Rubber spatula: For scraping every last bit of that gorgeous red batter into the pans. Waste not, want not!
That’s it—no fancy gadgets required! Though if you want to get extra, a kitchen scale helps with perfect layers, and a sifter makes your powdered sugar extra fluffy. But honestly? I’ve made this cake in college with just a fork and a cereal bowl (don’t tell my baking teacher). The heart wants what it wants—red velvet cake!
How to Make Red Velvet Cake with Vanilla Cream
Alright, let’s get to the fun part—actually making this gorgeous cake! I’ll walk you through each step just like I would if we were baking together in my kitchen (with fewer flour explosions, hopefully). Follow these steps, and you’ll have a showstopper that looks as good as it tastes.
Preparing the Red Velvet Cake Batter
First things first—preheat that oven to 350°F (175°C). While it’s heating up, let’s make magic happen with the batter:
- Whisk together all your dry ingredients—flour, sugar, baking soda, cocoa powder, and salt—in a big bowl. I like to give it a good 30-second whisk to make sure everything’s evenly distributed. No one wants a bite of pure baking soda!
- In another bowl (or your stand mixer bowl), beat the eggs until they’re just combined. Then add the oil, buttermilk, food coloring, vanilla, and vinegar. Mix until it’s all one gorgeous red liquid. Don’t panic if it looks neon pink at first—it’ll deepen as it bakes.
- Now, the crucial part: slowly add the dry ingredients to the wet ingredients. I do this in three batches, mixing just until combined after each addition. Overmixing is the enemy of tender cake—stop when you stop seeing flour streaks. The batter should be smooth and pourable, like thick paint.
Pro tip: If you’re using gel food coloring and want that deep red velvet color, now’s the time to add an extra tiny squeeze. The color fades a bit during baking, so go slightly bolder than you think you need.
Baking and Cooling the Cake
Okay, oven should be nice and hot by now—let’s get these cakes baking:
- Divide the batter evenly between your prepared pans. I use a kitchen scale for precision, but if you’re eyeballing it, just make sure they look roughly the same. Smooth the tops with a spatula so they bake evenly.
- Bake for 30 minutes, but start checking at 25. The cakes are done when a toothpick inserted in the center comes out clean (a few moist crumbs are fine, but no wet batter). The tops should spring back when lightly pressed.
- Here’s the hard part—let the cakes cool in their pans for exactly 10 minutes on a wire rack. Any less, and they might fall apart; any more, and they can stick. After 10 minutes, run a knife around the edges and flip them onto the rack to cool completely. Patience is key—frosting a warm cake is a recipe for melty disaster!
While they’re cooling, resist the urge to snack on the domed tops (though I won’t judge if you sneak a crumb or two). That vanilla cream frosting is coming up next!
Making the Vanilla Cream Frosting
This frosting is so good, you might find yourself “testing” it with a spoon (or finger) more than strictly necessary. Here’s how to make it perfectly smooth:
- In a large bowl, beat the softened cream cheese and butter together until completely smooth—about 2 minutes with an electric mixer. Scrape down the sides halfway through. Any lumps now will stay lumps, so take your time!
- With the mixer on low, gradually add the powdered sugar about 1 cup at a time. Once it’s all incorporated, bump up the speed and beat for another minute until fluffy. Add the vanilla and give it one final mix.
- If your frosting seems too soft (this can happen on warm days), pop it in the fridge for 15 minutes. Too thick? Add milk 1 teaspoon at a time until it’s spreadable.
Now the fun part—assembling your masterpiece! Place one cooled cake layer on your serving plate, spread a generous amount of frosting, top with the second layer, and frost the whole thing. I like to do a “naked cake” look where you can still see some of the red through the frosting—it’s rustic and shows off that beautiful color!
Tips for the Perfect Red Velvet Cake with Vanilla Cream
After baking more red velvet cakes than I can count (and yes, a few flops along the way), I’ve learned all the tricks to guarantee success every time. These are my absolute must-know tips—the kind I whisper to friends when they ask why my cake turns out better than theirs!
- Room temp is non-negotiable: Cold eggs and buttermilk make for a dense cake. I leave mine out for at least 2 hours—or cheat by placing eggs in warm water for 10 minutes!
- Sift those dry goods: I know it’s an extra step, but sifting the flour and powdered sugar prevents lumps in both cake and frosting. My grandma’s trick? Whisk dry ingredients vigorously instead if you’re short on time.
- Oil your pans like a pro: For foolproof release, I grease pans with butter then dust with a flour-cocoa powder mix. No white flour patches on your gorgeous red cake!
- Batter watch: That perfect thick-but-pourable consistency? If your batter seems too thick, add a splash more buttermilk. Too thin? A tablespoon of flour at a time until right.
- The toothpick lie: Don’t trust just one test—check multiple spots. Sometimes one stubborn wet spot hides in there!
- Frosting temperature magic: If your kitchen’s warm, chill the frosted cake for 15 minutes before serving—it gives that frosting perfect structure for slicing.
- Color boost secret: For truly vibrant red, add 1/4 tsp of cocoa powder to your food coloring before mixing in. Sounds crazy, but it deepens the hue beautifully!
The best part? Even if yours doesn’t come out picture-perfect the first time (my first attempt looked like a pink pancake), it’ll still taste amazing. That’s the magic of red velvet—it’s forgiving and delicious no matter what!
Variations and Substitutions
Listen, I’m all about sticking to the original recipe (Grandma would haunt me otherwise!), but sometimes you gotta improvise based on what’s in your pantry. Here are my tried-and-true swaps that still deliver that classic red velvet magic:
- No buttermilk? Mix 1 cup milk with 1 tablespoon lemon juice or vinegar and let it sit for 5 minutes. Greek yogurt thinned with milk works too—I’ve used this in a pinch and the cake stayed wonderfully moist.
- Natural food coloring route: For a less neon-red cake, try beet powder (about 2 tablespoons) mixed with the wet ingredients. The color will be more muted but still lovely. P.S. It adds a subtle earthy sweetness I actually love!
- Dairy-free? Use coconut oil instead of butter in the frosting, and dairy-free cream cheese (the kind in the purple tub works shockingly well here).
- Vinegar alternatives: If you’re out of white vinegar, apple cider vinegar works fine—just know it might give the slightest fruity hint. Lemon juice can pinch-hit in emergencies too.
- Crunch lovers: Fold in 1/2 cup chopped walnuts or pecans to the batter for texture. My Aunt Betty swears by this addition—though purists might side-eye you!
The beauty of this recipe is how adaptable it is—I once made it with melted butter instead of oil when I ran out, and while the texture was slightly denser, it disappeared just as fast at the potluck. Baking is about joy, not perfection!
Storing and Serving Red Velvet Cake with Vanilla Cream
Okay, let’s talk about keeping this beauty fresh—because unless you’re feeding a crowd (or have superhuman willpower), you’ll probably have leftovers. Here’s how I store my red velvet cake to keep it tasting just-baked delicious:
First rule: That cream cheese frosting means this cake absolutely needs refrigeration. Once frosted, I cover it loosely with plastic wrap or pop it in a cake carrier and store it in the fridge for up to 5 days. The cake actually gets more moist and flavorful by day two—like a fine wine, but sweeter!
Important tip: Always let the cake sit at room temperature for about 30 minutes before serving. Cold cake can taste dense, and the frosting will be too firm. That little rest brings back all the soft, velvety texture we worked so hard for. I usually take mine out when I start clearing the dinner dishes—perfect timing!
For longer storage: You can freeze unfrosted cake layers wrapped tightly in plastic for up to 3 months. Thaw overnight in the fridge, then frost as usual. The frosting itself freezes well too—just rewhip it briefly to restore the creamy texture.
And hey—if you’re transporting this cake to a party? Chill it for at least an hour first so the frosting firms up. I learned this the hard way when my beautiful cake turned into a “modern art” piece during a summer car ride. Now I bring the cake cold and let it come to temp at the party—problem solved!
Nutritional Information
Okay, let’s keep it real—we’re not eating red velvet cake for its health benefits (though I firmly believe joy is an essential nutrient!). But in case you’re curious, here’s the nutritional breakdown per slice. Just remember: these values are estimates since ingredients vary by brand, and hey—portion sizes are suggestions, not rules in my kitchen!
- Calories: 420 (worth every one!)
- Total Fat: 22g (14g unsaturated, 6g saturated)
- Cholesterol: 55mg
- Sodium: 280mg
- Total Carbohydrates: 52g
- Fiber: 1g (hey, it’s something!)
- Sugars: 35g (mostly from that glorious frosting)
- Protein: 4g
My philosophy? Life’s too short to stress over dessert nutrition facts. Slice yourself a piece, savor it slowly, and maybe balance it out with an extra veggie at dinner. That’s called being responsible… right?
Frequently Asked Questions
Over the years, I’ve gotten all sorts of questions about this red velvet cake—some smart, some silly, and some that made me go “Huh, I never thought of that!” Here are the most common ones I hear, along with my tried-and-true answers:
Q1. Why add vinegar to cake batter? That sounds weird!
Trust me, I thought the same thing when I first saw the recipe! That little teaspoon of white vinegar reacts with the baking soda to give the cake its signature tender crumb. You won’t taste it at all—it just works its magic behind the scenes. My grandma called it “the secret lift”!
Q2. Can I freeze this cake?
Absolutely! The unfrosted cake layers freeze beautifully for up to 3 months—just wrap them tightly in plastic wrap first. The frosting freezes well too (though I usually make it fresh). Thaw overnight in the fridge, then assemble as usual. Pro tip: Freeze slices individually for emergency dessert cravings!
Q3. My cake turned out pink instead of red—what happened?
Oh honey, welcome to the club! This happened to me three times before I figured it out. The color fades during baking, so you need to go bolder than you think. Use gel food coloring (the liquid kind isn’t strong enough), and don’t be shy—that bottle should look alarmingly empty when you’re done! Also, natural cocoa powder can mute the color, so stick with the regular kind.
Q4. Can I make cupcakes instead of a layer cake?
You bet! This batter makes about 24 perfect cupcakes. Bake them at the same temperature for 18-20 minutes instead. They’re adorable with a swirl of that vanilla cream frosting and a little red sprinkle on top. My niece calls them “velvet bites” and demands them for every birthday!
Q5. Help! My frosting is runny—what do I do?
First, deep breath—I’ve saved many a frosting disaster! If your kitchen’s warm, pop the bowl in the fridge for 15 minutes. Still too soft? Add more powdered sugar 1/4 cup at a time until it firms up. Worst case scenario? Call it a “glaze” and drizzle it artfully over the cake. No one will know it wasn’t planned!
Well, there you have it—my all-time favorite Red Velvet Cake with Vanilla Cream recipe, complete with all the tips and tricks I’ve collected over years of baking (and yes, a few kitchen disasters!). Now it’s your turn—I’d love to hear how your cake turns out! Did you add any fun twists? Did your family go crazy for it like mine always does? Drop a comment below or tag me in your cake photos—nothing makes me happier than seeing your baking adventures. And if you loved this recipe as much as I do, consider giving it a 5-star rating to help other bakers find it. Happy baking, friends—may your cakes be red, your frosting smooth, and your kitchen full of laughter (and maybe just a little bit of flour dust)!
Print
3-Layer Red Velvet Cake with Dreamy Vanilla Cream Joy
- Total Time: 50 minutes
- Yield: 12 servings 1x
- Diet: Vegetarian
Description
A classic red velvet cake with vanilla cream, perfect for celebrations. The cake is moist, slightly tangy, and topped with smooth vanilla frosting.
Ingredients
- 2 1/2 cups all-purpose flour
- 1 1/2 cups granulated sugar
- 1 tsp baking soda
- 1 tsp cocoa powder
- 1 tsp salt
- 2 eggs
- 1 1/2 cups vegetable oil
- 1 cup buttermilk
- 2 tbsp red food coloring
- 1 tsp vanilla extract
- 1 tsp white vinegar
- 8 oz cream cheese, softened
- 1/2 cup unsalted butter, softened
- 4 cups powdered sugar
- 1 tsp vanilla extract
Instructions
- Preheat oven to 350°F (175°C). Grease and flour two 9-inch round cake pans.
- Whisk flour, sugar, baking soda, cocoa powder, and salt in a bowl.
- Beat eggs, oil, buttermilk, food coloring, vanilla, and vinegar in another bowl.
- Combine wet and dry ingredients. Mix until smooth.
- Divide batter evenly between pans. Bake for 30 minutes or until a toothpick comes out clean.
- Cool cakes in pans for 10 minutes, then transfer to a wire rack.
- Beat cream cheese and butter until smooth. Gradually add powdered sugar and vanilla.
- Frost the cooled cake with vanilla cream.
Notes
- Use room-temperature ingredients for a smoother batter.
- For deeper color, add a little extra food coloring.
- Store cake in the refrigerator for up to 5 days.
- Prep Time: 20 minutes
- Cook Time: 30 minutes
- Category: Dessert
- Method: Baking
- Cuisine: American
Nutrition
- Serving Size: 1 slice
- Calories: 420
- Sugar: 35g
- Sodium: 280mg
- Fat: 22g
- Saturated Fat: 6g
- Unsaturated Fat: 14g
- Trans Fat: 0g
- Carbohydrates: 52g
- Fiber: 1g
- Protein: 4g
- Cholesterol: 55mg
Keywords: red velvet cake, vanilla cream, homemade cake, dessert recipe


