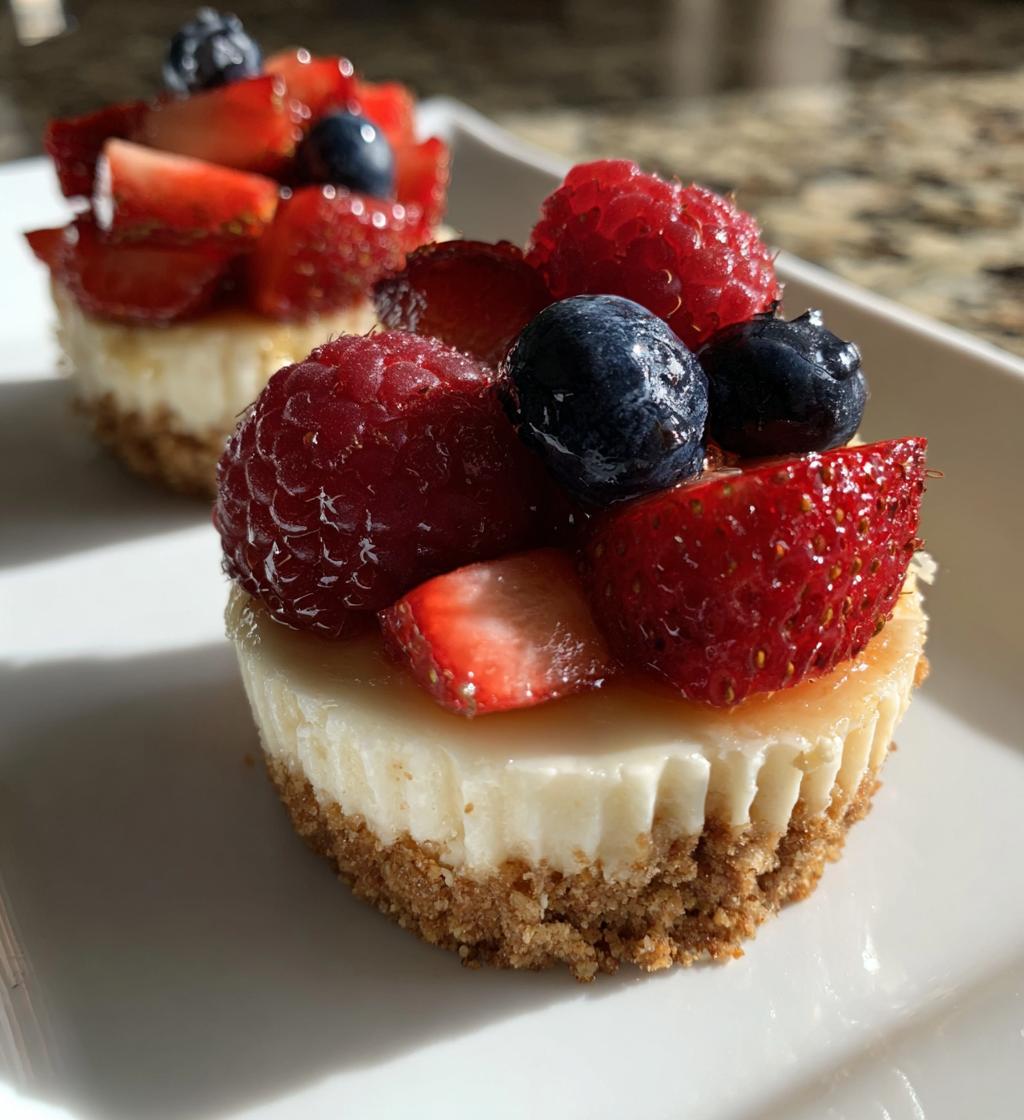
You know those little desserts that steal the show at every party? That’s exactly what these Pretty Berry Mini Cheesecakes with Fresh Topping do – they’re the bite-sized stars of my dessert table! I first made them for my niece’s baby shower, and let me tell you, people couldn’t stop raving about them. The best part? They look fancy but are surprisingly simple to make. With just a handful of ingredients and minimal baking time (we’re talking 5 minutes for the crust!), you get these adorable, creamy cheesecakes crowned with jewel-toned berries. They’re perfect for when you want something impressive without spending hours in the kitchen.
Why You’ll Love These Pretty Berry Mini Cheesecakes with Fresh Topping
Trust me, once you try these little beauties, you’ll be hooked. Here’s why:
- No baking drama: The filling comes together in minutes—just mix and chill while you do other things (or sneak a spoonful of that creamy goodness).
- Party perfect: They look so fancy arranged on a platter, but take half the effort of a full-sized cheesecake.
- Berry versatile: Use whatever fresh fruit looks best at the market—strawberries, raspberries, or even kiwi slices for a tropical twist.
- Portion control: Okay, let’s be real—you’ll probably eat three. But at least they’re perfectly portioned!
Ingredients for Pretty Berry Mini Cheesecakes with Fresh Topping
Here’s the simple lineup that makes these little cheesecakes so magical. I’ve learned over the years that quality ingredients really make a difference here – especially when it comes to the cream cheese and berries!
- For the crust:
- 1 cup graham cracker crumbs (about 8 full sheets, finely ground – I like to pulse mine in the food processor until they’re like sand)
- 3 tbsp melted butter (salted works great, but unsalted is fine too – just add a pinch of salt if you go that route)
- 1 tbsp granulated sugar (this tiny bit helps balance the tang of the cheesecake filling)
- For the filling:
- 8 oz cream cheese (full-fat, please! And it must be softened at room temperature for at least 30 minutes – cold cream cheese will leave you with lumps)
- 1/4 cup granulated sugar (I prefer fine sugar because it dissolves better, but regular works in a pinch)
- 1 tsp pure vanilla extract (the good stuff – it makes all the difference)
- 1/2 cup heavy whipping cream (chilled is best – I stick mine in the freezer for 10 minutes before whipping)
- For the topping:
- 1 cup mixed fresh berries (my favorite combo is strawberries, blueberries, and raspberries, but use whatever looks best at the market)
See? Nothing fancy or hard to find. Just simple ingredients that come together to make something absolutely delightful. The key is taking the time to let that cream cheese soften properly – I learned that the hard way after a few lumpy batches early on!
Equipment You’ll Need
You won’t need any fancy gadgets for these mini cheesecakes, promise! Here’s what I always have ready:
- Mini muffin tin (the 12-cup standard size works perfectly)
- A couple of mixing bowls (one for crust, one for filling)
- Electric mixer (or strong arms and a whisk if you’re feeling energetic)
- Measuring cups and spoons
- A rubber spatula (for that last bit of delicious filling – don’t waste it!)
That’s it! Well, besides spoons for taste-testing – the most important tool of all.
How to Make Pretty Berry Mini Cheesecakes with Fresh Topping
Okay, let’s dive into the fun part! These mini cheesecakes come together in just a few simple steps, but I’ll walk you through each one so they turn out perfect every time. The first time I made these, I was shocked at how easy they were – and how impressed everyone was with the results!
Step 1: Prepare the Crust
First, preheat your oven to 325°F (165°C). While it’s heating up, grab a medium bowl and mix together those graham cracker crumbs, melted butter, and sugar until it looks like wet sand. I use my fingers to really work the butter in evenly – it’s messy but effective!
Now, spoon about 1 tablespoon of this mixture into each cup of your mini muffin tin. Here’s my trick: use the back of a small spoon or a shot glass to press the crumbs firmly into the bottom and slightly up the sides. This creates a perfect little “cup” for your filling. Pop them in the oven for just 5 minutes – you’ll smell that glorious buttery graham cracker aroma when they’re ready. Let them cool while you make the filling.
Step 2: Make the Cheesecake Filling
This is where the magic happens! In a large bowl, beat your softened cream cheese until it’s completely smooth – no lumps allowed! This usually takes me about 1-2 minutes with my hand mixer. Add the sugar and vanilla, then beat again until everything is well combined and creamy.
Now, in a separate bowl (I chill mine first for better results), whip that heavy cream until stiff peaks form. Be patient here – it’ll take about 3-4 minutes of whipping. When you lift the beaters, the cream should hold its shape without drooping. Gently fold the whipped cream into your cream cheese mixture with a spatula, using big sweeping motions to keep it light and airy.
Step 3: Assemble and Chill
Time to bring it all together! Spoon or pipe the filling into your cooled crusts, filling them nearly to the top. I like to use a small cookie scoop for this – it keeps things neat and ensures equal portions. Smooth the tops with a damp finger or the back of a spoon.
Now comes the hardest part – waiting! Pop them in the fridge for at least 2 hours (I know, torture!) to set. If you’re in a rush, 1 hour in the freezer works too, but they’ll be firmer. The filling will transform from creamy to perfectly sliceable during this time.
Step 4: Add the Fresh Berry Topping
The grand finale! Right before serving (so the berries stay fresh and pretty), arrange your mixed berries on top of each mini cheesecake. I like to use one perfect strawberry slice with a few blueberries and raspberries nestled around it – it makes each one look like a tiny edible bouquet!
Pro tip: If you’re making these ahead, keep the berries separate and add them just before serving. That way, the juices won’t make the tops soggy. And don’t be afraid to get creative with your arrangements – sometimes I do all blueberries for a monochrome look, or alternate colors for a rainbow effect.
Tips for Perfect Pretty Berry Mini Cheesecakes with Fresh Topping
After making these little gems dozens of times (and learning from all my mistakes), here are my absolute must-know tips for cheesecake success:
- Chill everything cold for whipped cream: I stick my mixing bowl and beaters in the freezer for 10 minutes before whipping the cream. Cold tools = fluffy, stiff peaks every time!
- Room temp cream cheese is non-negotiable: Take it out at least 30 minutes before starting. If you’re impatient like me, you can microwave it for 10-second bursts (but don’t let it melt!).
- Press that crust firmly: Use the back of a spoon or small glass to really compact the graham cracker mixture. Loose crumbs will crumble when you try to eat them.
- Folding technique matters: When combining the whipped cream with the cream cheese, use big, gentle folding motions with a spatula. Overmixing deflates all that air you worked so hard to whip in!
- Storage smarts: Keep them in an airtight container in the fridge for up to 3 days – but add the berries right before serving. The berries will weep juice if they sit too long.
- Easy removal trick: Run a thin knife around each cheesecake’s edge after chilling to loosen them from the pan. They’ll pop right out!
- Berry prep: Wash and dry your berries thoroughly before topping – water makes the cheesecakes soggy. I pat mine dry with paper towels.
My biggest lesson? Don’t stress if they’re not perfect – even my “ugly” batches still taste amazing. The berries hide a multitude of sins!
Variations for Pretty Berry Mini Cheesecakes with Fresh Topping
The beauty of these mini cheesecakes is how easily you can mix them up! My niece loves when I swap the berries for diced mango – it gives a tropical twist that’s perfect for summer. A little lemon zest in the filling brightens everything up beautifully. If you’re feeling extra fancy, try a drizzle of melted chocolate over the berries before serving. My friend Sarah swears by adding a teaspoon of almond extract to the crust mixture for a nutty flavor. The possibilities are endless – just don’t tell Grandma I mess with her classic recipe!
Serving Suggestions
Oh, let me tell you how I love to serve these little beauties! They’re perfect with a cup of strong coffee – the bitterness balances the sweet creaminess so well. My neighbor swears by pairing them with Earl Grey tea, and honestly? She’s onto something. The bergamot notes make the berries pop!
For special occasions, I’ll drizzle melted chocolate over the tops – just microwave some chocolate chips for 30 seconds and use a fork to zigzag it over the berries. It looks fancy but takes seconds. If you’re serving them at a party, arrange them on a tiered cake stand with some fresh mint leaves scattered around. Trust me, people will think you slaved for hours!
Here’s my favorite presentation trick: Use a mini cupcake liner under each cheesecake when serving. Not only does it catch any berry juices, but it makes them look extra polished. I like the gold foil ones for holidays – they make the berries look like jewels!
Pro tip: If you’re serving these after dinner, pop them in the freezer for 10 minutes first. The slight chill makes them extra refreshing. And don’t forget the spoons – these are finger food in theory, but that creamy filling deserves proper utensils!
Storage & Reheating
Now let’s talk about keeping these little beauties fresh! I learned the hard way that cheesecakes can be a bit divas when it comes to storage. The good news? These mini versions actually hold up better than full-sized cheesecakes. Just pop them in an airtight container (I like using those plastic cupcake carriers with lids) and refrigerate for up to 3 days.
Here’s my golden rule: always add the berries right before serving. Those fresh toppings don’t play nice when stored – they’ll leak juice and make your perfect cheesecakes soggy. I prep everything ahead but keep the berries separate in a little container until showtime.
And about freezing… I know it’s tempting, but resist! The whipped cream in the filling doesn’t thaw well – it gets weepy and sad. Trust me, I ruined a whole batch learning this lesson. If you must freeze them (maybe you got carried away and made a quadruple batch like I sometimes do), leave off all toppings and wrap each cheesecake tightly in plastic before freezing. Thaw overnight in the fridge, then add fresh berries before serving.
One last pro tip: If your cheesecakes seem a bit soft after fridge time, give them 10 minutes in the freezer to firm up before serving. Works like a charm every time!
Nutritional Information
Now, I’m no nutritionist (and let’s be real – we’re eating cheesecake here!), but if you’re curious about what’s in these little treats, here’s the scoop. Remember, these values are estimates – your exact numbers might vary depending on your specific ingredients and berry choices. But for those keeping track, here’s the breakdown per mini cheesecake:
- Calories: About 180 (but totally worth every single one!)
- Fat: 12g (the good kind from all that creamy deliciousness)
- Saturated Fat: 7g (blame the cream cheese and butter – no regrets!)
- Carbohydrates: 16g
- Sugar: 12g (mostly from the natural fruit sugars and a bit of added sugar)
- Protein: 2g (surprising protein bonus from the cream cheese!)
- Fiber: 1g (thank you, berry skins!)
Now, if you’re looking to lighten things up, you could use reduced-fat cream cheese – but I’ll whisper a secret… it just doesn’t taste as rich and dreamy. Sometimes a little indulgence is good for the soul. And with all those fresh berries on top, you’re getting antioxidants too – that totally balances things out, right?
Frequently Asked Questions
I’ve gotten so many questions about these Pretty Berry Mini Cheesecakes over the years – here are the ones that pop up most often with my tried-and-true answers!
Can I use frozen berries for the topping?
Oh, I get this one all the time! Fresh berries are ideal, but if you’re in a pinch, thawed frozen berries will work. Just pat them super dry with paper towels first – that extra moisture can make the cheesecakes soggy. My trick? Lay them on a paper towel-lined plate for 10 minutes after thawing.
How do I prevent cracks in my mini cheesecakes?
The beauty of these no-bake versions is that cracks are rare! But if you’re worried, here’s my secret: make sure your cream cheese mixture is perfectly smooth before adding the whipped cream, and don’t overmix when combining them. Those little air bubbles are what cause cracks as they set.
Can I make these gluten-free?
Absolutely! Just swap the graham crackers for gluten-free ones (I like the almond flour kind) or use crushed gluten-free cookies. The filling is naturally gluten-free already – bonus!
My cheesecakes won’t come out of the pan – help!
Been there! First, make sure you grease your muffin tin well (I use baking spray). After chilling, run a thin knife around each one to loosen. If they’re still stubborn, pop the whole pan in the freezer for 5 minutes – the cold makes them contract slightly and usually releases perfectly.
Can I make these ahead for a party?
You bet! The crusts and filling can be assembled up to 2 days in advance – just wait to add the berries until right before serving. They actually taste better after chilling overnight as the flavors meld together beautifully.
Try this recipe and share your berry creations below! I’d love to see your mini cheesecake masterpieces and hear about your favorite topping combinations.
Print
5-Ingredient Pretty Berry Mini Cheesecakes – Decadent Delights You’ll Crave
- Total Time: 2 hours 20 minutes
- Yield: 12 mini cheesecakes 1x
- Diet: Vegetarian
Description
Delightful mini cheesecakes topped with fresh berries for a sweet and tangy treat.
Ingredients
- 1 cup graham cracker crumbs
- 3 tbsp melted butter
- 1 tbsp sugar
- 8 oz cream cheese, softened
- 1/4 cup sugar
- 1 tsp vanilla extract
- 1/2 cup heavy cream
- 1 cup mixed fresh berries (strawberries, blueberries, raspberries)
Instructions
- Preheat oven to 325°F (165°C).
- Mix graham cracker crumbs, melted butter, and sugar. Press into mini muffin tins.
- Bake crust for 5 minutes, then let cool.
- Beat cream cheese, sugar, and vanilla until smooth.
- Whip heavy cream until stiff peaks form, then fold into cream cheese mixture.
- Spoon filling into crusts and refrigerate for at least 2 hours.
- Top with fresh berries before serving.
Notes
- Use room-temperature cream cheese for smoother filling.
- Chill the mixing bowl before whipping cream for best results.
- Store leftovers in the refrigerator for up to 3 days.
- Prep Time: 15 minutes
- Cook Time: 5 minutes
- Category: Dessert
- Method: Baking
- Cuisine: American
Nutrition
- Serving Size: 1 mini cheesecake
- Calories: 180
- Sugar: 12g
- Sodium: 120mg
- Fat: 12g
- Saturated Fat: 7g
- Unsaturated Fat: 4g
- Trans Fat: 0g
- Carbohydrates: 16g
- Fiber: 1g
- Protein: 2g
- Cholesterol: 35mg
Keywords: mini cheesecakes, berry dessert, easy dessert, no-bake cheesecake


