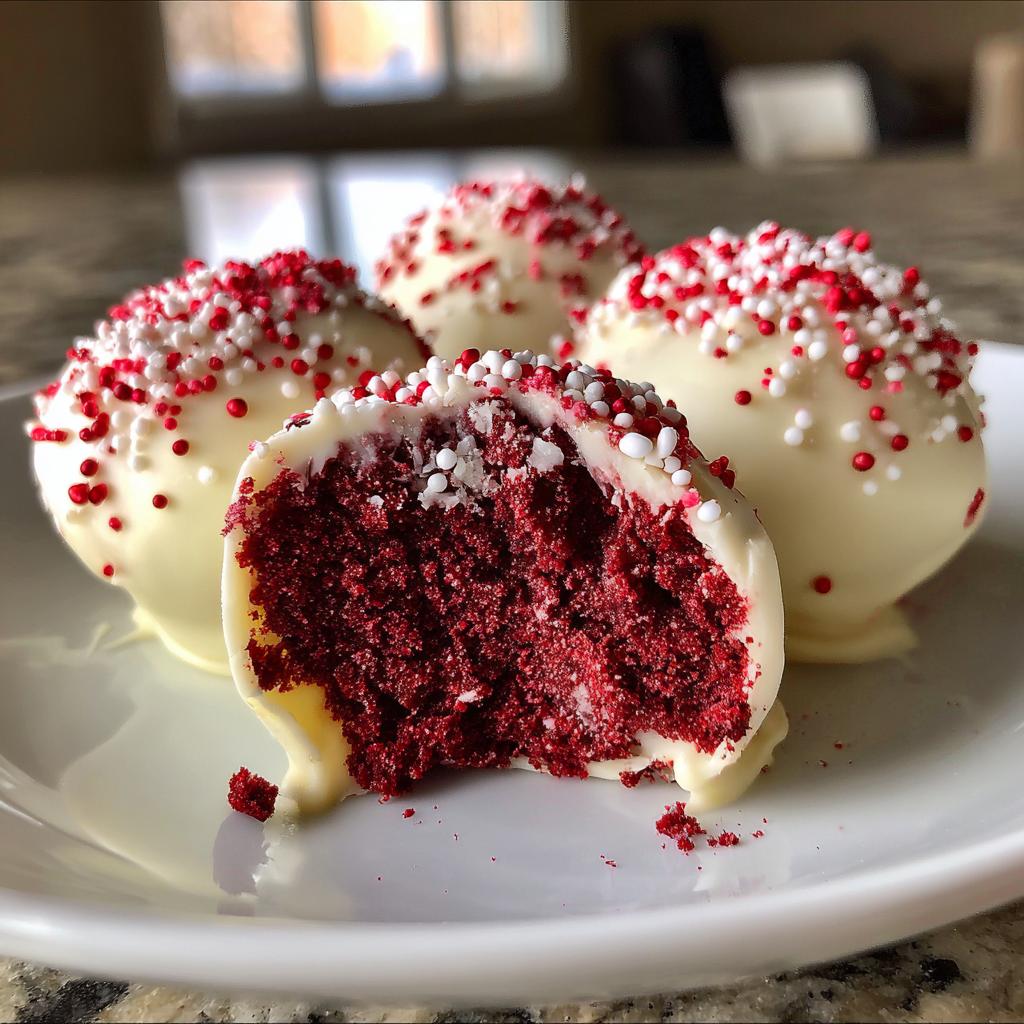
Oh, do I have a treat for you! These perfect red velvet cake pops are my go-to for every celebration – birthdays, holidays, even “just because” days. I first made them for my niece’s princess-themed party, and let me tell you, they were such a hit that now I’m the official “cake pop auntie” at every family gathering. The magic happens when rich red velvet cake meets creamy frosting, rolled into adorable bites and dipped in smooth white chocolate. They look fancy but trust me, they’re way easier than they appear. Whether you’re hosting a party or just craving something sweet, these little gems never disappoint!
Ingredients for Perfect Red Velvet Cake Pops
Okay, let’s talk ingredients! I’ve learned through trial and error that quality matters here – but don’t worry, we’re keeping it simple. You probably have most of this in your pantry already!
- 1 box (15.25 oz) red velvet cake mix – plus whatever ingredients the box calls for (usually eggs, oil, and water)
- 1 cup cream cheese frosting – store-bought works great, but homemade is even better if you’re feeling fancy
- 2 cups white chocolate chips – I prefer the melting wafers for smoother coating
- 1 tbsp vegetable oil – this helps thin the chocolate for perfect dipping
- Sprinkles (optional but highly recommended) – I always have holiday-themed ones on hand for special occasions
Pro tip: For the cake mix, I swear by the name brands – they give that classic red velvet color and flavor we all love. And about that frosting? If you’re using store-bought, let it sit at room temperature for 15 minutes before mixing. It’ll blend way easier with the cake crumbs!
How to Make Perfect Red Velvet Cake Pops
Alright, let’s get our hands dirty (literally)! I’ve made hundreds of these little beauties over the years, and I promise if you follow these steps, you’ll have showstopping cake pops that’ll make everyone think you’re a professional baker.
Baking and Crumbling the Cake
First things first – bake that red velvet cake according to the package directions. I always use a 9×13 pan because it gives me the perfect thickness. Once it’s baked, let it cool completely – I mean completely. Warm cake will turn into paste when you mix it with frosting, and nobody wants mushy cake pops!
When it’s cool, crumble it into a large bowl. You want fine crumbs here – no big chunks! I run my fingers through it like I’m playing in sand. Some people use a food processor, but I find hands-on crumbling gives me better control over the texture.
Mixing and Shaping the Cake Pops
Now for the fun part! Add your cream cheese frosting a tablespoon at a time to the crumbs, mixing as you go. You’re aiming for a Play-Doh like consistency – sticky enough to hold together but not so wet it sticks to your hands. This usually takes about 3/4 to 1 cup of frosting for me.
Here’s my secret weapon: a small cookie scoop! It gives me perfectly uniform balls every time. Scoop, then roll between your palms to smooth them out. Place them on parchment paper – don’t crowd them! – and pop them in the fridge for 30 minutes. This chilling step is crucial for firmness before dipping.
Coating and Decorating
Time for the magic coating! Melt your white chocolate chips with the vegetable oil in 30-second bursts in the microwave, stirring between each. When it’s smooth but not too hot (test on your wrist – it should feel warm, not burning), we’re ready to dip.
Hold a cake pop by the bottom, dip gently into the chocolate, then lift straight up while twisting slightly. Tap your wrist lightly to remove excess chocolate – this prevents those annoying drips! Immediately add sprinkles before the chocolate sets. I like to stick the pops upright in a Styrofoam block to dry – it keeps them perfectly round.
Pro tip: If your chocolate starts thickening, just add another tiny splash of oil and reheat briefly. And work quickly with those sprinkles – they won’t stick once the chocolate starts setting!
Tips for Perfect Red Velvet Cake Pops
After making more cake pops than I can count, I’ve picked up some tricks that’ll save you from the mistakes I made (like that time my entire batch fell off their sticks – oops!). Here are my go-to tips for red velvet cake pop success:
- The texture test – If your cake mixture feels too wet and sticky, add more cake crumbs a tablespoon at a time. Too dry and crumbly? Mix in extra frosting sparingly. You want it to hold together when rolled but not stick to your hands.
- Chill time matters – Don’t skip the fridge time after shaping! Those 30 minutes make all the difference between cake pops that hold their shape and ones that collapse when dipped. If you’re in a hurry, 15 minutes in the freezer works too.
- Styrofoam is your friend – Poke holes in a Styrofoam block to stand your cake pops upright while drying. This prevents flat sides and keeps the chocolate coating perfectly round.
- Temperature control – Keep your melted chocolate warm but not hot by working over a bowl of warm water. Too hot and it’ll crack as it sets; too cool and it’ll be gloppy.
- The twist technique – When dipping, gently twist the stick as you lift the cake pop out of the chocolate. This helps the excess drip off evenly for a smooth finish.
Remember, even if they’re not perfect, they’ll still taste amazing! My first batch looked like abstract art, but everyone gobbled them up anyway. That’s the beauty of red velvet cake pops – they’re forgiving little treats.
Variations for Perfect Red Velvet Cake Pops
Now let’s get creative! One of my favorite things about red velvet cake pops is how easily you can customize them. I love playing with different flavors and decorations to match any occasion – here are some of my go-to variations that always impress:
Chocolate Coatings Beyond White
While classic white chocolate is beautiful, don’t be afraid to switch it up! Dark chocolate makes an amazing contrast with the red velvet’s sweetness – I use it for more sophisticated gatherings. For Valentine’s Day last year, I did half white and half milk chocolate dipped, then drizzled them with the opposite color. The two-tone effect was stunning!
Holiday-Themed Twists
Those sprinkles we talked about? They’re a game-changer for holidays. At Christmas, I’ll roll some pops in crushed candy cane after dipping. For the Fourth of July, I use red, white and blue nonpareils. And for Halloween? Black and orange sprinkles with candy eyes make the cutest little monsters!
Flavor Boosters
Want to take the flavor up a notch? Try these easy additions:
- Mix 1/4 tsp cinnamon into the cake crumbs for extra warmth
- Add 1 tsp instant espresso powder to the frosting for depth
- Stir in 1/2 cup mini chocolate chips to the cake mixture for texture
- Swap the vanilla in your frosting for almond extract (just 1/4 tsp!)
My absolute favorite variation came from a happy accident: I once ran out of white chocolate and used strawberry-flavored melting wafers instead. The pink coating with the red velvet inside looked gorgeous for a baby shower! That’s the fun part – sometimes the best ideas come from improvisation. What creative combinations can you dream up?
Storing Perfect Red Velvet Cake Pops
Okay, let’s talk about keeping these beauties fresh! One of the best things about red velvet cake pops is how well they store – if they last long enough to be stored, that is! (I can never resist sneaking one or two…) Here’s exactly how I keep mine tasting as delicious as the day I made them.
For short-term storage, an airtight container at room temperature works perfectly. I like to line mine with parchment paper between layers so the pops don’t stick together. They’ll stay fresh this way for about 3 days – though in my house, they rarely last that long!
If you need them to last a bit longer, pop them in the fridge. The cool temperature helps preserve the moisture in the cake. Just be sure to let them come to room temperature before serving – that cream cheese frosting tastes best when it’s not ice cold. Refrigerated cake pops will keep beautifully for up to a week.
Now here’s my secret weapon: freezing! These cake pops freeze like a dream. I wrap each one individually in plastic wrap, then place them in a freezer bag. They’ll keep for up to 2 months this way. When you’re ready to enjoy, just thaw them overnight in the fridge or for an hour at room temperature. Perfect for making ahead for parties or satisfying sudden cake pop cravings!
One quick warning: humidity is the enemy here. If your kitchen is particularly humid, I’d skip the room temperature storage and go straight to fridge or freezer. There’s nothing sadder than opening your container to find soggy cake pops!
Perfect Red Velvet Cake Pops FAQs
Over the years, I’ve gotten so many questions about these cake pops – and I’ve made all the mistakes so you don’t have to! Here are the answers to the most common questions I hear:
Can I use homemade cake instead of box mix?
Absolutely! My from-scratch red velvet cake works wonderfully – just bake it in a 9×13 pan. The key is making sure it’s moist enough to bind with the frosting. Sometimes homemade cakes are drier, so you might need a bit more frosting.
Why do my cake pops keep falling off the sticks?
This used to drive me crazy! Two things: First, make sure you dip the stick in melted chocolate before inserting it – that acts like glue. Second, don’t skip that chilling step! The colder the cake balls, the better they hold onto the sticks.
How do I prevent cracks in the chocolate coating?
Temperature is everything here. If your cake pops are too cold when dipped, the coating will crack as it sets. Let them sit at room temp for 5 minutes before dipping. Also, make sure your chocolate isn’t too hot – warm, not scalding!
Can I make these without sticks?
Of course! I actually make cake balls all the time – just skip the sticks and decorate them as truffles. They’re perfect for cookie trays or packaged as gifts. I even press them into mini muffin liners for a fancier look.
What’s the best way to transport cake pops?
After years of cake pop disasters in the car, I’ve learned: Styrofoam blocks are lifesavers! Place them in a box with the pops standing upright, and they won’t budge. For extra security, I sometimes pack tissue paper around them.
Can I use candy melts instead of white chocolate?
Yes! In fact, candy melts are often easier to work with because they’re formulated for coating. They come in so many colors too – perfect for themed parties. Just remember they don’t need the added oil like chocolate chips do.
Nutritional Information
While I’m all about indulging in these delicious red velvet cake pops (because hey, life’s too short!), I know some folks like to keep an eye on nutrition. Just remember – these numbers are ballpark estimates based on standard ingredients. Your exact counts might vary depending on the specific brands you use or if you tweak the recipe!
Each cake pop is a perfect little package of joy, but they do contain sugar and carbs from the cake and frosting. The good news? Since they’re portion-controlled treats, it’s easier to enjoy them in moderation. I always tell my friends – one or two cake pops can satisfy that sweet craving without going overboard!
If you’re making these for dietary needs, feel free to experiment with sugar-free cake mixes or alternative sweeteners. I’d love to hear how your healthier versions turn out! Tag me in your photos so I can see your creations.
Print
10 Secrets to Perfect Red Velvet Cake Pops That Wow
- Total Time: 1 hour 15 minutes
- Yield: 24 cake pops 1x
- Diet: Vegetarian
Description
Delicious red velvet cake pops coated in creamy white chocolate. Perfect for parties, holidays, or sweet treats.
Ingredients
- 1 box red velvet cake mix
- 1 cup cream cheese frosting
- 2 cups white chocolate chips
- 1 tbsp vegetable oil
- Sprinkles (optional)
Instructions
- Bake the red velvet cake according to package instructions.
- Crumble the cooled cake into fine crumbs.
- Mix crumbs with cream cheese frosting until sticky.
- Roll mixture into 1-inch balls and place on parchment paper.
- Chill for 30 minutes.
- Melt white chocolate with vegetable oil until smooth.
- Dip cake pops into melted chocolate, tapping off excess.
- Decorate with sprinkles while wet.
- Chill again until set.
Notes
- Use a cookie scoop for even-sized cake pops.
- If mixture is too wet, add more cake crumbs.
- For smoother coating, thin chocolate with extra oil if needed.
- Prep Time: 20 minutes
- Cook Time: 25 minutes
- Category: Dessert
- Method: Baking
- Cuisine: American
Nutrition
- Serving Size: 1 cake pop
- Calories: 150
- Sugar: 12g
- Sodium: 120mg
- Fat: 7g
- Saturated Fat: 3g
- Unsaturated Fat: 2g
- Trans Fat: 0g
- Carbohydrates: 20g
- Fiber: 1g
- Protein: 2g
- Cholesterol: 10mg
Keywords: red velvet cake pops, dessert recipe, party treats


