Oh my gosh, you guys – this Peppermint Mocha Cheesecake Recipe is my absolute favorite holiday showstopper! I wait all year for an excuse to make it. There’s just something magical about that rich chocolate and coffee combo with a refreshing peppermint kick. It’s like your favorite winter coffee drink transformed into the creamiest, dreamiest dessert.
I first stumbled upon this flavor combo when I accidentally dumped peppermint extract into my mocha cheesecake batter one Christmas Eve (oops!). Turned out to be the happiest kitchen accident ever. Now my family demands it at every holiday gathering. The way the semi-sweet chocolate balances the bright peppermint? Perfection. And that hint of coffee? It takes this cheesecake from “yum” to “where has this been all my life?”
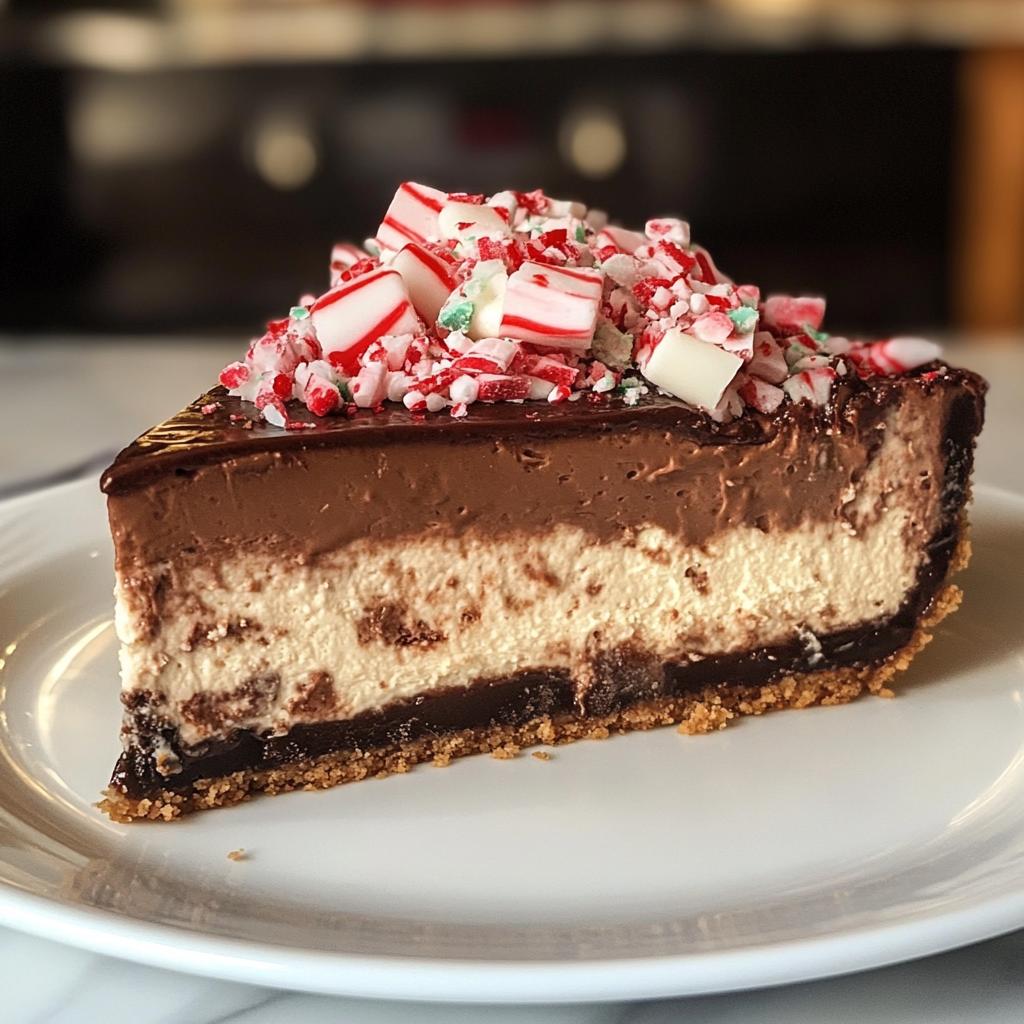
Trust me, this isn’t your average cheesecake. It’s got that festive sparkle from crushed peppermint candies on top, plus that velvety texture we all crave in a perfect slice. Whether you’re hosting a party or just treating yourself, this recipe delivers holiday cheer in every bite.
Why You’ll Love This Peppermint Mocha Cheesecake Recipe
Let me tell you why this cheesecake will become your new holiday tradition:
- That magical flavor trio – rich chocolate, bold coffee, and cool peppermint create the most festive taste explosion
- Creamiest texture ever – the sour cream and proper mixing technique give it that melt-in-your-mouth quality
- Holiday showstopper – the crushed peppermint topping looks like edible glitter (and tastes even better)
- Better than coffee shops – all your favorite peppermint mocha flavors in a decadent dessert form
- Make-ahead dream – tastes even better the next day when flavors have time to mingle
Seriously, one bite and you’ll understand why I’m obsessed with this recipe!
Ingredients for Peppermint Mocha Cheesecake Recipe
Okay, let’s talk ingredients – because using the right stuff makes ALL the difference here. I’ve learned through plenty of kitchen disasters (we don’t talk about The Great Lump Incident of 2018) that quality matters with cheesecake. Here’s exactly what you’ll need:
- 2 cups graham cracker crumbs – about 14 whole sheets crushed fine (trust me, measure after crushing)
- 1/2 cup unsalted butter, melted – and cooled slightly so it doesn’t make your crumbs soggy
- 24 oz cream cheese, softened – this means leave it out for 2+ hours! No shortcuts or you’ll get lumps
- 1 cup granulated sugar – regular white sugar works perfectly here
- 1/2 cup sour cream – full-fat please, this is dessert not diet food!
- 3 large eggs – room temp is ideal (just leave them out with the cream cheese)
- 1/2 cup semi-sweet chocolate, melted – use good quality baking chocolate, not chips
- 2 tbsp instant coffee granules – I use espresso powder for extra punch
- 1 tsp peppermint extract – NOT mint extract (learned that one the hard way)
- 1/2 cup crushed peppermint candies – plus extra for garnish if you’re feeling fancy
A quick note – I know peppermint extract smells strong when you first open the bottle, but don’t panic! It mellows beautifully when baked into the creamy cheesecake batter.
Equipment Needed
Don’t worry – you don’t need fancy gadgets to make this peppermint mocha cheesecake shine! Just gather these basic tools before you start (I’ve learned the hard way that rummaging through cabinets mid-recipe leads to kitchen chaos):
- 9-inch springform pan – the removable sides are crucial for clean slices
- Electric mixer – stand or hand mixer both work (your arms will thank you)
- Mixing bowls – one large for filling, one medium for crust
- Measuring cups & spoons – because eyeballing peppermint extract is risky business
- Rubber spatula – for scraping every last bit of that delicious batter
- Double boiler or microwave-safe bowl – for melting chocolate without burning it
- Fine mesh sieve (optional) – for dusting powdered sugar if you’re extra
Pro tip from my many cheesecake adventures: if you don’t have a springform pan, line a regular cake pan with parchment paper with extra hanging over the sides to lift the cheesecake out later. It’s not perfect, but it works in a pinch!
How to Make Peppermint Mocha Cheesecake Recipe
Alright, let’s get baking! I promise this isn’t as intimidating as it looks – just follow these steps carefully and you’ll have the most amazing peppermint mocha cheesecake. The key is taking your time and not rushing any step (learned that lesson after my first cracked cheesecake disaster!).
Step 1: Prepare the Crust
First things first – preheat that oven to 325°F (165°C). While it’s heating up, let’s make that buttery graham cracker crust that’ll hold all our creamy goodness.
In a medium bowl, mix your graham cracker crumbs with the melted butter until it looks like wet sand. You want every crumb coated – this is what gives the crust that perfect texture. Press this mixture firmly into the bottom of your springform pan using the back of a measuring cup or glass. Get it nice and even!
Pop the crust in the oven for 10 minutes while you make the filling. This quick pre-bake helps prevent a soggy bottom (and nobody wants that!).
Step 2: Make the Cheesecake Filling
Now for the magic! In your large mixing bowl, beat the softened cream cheese and sugar together until completely smooth – I mean no lumps whatsoever. This usually takes about 3 minutes with an electric mixer on medium. Scrape down the sides halfway through!
Add the sour cream and mix until just combined. Then add the eggs one at a time, mixing well after each addition but not overbeating. We want creamy, not fluffy!
While that’s mixing, melt your chocolate gently (I use 30-second bursts in the microwave, stirring between each). Let it cool slightly so it doesn’t cook the eggs when added. Stir in the melted chocolate, coffee granules, and peppermint extract until everything is beautifully combined.
Pour this luscious mixture over your pre-baked crust, then sprinkle the crushed peppermint candies evenly over the top. The candies will sink slightly during baking – that’s perfect!
Step 3: Bake and Cool
Bake your cheesecake for 55-60 minutes. You’ll know it’s done when the edges are set but the center still has a slight jiggle (like Jell-O!). Resist the urge to open the oven door too much – sudden temperature changes cause cracks.
Here’s the most important part: let it cool gradually! Turn off the oven and crack the door open slightly for 1 hour. Then move it to a wire rack to cool completely to room temperature (about 2 more hours). Finally, refrigerate for at least 4 hours, preferably overnight. I know waiting is hard, but trust me – it’s worth it!
The slow cooling prevents cracks and lets all those amazing flavors develop fully. When you’re ready to serve, run a knife around the edge before releasing the springform sides for picture-perfect slices.
Tips for Perfect Peppermint Mocha Cheesecake Recipe
After making this cheesecake more times than I can count (and learning from all my mistakes), here are my can’t-miss tips for absolute perfection:
- Patience with softening cream cheese – Seriously, leave it out for at least 2 hours. Cold cream cheese = lumpy cheesecake. If you’re in a pinch, microwave it in 15-second bursts, but watch carefully!
- Room temp eggs are non-negotiable – Cold eggs can make your batter curdle. Just set them out with the cream cheese.
- Don’t overmix after adding eggs – Once you incorporate the eggs, mix just until combined. Too much air = cracks!
- Parchment paper trick – For extra insurance, line the bottom of your pan with parchment before adding the crust. Makes removal foolproof.
- Water bath alternative – If you’re worried about cracks, place a pan of water on the rack below your cheesecake while baking.
- Peppermint extract measuring – That stuff is potent! Use exactly 1 tsp – no eyeballing unless you want toothpaste-flavored dessert.
- Cooling is key – I know it’s tempting, but don’t rush the cooling steps. Your cheesecake will thank you with perfect texture.
Remember – even if your cheesecake cracks (we’ve all been there!), a little whipped cream and extra crushed candy canes make everything better. The taste is what really matters!
Ingredient Notes & Substitutions
I get it – sometimes you’re halfway through a recipe and realize you’re missing something! Or maybe you need to adjust for dietary needs. Here are all my tested swaps and tips so you can still make an amazing peppermint mocha cheesecake:
- Graham cracker crust alternatives:
- Gluten-free graham crackers work beautifully
- Crushed oreos make a delicious chocolate crust
- For nut lovers, try almond flour mixed with melted butter
- Cream cheese options:
- Dairy-free cream cheese substitutes work surprisingly well
- Full-fat is best, but reduced-fat will do in a pinch
- Never use whipped cream cheese – the texture will be off
- Coffee tweaks:
- Decaf granules are totally fine if you’re caffeine-sensitive
- For stronger coffee flavor, use espresso powder
- Don’t have instant? Dissolve 2 tbsp finely ground coffee in 1 tbsp hot water
- Peppermint adjustments:
- Fresh peppermint leaves can garnish instead of candies
- Crushed candy canes are perfect holiday substitutes
- For kids, you can reduce extract to 1/2 tsp
- Other handy swaps:
- Sour cream: Greek yogurt works beautifully
- Eggs: I’ve had success with flax eggs for vegan versions
- Chocolate: Dark or milk chocolate can replace semi-sweet
One golden rule I’ve learned: if you’re making multiple substitutions, the texture might change slightly. But hey – cheesecake is cheesecake, and it’s always delicious!
Serving Suggestions
Okay, let’s talk presentation – because this peppermint mocha cheesecake deserves to look as amazing as it tastes! I love playing around with different toppings to make each slice feel extra special. Here are my absolute favorite ways to serve this holiday showstopper:
- Fresh whipped cream swirls – Pipe little dollops around the edges or cover the whole top for a snowy effect. A dash of peppermint extract in the whipped cream takes it next level!
- Extra crushed peppermint – Right before serving, sprinkle more crushed candies on top for that festive crunch and pop of color (they’ll stay crisp this way).
- Chocolate drizzle – Melt some extra chocolate and zigzag it over each slice. Pro tip: use a sandwich bag with the corner snipped off for easy drizzling.
- Coffee dusting – For an elegant touch, dust the plate with a mix of cocoa powder and instant coffee before placing the slice.
- Mini candy cane garnish – Place a small whole candy cane on each plate for a cute holiday touch (kids love this!).
My personal favorite? A little of everything! I’ll do whipped cream rosettes with chocolate drizzle and crushed peppermint for maximum wow factor. And don’t forget – this cheesecake pairs perfectly with a hot cup of coffee or cocoa. The flavors complement each other beautifully!
For parties, I sometimes skip slicing it in the kitchen and bring the whole cheesecake to the table with all the toppings on the side. Let guests customize their own slices – it’s so fun to watch everyone create their perfect bite!
Storage & Reheating Instructions
Alright, let’s talk about keeping your peppermint mocha cheesecake tasting fresh – because I know you might not finish it all in one sitting (though I wouldn’t blame you if you tried!). Here’s everything I’ve learned about storing and reviving this holiday treat:
Refrigerator Storage
In the fridge, your cheesecake will stay perfect for up to 5 days. The key is keeping it airtight – I press plastic wrap directly onto the surface before covering the whole pan with foil. This prevents it from absorbing fridge odors and stops that weird “skin” from forming on top.
Pro tip: If you’ve already sliced it, place parchment paper between slices before storing so they don’t stick together. The crust stays crispest if you store leftovers in the original springform pan.
Freezing for Later
This cheesecake freezes like a dream! Here’s my foolproof method:
- First, make sure it’s completely chilled in the fridge overnight
- Wrap tightly in plastic wrap, then foil (double protection against freezer burn)
- Label with the date – it keeps for up to 2 months frozen
- For individual slices, freeze them on a tray first, then wrap once firm
Thawing Tips
When you’re ready for more cheesecake goodness:
- Transfer from freezer to fridge 24 hours before serving
- Keep it wrapped while thawing to prevent condensation
- If you’re in a hurry, you can thaw at room temp for 2-3 hours
- Never microwave to thaw – it’ll ruin the texture!
One last secret – the flavors actually deepen after a day in the fridge, so sometimes I make this cheesecake specifically to enjoy later. The peppermint mellows slightly while the chocolate and coffee notes become more pronounced. It’s like a delicious little holiday time capsule!
Peppermint Mocha Cheesecake Recipe FAQs
I get so many questions about this cheesecake – here are the answers to everything you might be wondering before you bake:
Can I make this cheesecake ahead of time?
Absolutely! In fact, I recommend it. The flavors develop beautifully overnight. Bake it 1-2 days before serving and keep refrigerated. Just add fresh toppings right before serving.
How do I prevent cracks in my cheesecake?
Three magic words: don’t overbake it! The center should still jiggle slightly when done. Also, let it cool gradually in the oven with the door cracked, then at room temp before refrigerating. And resist the urge to peek while baking!
Can I leave out the coffee?
Sure, but you’ll lose that mocha magic! The coffee enhances the chocolate flavor. If you must skip it, add an extra 1/4 tsp vanilla extract to balance the flavors.
My cheesecake cracked – is it ruined?
Not at all! Every baker gets cracks sometimes. Cover them with whipped cream, extra crushed candy canes, or chocolate drizzle. No one will know – and it’ll still taste amazing.
Can I use mint extract instead of peppermint?
I don’t recommend it – mint extract tastes more like spearmint gum while peppermint has that classic holiday flavor. The difference is noticeable in the final dessert.
How do I know when it’s fully baked?
The edges should be set but the center will have a slight jiggle (like Jell-O) when you gently shake the pan. A toothpick inserted about 2 inches from the edge should come out clean.
Can I double this recipe?
Yes! Use two 9-inch pans and increase baking time by 10-15 minutes. The crust-to-filling ratio stays perfect this way versus using one larger pan.
Nutritional Information
Okay, let’s talk numbers – but first, a big ol’ disclaimer! These values are estimates based on standard ingredients. Your actual nutrition facts might vary depending on the specific brands you use or if you make any substitutions (like that dairy-free cream cheese or sugar alternative). I’m not a nutritionist, just a cheesecake enthusiast sharing ballpark figures!
For a standard slice (about 1/12th of the cheesecake), you’re looking at roughly:
- Calories: Around 450 (hey, it’s a holiday treat!)
- Sugar: 35g (mostly from the chocolate and peppermint candies)
- Fat: 30g (that creamy texture comes from quality ingredients)
- Protein: 7g (thank you, cream cheese and eggs!)
- Carbs: 40g (worth every delicious bite)
If you’re watching specific dietary needs, here are some easy tweaks I’ve tried:
- Use sugar substitutes like erythritol for lower carbs
- Swap in low-fat cream cheese and sour cream (though texture changes slightly)
- Make mini cheesecakes in a muffin tin for built-in portion control
But let’s be real – this peppermint mocha cheesecake is meant to be enjoyed as an occasional indulgence. When those holiday flavors hit your tastebuds, every calorie feels absolutely worth it! Just savor each creamy, minty-chocolatey bite mindfully.
Final Thoughts
Well, there you have it – my absolute favorite holiday dessert that never fails to impress! This peppermint mocha cheesecake has become such a special part of my family’s traditions, and I hope it brings as much joy to your table as it does to mine.
Don’t let the multiple steps intimidate you – each one is totally doable, and the payoff is so worth it. That first creamy, minty-chocolatey bite will make all your effort disappear faster than holiday cookies at a party!
I’d love to hear how your cheesecake turns out. Did you add any fun twists? Did your family go crazy for it like mine does? Drop me a note in the comments – I read every single one (and might just steal your brilliant ideas for my next batch!).
Most importantly, have fun with it! Baking should be joyful, especially during the holidays. Even if your cheesecake isn’t picture-perfect (mine certainly wasn’t the first time!), the love you put into it makes all the difference. Now go preheat that oven – your new favorite dessert awaits!
Print
Irresistible Peppermint Mocha Cheesecake Recipe – 5-Star Magic!
- Total Time: 80 minutes
- Yield: 12 servings 1x
- Diet: Vegetarian
Description
A rich and creamy peppermint mocha cheesecake that combines the flavors of chocolate, coffee, and peppermint for a festive dessert.
Ingredients
- 2 cups graham cracker crumbs
- 1/2 cup unsalted butter, melted
- 24 oz cream cheese, softened
- 1 cup granulated sugar
- 1/2 cup sour cream
- 3 large eggs
- 1/2 cup semi-sweet chocolate, melted
- 2 tbsp instant coffee granules
- 1 tsp peppermint extract
- 1/2 cup crushed peppermint candies
Instructions
- Preheat your oven to 325°F (165°C).
- Mix graham cracker crumbs and melted butter. Press into the bottom of a 9-inch springform pan.
- Beat cream cheese and sugar until smooth. Add sour cream and mix well.
- Add eggs one at a time, beating after each addition.
- Stir in melted chocolate, coffee granules, and peppermint extract.
- Pour the mixture over the crust. Sprinkle with crushed peppermint candies.
- Bake for 55-60 minutes or until the center is set.
- Cool to room temperature, then refrigerate for at least 4 hours before serving.
Notes
- Use high-quality chocolate for the best flavor.
- Make sure the cream cheese is softened to avoid lumps.
- Let the cheesecake cool completely before refrigerating to prevent cracking.
- Prep Time: 20 minutes
- Cook Time: 60 minutes
- Category: Dessert
- Method: Baking
- Cuisine: American
Nutrition
- Serving Size: 1 slice
- Calories: 450
- Sugar: 35g
- Sodium: 300mg
- Fat: 30g
- Saturated Fat: 18g
- Unsaturated Fat: 10g
- Trans Fat: 0g
- Carbohydrates: 40g
- Fiber: 2g
- Protein: 7g
- Cholesterol: 120mg
Keywords: peppermint mocha cheesecake, holiday dessert, chocolate cheesecake, peppermint dessert, coffee cheesecake


