Ah, peanut butter blossoms! Just saying the name brings back a wave of nostalgia. These cookies have this magical ability to transport me right back to my childhood kitchen, where the sweet, nutty aroma would fill the air. The moment I’d bite into one, I’d be greeted by that perfect soft and chewy texture, with a burst of chocolate in the center. It’s no wonder these little delights are a hit at every family gathering! I remember making them with my mom during the holidays, her laughter mingling with the sound of chocolate kisses being unwrapped. We’d sneak a few from the cooling rack before they were even fully set, giggling and trying to hide our guilty pleasure. Trust me, there’s something so comforting about whipping up a batch of peanut butter blossoms, and I can’t wait to share my recipe with you! Let’s get baking!
Ingredients for Peanut Butter Blossoms Recipe
Gathering the right ingredients is the first step to creating these delightful cookies. Here’s what you’ll need:
- 1 cup peanut butter: You can use either smooth or chunky peanut butter, depending on your texture preference. The creaminess of the peanut butter is key to achieving that soft, chewy consistency.
- 1 cup sugar: Regular granulated sugar works perfectly here. It helps create a sweet balance with the peanut butter and adds to the lovely texture.
- 1 egg: This binds everything together and gives the cookies their tender crumb. Make sure your egg is at room temperature for the best results!
- 1 tsp vanilla extract: Pure vanilla extract enhances the flavor beautifully. It’s a small addition, but it makes a big difference!
- 1/2 tsp baking soda: This is essential for making your cookies rise just right, giving them that perfect lift.
- 1/4 tsp salt: A pinch of salt balances the sweetness and brings out the rich flavors of the peanut butter.
- 24 chocolate kisses: These are the crowning glory of your cookies! You’ll place one on each cookie right after they come out of the oven, adding that delightful chocolatey touch.
Having these ingredients on hand will set you up for cookie success. Let’s get ready to mix them all together and create something scrumptious!
How to Prepare the Peanut Butter Blossoms Recipe
Now that you have your ingredients ready, let’s dive into making these delicious peanut butter blossoms! Follow these simple steps to ensure your cookies turn out perfectly every time.
Preheat the Oven and Prepare Baking Sheet
First things first, preheat your oven to 350°F (175°C). This is crucial for baking those cookies evenly. While that’s heating up, prepare your baking sheet. I like to line mine with parchment paper for easy cleanup and to prevent sticking. If you don’t have parchment, a light greasing with butter or cooking spray works just fine. Just make sure it’s well-coated!
Mix the Cookie Dough
In a large mixing bowl, combine your peanut butter, sugar, egg, vanilla extract, baking soda, and salt. I like to add the peanut butter and sugar first and mix them together until they’re smooth. Then, add the egg and vanilla, mixing until everything is well combined. It’s okay if the batter is a bit thick – that’s what gives these cookies their chewy texture! Use a wooden spoon or a sturdy spatula for this. Trust me, your arm will get a workout, but it’s totally worth it!
Shape and Bake the Cookies
Now for the fun part! Roll the dough into 1-inch balls and place them about 2 inches apart on your prepared baking sheet. It’s important not to crowd them, as they will spread a bit while baking. Pop them into the preheated oven and bake for about 10 minutes. Keep an eye on them; they should be just set and lightly golden around the edges but still soft in the center. They’ll firm up as they cool!
Add Chocolate Kisses
As soon as the cookies come out of the oven, it’s time for the chocolate kisses! While they’re still warm, gently press a chocolate kiss into the center of each cookie. This creates that signature look and adds a delicious melty center. Don’t wait too long to do this; the cookies need to be warm enough for the kisses to stick but not so hot that they melt completely!
Cooling the Cookies
Finally, let the cookies cool on a wire rack. This is super important because it helps them set up perfectly. If you leave them on the baking sheet too long, they might get too soft and fall apart when you try to move them. Cooling on the rack allows air to circulate, keeping them chewy on the inside and just slightly crisp on the outside. Trust me, the wait will be worth it when you finally take that first bite!
Why You’ll Love This Peanut Butter Blossoms Recipe
- Quick Preparation: These cookies come together in just about 25 minutes, making them perfect for when you need a treat in a hurry!
- Simple Ingredients: You likely have most of these ingredients in your pantry already! No need for fancy additions here – just pure peanut butter goodness.
- Delicious Flavor: The combination of rich peanut butter and sweet chocolate kisses creates an irresistible flavor that everyone will love.
- Family-Friendly Appeal: Kids and adults alike adore these cookies, making them a hit at family gatherings, school events, or even just for a cozy night in.
- Customizable: Feel free to add your twist, like chopped nuts or different chocolate types, to make them your own!
Tips for Success with Peanut Butter Blossoms Recipe
To make sure your peanut butter blossoms turn out perfect every time, here are some practical tips that I’ve learned through years of baking these delightful cookies. Trust me, these little nuggets of wisdom can save you from common pitfalls!
Use Room Temperature Ingredients
Always remember to let your egg come to room temperature before mixing it into the dough. This helps it blend more easily with the peanut butter and sugar, giving you that lovely smooth texture. If you forget to take it out beforehand, just place the egg in a bowl of warm water for about 10 minutes – it works like a charm!
Don’t Overmix the Dough
When mixing your ingredients, be careful not to overdo it. Overmixing can lead to tough cookies, which we definitely don’t want! Mix just until everything is combined and you see no dry flour. A few lumps are totally okay – they’ll bake out!
Monitor the Baking Time
Every oven is a little different, so keep an eye on your cookies as they bake. Start checking at the 8-minute mark. If the edges look set and the center is still slightly soft, they’re ready to come out! Remember, they’ll continue to cook a bit while cooling, so it’s better to slightly underbake them than overbake.
Chill the Dough for Extra Chewiness
If you have the time, try chilling the dough for about 30 minutes before rolling it into balls. This will help the cookies maintain their shape while baking and give them an even chewier texture. Just wrap the dough in plastic wrap and pop it in the fridge!
Experiment with Toppings
While classic chocolate kisses are a must, don’t hesitate to get creative! You can swap in different types of chocolate, like dark or milk chocolate, or even sprinkle some sea salt on top before baking for a delicious sweet-and-salty combo. Chopped nuts can also add a nice crunch – just fold them into the dough before rolling!
With these tips in your back pocket, you’ll be well on your way to baking the best peanut butter blossoms ever. Happy baking!
Variations on the Peanut Butter Blossoms Recipe
One of the best things about peanut butter blossoms is how easily they can be customized to fit your taste or to shake things up a bit! Here are some fun variations that I love, and I think you’ll enjoy them too:
Different Types of Chocolate
While classic chocolate kisses are a crowd-pleaser, why not mix it up? Try using dark chocolate kisses for a richer flavor or even white chocolate for a sweet twist. You can also chop up your favorite chocolate bar and sprinkle the pieces on top right after baking for a decadent touch. The melting chocolate adds an extra layer of yumminess!
Nutty Additions
If you love a little crunch, consider folding in some chopped nuts into the dough before rolling it into balls. Peanuts, of course, are a natural fit, but walnuts or pecans would also add a delightful texture. Just keep in mind that you may want to adjust the sugar slightly if you’re adding sweetened nuts.
Peanut Butter Swirls
For a fun visual and flavor twist, try swirling in a bit of creamy peanut butter into the dough. Just take a spoonful of peanut butter and gently fold it into the cookie dough, creating marbled patterns. This gives each bite a lovely peanut butter burst!
Seasonal Spices
You can also experiment with spices to give your cookies a seasonal flair. A sprinkle of cinnamon or nutmeg can add warmth, making them perfect for fall. During holidays, a dash of ginger or a hint of pumpkin spice can really elevate the flavor profile. Trust me, your taste buds will thank you!
Stuffed Cookies
If you’re feeling adventurous, why not try stuffing your peanut butter blossoms? Before rolling the dough into balls, flatten a piece of dough and place a chocolate kiss in the center, then wrap the dough around it and roll it back into a ball. This way, when you bite into the cookie, you’ll get an extra surprise of melted chocolate!
These variations allow you to put your own spin on a classic recipe while still keeping the beloved flavors of peanut butter and chocolate. So, let your creativity shine and make these cookies your own! Happy baking!
Storage & Reheating Instructions
Once you’ve baked up a batch of these delightful peanut butter blossoms, you’ll want to make sure they stay fresh and yummy for as long as possible. Here’s how to store them properly and enjoy them later!
Storing Leftover Cookies
To keep your cookies fresh, place them in an airtight container. I usually layer them between sheets of parchment paper to prevent them from sticking together. This will help maintain their chewy texture and keep them from getting too hard. If you store them this way, they should stay delicious for about a week at room temperature. If you want to extend their life, you can pop them in the fridge for up to two weeks, but be aware they might lose a bit of that lovely soft texture.
Freezing for Later Enjoyment
If you want to save some cookies for a special occasion or just to have on hand for a sweet craving, freezing is the way to go! Just make sure they’re completely cooled before you freeze them. I recommend placing them in a single layer on a baking sheet to freeze individually for about an hour. Then, transfer them to a zip-top freezer bag or airtight container, separating layers with parchment paper. They can last for up to three months in the freezer!
Reheating Your Peanut Butter Blossoms
When you’re ready to enjoy your frozen or refrigerated cookies, reheating them is simple! Preheat your oven to 350°F (175°C) and place the cookies on a baking sheet. Heat them for about 5-7 minutes, just until they’re warmed through. If you have a microwave handy, you can also pop one in for about 10-15 seconds, but be careful not to overdo it, as they can become chewy instead of soft.
Following these storage and reheating tips will ensure your peanut butter blossoms remain enjoyable and delicious, even days after baking. Trust me, there’s nothing like a warm cookie fresh out of the oven, no matter when it was made!
Nutritional Information
Before you dive into those delicious peanut butter blossoms, it’s good to know a bit about their nutritional content. Keep in mind that these values can vary based on the specific ingredients and brands you choose to use, but here’s a general breakdown of what you can expect per cookie:
- Calories: 100
- Fat: 5g
- Saturated Fat: 1g
- Unsaturated Fat: 4g
- Trans Fat: 0g
- Cholesterol: 5mg
- Sodium: 50mg
- Carbohydrates: 12g
- Fiber: 1g
- Sugar: 8g
- Protein: 2g
These little gems pack a delightful punch of flavor without overwhelming your daily intake. Enjoy them as a sweet treat, and remember that balance is key in any diet! Happy baking and munching!
FAQ About Peanut Butter Blossoms Recipe
Got questions about making the perfect peanut butter blossoms? You’re not alone! Here are some common inquiries that I often hear, along with my answers to help you out:
Can I make peanut butter blossoms with natural peanut butter?
Absolutely! You can use natural peanut butter, but keep in mind that it may alter the texture slightly. Natural peanut butter has a different consistency and may be a bit more oily, so you might want to adjust the sugar a little if you find the dough too wet. Just give it a good stir before measuring!
How do I know when my cookies are done baking?
Great question! You’ll want to look for the edges to be set and just lightly golden while the center remains soft. If they seem a little underbaked, don’t worry! They’ll firm up as they cool. Remember, a little softness now means chewy goodness later!
Can I freeze the dough for later use?
Yes! Freezing the dough is a fantastic option. Just roll the dough into balls and freeze them on a baking sheet first. Once they’re firm, transfer them to a zip-top freezer bag. When you’re ready to bake, just pop them in the oven straight from the freezer – you might need to add a minute or two to the baking time.
What can I substitute for the chocolate kisses?
If you want to get creative, there are plenty of options! You can use different types of chocolate candies, like mini chocolate chips or chopped chocolate bars. For a fun twist, try using caramel-filled chocolates or even peanut butter cups for an extra punch of flavor!
How should I store my peanut butter blossoms?
To keep your cookies fresh, store them in an airtight container at room temperature. They should stay delicious for about a week. If you want to keep them longer, consider freezing them as mentioned earlier. Enjoy those sweet treats whenever the craving hits!
Print
Peanut Butter Blossoms Recipe That Will Melt Your Heart
- Total Time: 25 minutes
- Yield: 24 cookies 1x
- Diet: Vegetarian
Description
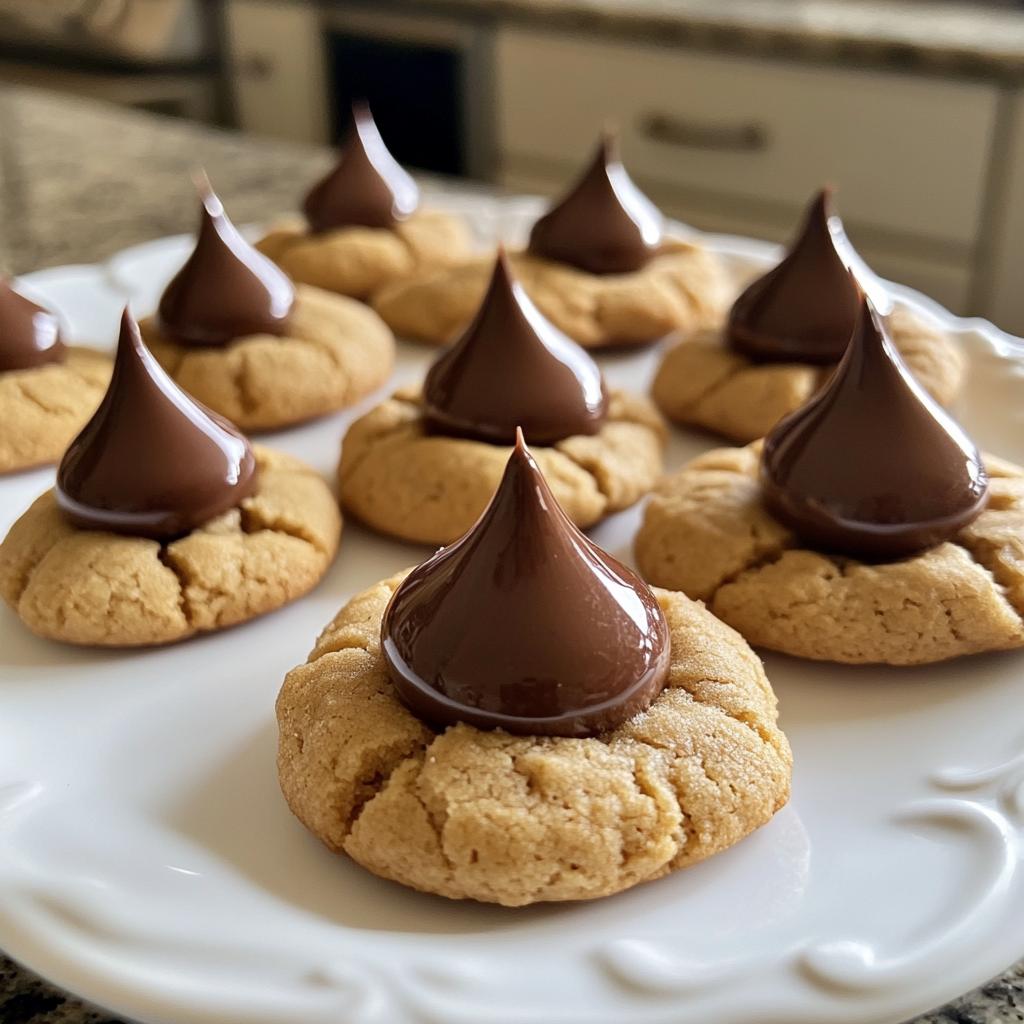
Peanut butter blossoms are soft and chewy cookies topped with chocolate kisses.
Ingredients
- 1 cup peanut butter
- 1 cup sugar
- 1 egg
- 1 tsp vanilla extract
- 1/2 tsp baking soda
- 1/4 tsp salt
- 24 chocolate kisses
Instructions
- Preheat the oven to 350°F (175°C).
- In a bowl, mix peanut butter, sugar, egg, vanilla, baking soda, and salt.
- Roll dough into 1-inch balls and place on baking sheet.
- Bake for 10 minutes.
- Remove from oven and immediately press a chocolate kiss into the center of each cookie.
- Allow to cool completely on a wire rack.
Notes
- Store cookies in an airtight container.
- You can use smooth or chunky peanut butter.
- For a twist, add chopped nuts to the dough.
- Prep Time: 15 minutes
- Cook Time: 10 minutes
- Category: Dessert
- Method: Baking
- Cuisine: American
Nutrition
- Serving Size: 1 cookie
- Calories: 100
- Sugar: 8g
- Sodium: 50mg
- Fat: 5g
- Saturated Fat: 1g
- Unsaturated Fat: 4g
- Trans Fat: 0g
- Carbohydrates: 12g
- Fiber: 1g
- Protein: 2g
- Cholesterol: 5mg
Keywords: peanut butter blossoms recipe


