Description
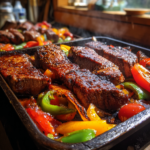
Transform a simple oil drum into a functional and stylish BBQ grill perfect for outdoor gatherings.
Ingredients
Scale
- 1 used oil drum (cleaned and free of residues)
- Charcoal or wood for fuel
- Grill grates (size depending on drum dimensions)
- High-temperature paint (optional, for aesthetics)
- Wheels (optional, for mobility)
- Ventilation holes (drilled for airflow)
- Thermometer (for monitoring temperature)
- Tools: drill, saw, measuring tape, gloves
Instructions
- Ensure the oil drum is completely cleaned and free of any oil residues. It’s best to use a drum that has been used for food-grade products.
- Using a saw, cut the drum in half lengthwise to create a top and bottom section. This will serve as the cooking chamber.
- Drill ventilation holes on the sides of the drum for proper airflow. This will help maintain an even cooking temperature.
- If desired, paint the exterior of the drum with high-temperature paint to enhance its appearance and protect it from rust.
- Install grill grates inside the top section of the drum. Ensure they fit securely and can hold the weight of the food being grilled.
- Attach wheels to the bottom of the drum for easy mobility, if desired.
- Place a thermometer on the lid or side of the drum to monitor cooking temperatures.
- Fill the bottom of the drum with charcoal or wood, light it, and let it heat up. Adjust the ventilation holes to control the temperature.
- Once the grill reaches the desired temperature, place your food on the grill grates and cook to your preference.
Notes
- Always ensure the oil drum is properly cleaned before use.
- Be cautious when handling hot materials and tools.
- Customize the size of the grill according to your needs.
Keywords: oil drum bbq, homemade oil drum grill, outdoor grilling, DIY BBQ grill, charcoal grill, wood-fired BBQ