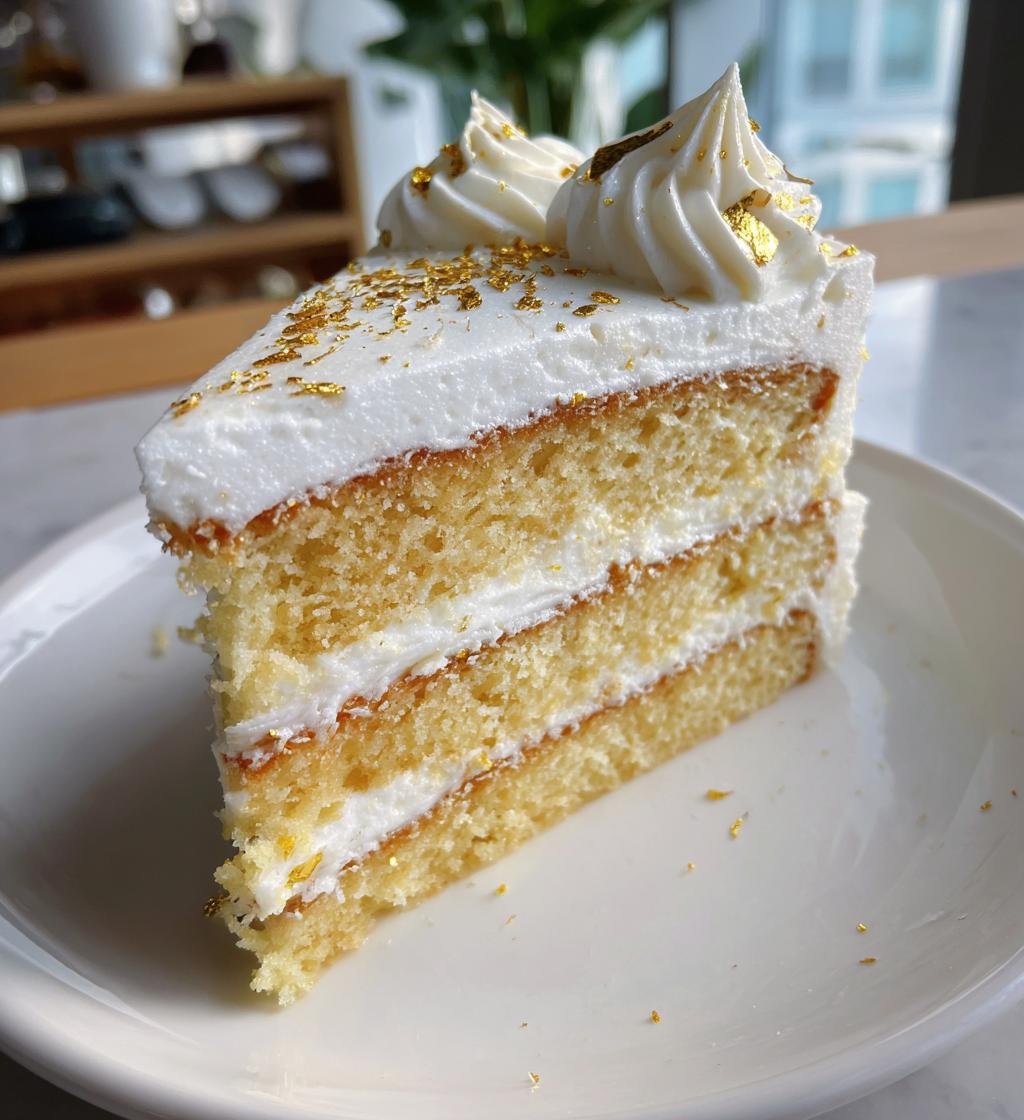
Nothing says “Happy New Year” quite like a beautifully decorated cake sparkling with edible glitter and topped with festive sprinkles! I still remember the first time I attempted New Years cake decorating—it was a total mess (frosting everywhere!), but the joy it brought to my family made every sticky finger worth it. Whether you’re hosting a big party or just want something special for midnight, decorating a cake is the easiest way to make your dessert table shine. Trust me, even if you’ve never decorated a cake before, these simple steps will have you creating show-stopping treats in no time!
Why You’ll Love This New Years Cake Decorating Idea
This cake decorating method is my go-to for New Year’s because it’s foolproof and full of sparkle—exactly what the occasion calls for! Here’s why you’ll adore it too:
- Effortless elegance: No fancy skills needed—just frosting, sprinkles, and a little glitter for instant wow factor.
- Totally customizable: Swap colors to match your party theme, or go all-out with gold and silver for classic New Year’s glam.
- Kid-friendly fun: Let little hands scatter sprinkles—it’s messy, magical, and makes them feel like part of the celebration.
Seriously, if I can pull this off after my first frosting disaster, anyone can!
Ingredients for New Years Cake Decorating
Gathering the right ingredients is half the fun when it comes to New Years cake decorating! Here’s what you’ll need to create your festive masterpiece:
- 1 pre-baked cake – Any flavor you love! I’m partial to vanilla or chocolate because they let the decorations shine.
- 2 cups frosting – Pick your favorite flavor and color. Pro tip: white frosting makes gold and silver decorations pop!
- Assorted sprinkles – Gold and silver are classics, but don’t be afraid to mix in some midnight blue or deep purple for extra sparkle.
- Edible glitter or luster dust – This is what gives that magical “New Year’s Eve” shimmer. A little goes a long way!
- Fresh fruit or berries (optional) – For a pop of color and freshness against all that sweetness.
- Candles or cake toppers (optional) – The perfect finishing touch to count down to midnight!
The best part? You probably have most of these in your pantry already!
Equipment You’ll Need for New Years Cake Decorating
Don’t worry—you don’t need fancy gadgets to make your New Year’s cake sparkle! Here’s what I always grab from my kitchen:
- Offset spatula – My secret weapon for smooth frosting (even if yours ends up charmingly imperfect—that’s part of the fun!).
- Cake stand or turntable – Spinning your cake makes decorating SO much easier—trust me!
- Piping bags & tips (optional) – For fancy borders, but a zip-top bag with the corner snipped works in a pinch.
- Small bowls – To organize sprinkles and keep edible glitter from coating your entire kitchen.
That’s it! Now you’re ready to turn that cake into a New Year’s showstopper.
How to Decorate a New Years Cake Step by Step
Alright, let’s get to the fun part—transforming that plain cake into a glittering New Year’s masterpiece! I’ve learned through trial and error (mostly error) that taking it step by step makes all the difference. Follow these simple stages, and you’ll have a cake that looks like it came from a fancy bakery!
Step 1: Prepare Your Cake Base
First things first—we need a smooth canvas for our decorations. That’s where the crumb coat comes in! Spread a thin layer of frosting over the entire cake (don’t worry about perfection here). This “glue” layer traps any loose crumbs so they won’t mess up your final look. Pop it in the fridge for 15 minutes—I know waiting is hard, but this chill time makes the next step SO much easier. Pro tip: If your kitchen’s warm, give it 20 minutes—you’ll thank me later!
Step 2: Apply the Final Frosting Layer
Now for the satisfying part! Use your offset spatula to spread a generous amount of frosting evenly over the chilled cake. Here’s my trick: hold the spatula at a slight angle and turn your cake stand as you go for smoother coverage. If you get little peaks or imperfections? No stress—those add homemade charm! Want ultra-smooth sides? Dip your spatula in warm water, dry it quickly, and glide it over the frosting. Works like magic every time!
Step 3: Add Festive New Years Decorations
This is where the party starts! While the frosting’s still slightly soft, shower your cake with sprinkles—I like to gently press some into the sides too for full coverage. Next comes the edible glitter (my favorite part!). Tap a dry brush into the glitter and lightly dust it over the cake—it’ll catch the light beautifully at midnight! For extra dazzle, arrange fresh berries around the top or add a “Happy New Year” cake topper. Last year I used sparkly number candles shaped like “2024”—total crowd-pleaser! Remember: there’s no wrong way to decorate here. Let your creativity run wild!
Tips for Perfect New Years Cake Decorating
After decorating more New Year’s cakes than I can count (and yes, plenty of frosting mishaps along the way), I’ve picked up some foolproof tricks to make your cake shine—literally! Here are my absolute must-know tips:
- Chill like it’s midnight: That crumb coat needs at least 15 minutes in the fridge—it makes frosting SO much easier. If you’re short on time, pop it in the freezer for 5 minutes!
- Piping bag hack: No piping tips? No problem! Snip the tiniest corner off a zip-top bag—you’ll have perfect control for writing “2024” or adding dots around the edges.
- Glitter application: Always apply edible glitter with a dry brush—wet frosting makes it clump. And do this over a tray unless you want your countertops sparkling till July!
- Sprinkle strategy: Hold your hand high above the cake when sprinkling—this gives even coverage instead of big clumps in one spot.
- Last-minute touch-ups: Keep extra frosting in a small bowl to fix any bare spots after decorating—it’s my secret for Instagram-worthy cakes every time!
Remember—the messier the process, the more memorable the cake! Happy decorating!
New Years Cake Decorating Variations
Who says you have to stick to tradition? Over the years, I’ve played with so many fun twists on classic New Years cake decorating! Here are my favorite ways to mix it up:
- Midnight Magic: Skip the sprinkles and go all-in on edible glitter—just dust the entire cake for a sophisticated, shimmery effect that screams “New Year’s Eve!”
- Fruit Fiesta: Arrange vibrant berries in a clock-face pattern (perfect for counting down!) or scatter pomegranate seeds for lucky red accents.
- Chocolate Lover’s Dream: Pipe chocolate ganache drips down the sides, then top with gold-dusted chocolate curls—decadence at its finest!
- Confetti Explosion: Mix colorful jimmies right into the frosting before applying for a fun, confetti-filled look that kids adore.
The best part? You can reinvent your cake every year—that’s half the fun!
Serving and Storing Your New Years Cake
Presentation is everything with a New Year’s cake! I always place mine on a cake stand with some extra sprinkles scattered around the base—it makes even the simplest cake feel special. If you’re serving it at midnight, light those sparkler candles for an unforgettable moment!
Leftovers? (As if!) Store any uneaten cake in an airtight container at room temperature for 2-3 days. The frosting actually helps keep it moist! For longer storage, wrap slices tightly in plastic and freeze for up to a month—just thaw at room temperature when those New Year’s cravings hit again.
New Years Cake Decorating FAQs
Over the years, I’ve gotten so many questions about New Years cake decorating—especially from nervous first-timers! Here are the answers to everything you might be wondering:
Can I use store-bought frosting?
Absolutely! I’ve used it plenty of times when I’m short on time—just give it a quick stir to make it extra smooth before spreading. Pro tip: If it’s too thick, microwave it for 5-10 seconds to make it more spreadable.
How do I keep sprinkles from falling off?
The secret is timing! Apply them while the frosting is still slightly soft—they’ll stick like magic. For extra security, you can gently press them in with clean fingers or the back of a spoon.
Is edible glitter really safe to eat?
Yes, but only if it specifically says “edible” on the label! Regular craft glitter is a no-go. I always look for FDA-approved luster dust or decorator’s glitter—it tastes like nothing but looks like everything!
Can I decorate the cake in advance?
You sure can! Decorated cakes keep beautifully at room temperature for a day—just wait to add fresh fruit until right before serving. The glitter and sprinkles will stay perfectly sparkly!
What if my frosting isn’t perfectly smooth?
Embrace it! Some of my most-loved cakes had “rustic” frosting—it adds homemade charm. If you’re really bothered, dust more glitter over the uneven spots. Problem solved with extra sparkle!
Nutritional Information
Just a quick note about nutrition—these numbers can vary wildly depending on your specific ingredients and brands! A slice of decorated New Year’s cake typically contains calories from sugar and fats in the frosting and decorations. Remember, it’s a celebratory treat meant to be enjoyed in moderation as you ring in the new year!
Share Your New Years Cake Creation
I’d love to see your sparkling creations! Tag me on social media with your decorated New Year’s cakes—nothing makes me happier than seeing your festive masterpieces. And if you tried any of my tips, leave a comment below to tell me how it went. Here’s to sweet starts and glittery cakes in the new year!
Print
Sparkling New Years Cake Decorating in 3 Easy Steps
- Total Time: 20 minutes
- Yield: 1 cake (8-10 servings) 1x
- Diet: Vegetarian
Description
Decorate your New Year’s cake with these simple steps to make it festive and delicious.
Ingredients
- 1 pre-baked cake (any flavor)
- 2 cups frosting (your choice of flavor and color)
- Assorted sprinkles (gold, silver, or themed)
- Edible glitter or luster dust
- Fresh fruit or berries (optional)
- Candles or cake toppers (optional)
Instructions
- Place the cake on a flat surface or cake stand.
- Spread a thin layer of frosting over the cake to create a crumb coat.
- Chill the cake for 15 minutes to set the crumb coat.
- Apply a final layer of frosting evenly over the cake.
- Decorate with sprinkles, edible glitter, or fresh fruit as desired.
- Add candles or cake toppers for a festive touch.
- Serve and enjoy!
Notes
- Use a piping bag for detailed frosting designs.
- Chill the cake before decorating for easier handling.
- Customize colors and toppings to match your New Year’s theme.
- Prep Time: 20 minutes
- Cook Time: 0 minutes
- Category: Dessert
- Method: No-Bake
- Cuisine: International
Nutrition
- Serving Size: 1 slice
- Calories: 250
- Sugar: 20g
- Sodium: 150mg
- Fat: 10g
- Saturated Fat: 5g
- Unsaturated Fat: 3g
- Trans Fat: 0g
- Carbohydrates: 35g
- Fiber: 1g
- Protein: 2g
- Cholesterol: 20mg
Keywords: New Year cake, cake decorating, festive dessert, easy cake ideas


