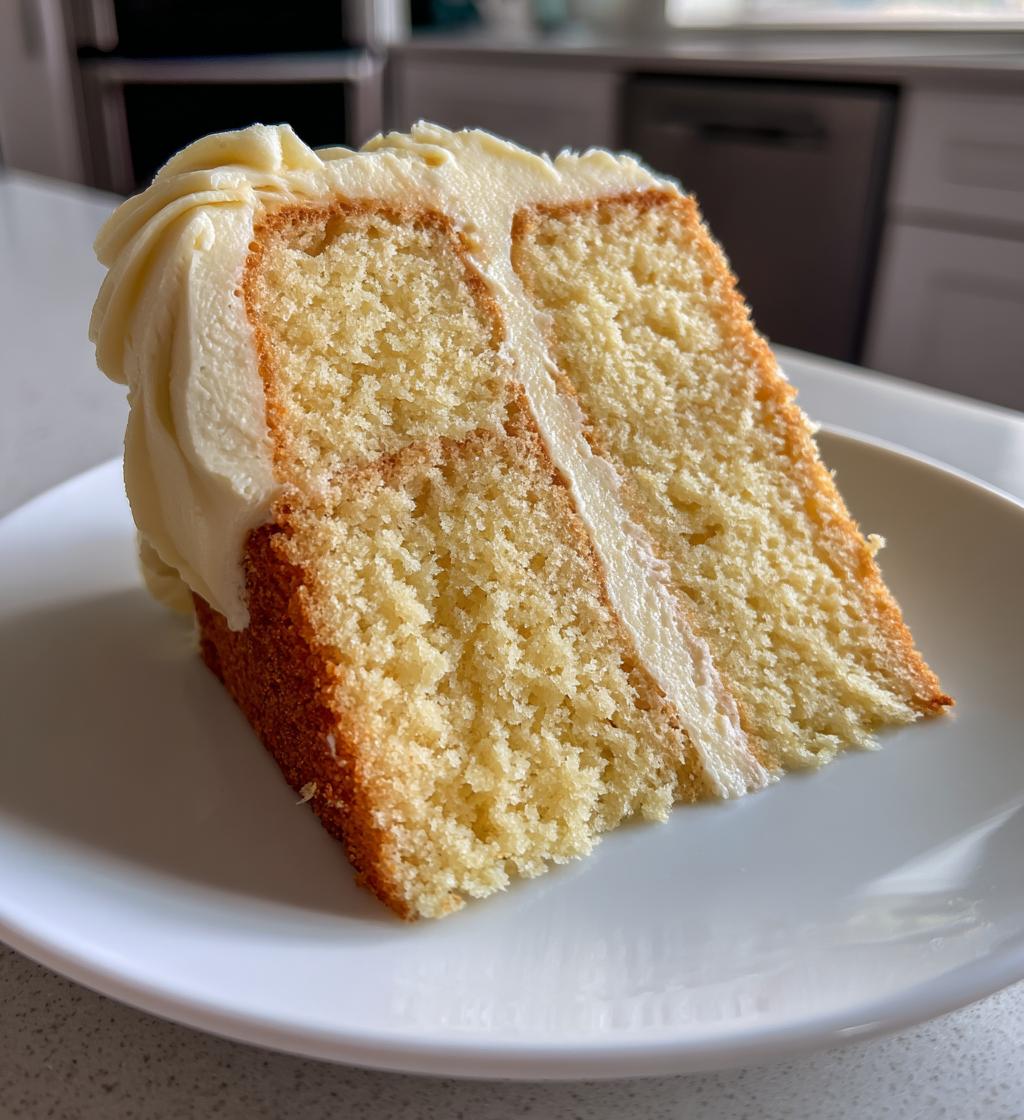
There’s something magical about a homemade layer cake, don’t you think? That moment when you slide the first slice onto a plate and reveal those perfect, even layers? I swear, nothing says “celebration” quite like it. My love affair with layer cakes started when I was twelve, attempting (and slightly failing) to make my mom’s birthday cake. But oh, the look on her face when she saw my lopsided creation! Now, after years of practice and plenty of frosting mishaps, I’ve figured out the secrets to a classic, crowd-pleasing layer cake that’s as fun to make as it is to eat.
This recipe gives you that dreamy combination – a tender, buttery sponge stacked high with creamy frosting. It’s the kind of cake that disappears fast at parties and leaves everyone asking for the recipe. The best part? You probably have most of these simple ingredients in your pantry already. So grab your mixing bowls – let’s make some cake magic happen!
Why You’ll Love This Layer Cake
Trust me, this isn’t just any cake—it’s the kind that makes people stop mid-bite to sigh happily. Here’s why:
- The sponge is so moist it practically melts in your mouth (no dry crumbs here!)
- Simple steps even beginner bakers can nail—I’ve tested every tip to make it foolproof
- Frosting freedom! Use classic vanilla, rich chocolate, or get creative with citrus or berry swirls
- That “wow” factor when you reveal the layers—perfect for birthdays, anniversaries, or “just because” days
Seriously, one bite and you’ll understand why this became my go-to celebration cake.
Layer Cake Ingredients
Alright, let’s talk ingredients! The magic of this layer cake really comes down to using good quality stuff and having everything prepped just right. Trust me, it makes all the difference. Here’s what you’ll need:
Dry Ingredients:
- 2 cups all-purpose flour (spooned and leveled, don’t pack it down!)
- 2 teaspoons baking powder
- ½ teaspoon salt
Wet Ingredients:
- 1½ cups granulated sugar
- ½ cup unsalted butter, softened (this is key – it should leave a slight indent when you press it)
- 3 large eggs, at room temperature
- 1 cup milk, at room temperature
- 1 teaspoon vanilla extract
Plus about 2 cups of your favorite frosting to finish it all off! I’m a classic vanilla buttercream girl myself, but you do you.
Equipment You’ll Need
Let’s gather our baking tools! Here’s what you’ll want to have ready:
- Two 9-inch round cake pans (the non-stick kind are lifesavers)
- Stand mixer or hand mixer (though you can mix by hand if you’ve got the arm strength!)
- Rubber spatula for scraping every last bit of batter
- Wire cooling rack (crucial for preventing soggy bottoms)
Nice-to-haves if you’re feeling fancy: a cake leveler for perfect layers and an offset spatula for smooth frosting. But honestly? A butter knife works fine in a pinch!
How to Make a Layer Cake
Okay, friends, here’s where the real fun begins! Making a layer cake might look fancy, but I promise it’s just a series of simple steps done with love (and maybe a little butter). Follow along and you’ll have a stunning cake before you know it!
Preparing the Cake Batter
First things first – preheat that oven to 350°F (175°C). While it’s warming up, let’s make magic with the batter.
In a medium bowl, whisk together your dry ingredients – that’s the flour, baking powder, and salt. I like to give it about 15 whisks to make sure everything’s perfectly combined. Set this aside.
Now, the good part! In your mixing bowl, beat the butter and sugar together on medium speed for a good 2-3 minutes. You want it light and fluffy – that pale yellow color is your sign it’s ready. This step is SO important for getting that perfect cake texture, so don’t rush it!
Add the eggs one at a time, mixing well after each. Then pour in that vanilla and give it another quick mix. Here’s my pro tip: scrape down the bowl with a rubber spatula between additions. Those sneaky bits at the bottom love to stay unmixed!
Now, alternate adding your dry ingredients and milk – start and end with the dry. Mix just until combined after each addition. Overmixing is the enemy here – a few small flour streaks are better than a tough cake!
Baking and Cooling the Layers
Divide that beautiful batter evenly between your two prepared pans. I use a kitchen scale for precision, but the eye test works too – just get them as close as possible.
Slide them into your preheated oven and set your timer for 25 minutes. Don’t open the oven door before then or your cakes might fall! At 25 minutes, do the toothpick test – if it comes out with a couple moist crumbs, it’s perfect. Clean? It’s done. Wet batter? Give it another 3-5 minutes.
Here’s the hardest part – patience! Let the cakes cool in their pans for exactly 10 minutes on a wire rack. Then run a knife around the edges and flip them out onto the rack to cool completely, about 1 hour. I know it’s tempting to frost warm cake, but trust me, waiting prevents crumbly disasters!
Assembling and Frosting the Layer Cake
Place your first layer on a cake stand or plate. If it domed while baking, use a serrated knife to gently level it – eat those scraps as your chef’s treat!
Dollop about ¾ cup frosting in the center and spread it out to the edges with an offset spatula or butter knife. Leave about ½ inch bare around the edge – the weight of the next layer will push the frosting out.
Carefully place the second layer on top, bottom-side up for a perfectly flat surface. Now for the fun part – frosting the whole cake! Start with a thin “crumb coat” to trap any loose crumbs, then chill for 15 minutes. This makes your final frosting layer look so smooth and professional.
Apply the remaining frosting, turning the cake as you go for even coverage. Want those pretty swirls? Lift your spatula straight up at the end of each stroke. And remember – it doesn’t have to be perfect to be delicious!
Tips for the Perfect Layer Cake
After making more layer cakes than I can count (and learning from plenty of mistakes!), here are my can’t-miss tips:
- Room temp is key – Cold eggs and butter don’t cream well. Set everything out 1-2 hours before baking.
- Line pans with parchment circles – Even if you grease them, this guarantees easy release every time.
- Chill layers before frosting – 30 minutes in the fridge makes them so much easier to handle without crumbling.
- Crumb coat first! That thin layer of frosting locks in crumbs for a polished final look.
- Rotate your cake stand while frosting – It helps you get those smooth, even sides we all love in a layer cake.
These little tricks have saved me from so many cake disasters – now they’re my baking bible!
Layer Cake Variations
Oh, the fun part—let’s talk variations! This layer cake is like your favorite blank canvas just begging for creative touches. Want chocolate? Swap out ½ cup flour for cocoa powder and add a teaspoon of espresso powder to deepen the flavor. Lemon lovers, zest a whole lemon into the batter and use lemon curd between the layers. For almond joy vibes, add ½ teaspoon almond extract to the batter and top with toasted coconut.
Dietary needs? No problem! A 1:1 gluten-free flour blend works beautifully here. Dairy-free? Use plant-based butter and milk. The possibilities are endless—I once made a chai-spiced version with cardamom frosting that disappeared in minutes! Whatever you choose, just keep the basic ratios the same and let your taste buds lead the way.
Serving and Storing Your Layer Cake
Here’s the best part – slicing into that beautiful creation! Always serve your layer cake at room temperature – cold cake just doesn’t have that same melt-in-your-mouth magic. If you’ve refrigerated it (maybe for that perfect frosting firmness), let it sit out for about an hour before serving.
Leftovers? Ha – as if! But if you do have some, cover the cake loosely with a cake dome or inverted bowl at room temp for up to 3 days. Want to get ahead? Unfrosted layers freeze beautifully for 2 months – just wrap them tight in plastic wrap and thaw at room temp when you’re ready to decorate!
Layer Cake FAQs
Over the years, I’ve gotten so many questions about this layer cake recipe – here are the ones that pop up most often with my tried-and-true answers:
Can I substitute buttermilk for regular milk?
Absolutely! Buttermilk makes the sponge cake extra tender. Just replace the milk cup-for-cup and add ¼ teaspoon baking soda to your dry ingredients to balance the acidity. The slight tang pairs beautifully with rich frostings!
Help! My cake turned out dry – what went wrong?
Oh honey, we’ve all been there! Usually it’s one of three things: overbaking (set that timer!), overmixing the batter (stop when just combined), or old baking powder (check the date). Next time, try brushing the layers with simple syrup before frosting – it’s my secret rescue trick!
What’s the easiest frosting for beginners?
Hands down, American buttercream! Just beat 1 cup softened butter with 4 cups powdered sugar, ¼ cup milk, and 2 teaspoons vanilla until fluffy. It’s forgiving if you need to adjust consistency and pipes beautifully. Pro tip: sift your sugar first to avoid lumps!
Can I make this sponge cake ahead of time?
You bet! Bake the layers up to 2 days in advance – just wrap them tightly in plastic once cooled. They actually taste better after resting! Frost the day you’re serving for the freshest look.
Why did my cake layers sink in the middle?
Most likely culprit? Opening the oven door too soon or underbaking. That initial structure needs time to set! Wait until at least the 25-minute mark to peek, and make sure your baking powder is fresh. If it still happens, just trim the dome – no one will know!
Nutritional Information
Just a quick note about nutrition – these numbers can vary depending on your specific ingredients and brands. But for a general idea, one slice of this heavenly layer cake comes in around:
- 350 calories
- 55g carbohydrates
- 12g fat
Of course, if you go wild with the frosting (no judgment here!), those numbers might climb a bit. But hey – it’s cake! Worth every delicious bite if you ask me.
Did you make this layer cake? I’d love to see your creation! Snap a photo and tag me – nothing makes me happier than seeing your baking triumphs. And if you loved it, leave a star rating so others can find this recipe too!
Print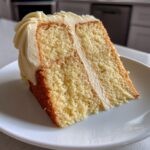
Moist 4-Layer Cake Recipe That’ll Steal the Show
- Total Time: 50 minutes
- Yield: 1 layer cake (8-10 servings) 1x
- Diet: Vegetarian
Description
A classic layer cake made with soft sponge layers and creamy frosting.
Ingredients
- 2 cups all-purpose flour
- 1 1/2 cups granulated sugar
- 1/2 cup unsalted butter, softened
- 3 large eggs
- 1 cup milk
- 1 tsp vanilla extract
- 2 tsp baking powder
- 1/2 tsp salt
- 2 cups frosting (your choice)
Instructions
- Preheat oven to 350°F (175°C). Grease and flour two 9-inch round cake pans.
- In a bowl, mix flour, baking powder, and salt.
- Cream butter and sugar until light and fluffy. Add eggs one at a time, then mix in vanilla.
- Alternate adding flour mixture and milk, mixing until smooth.
- Divide batter evenly between pans. Bake for 25-30 minutes or until a toothpick comes out clean.
- Cool cakes in pans for 10 minutes, then transfer to a wire rack to cool completely.
- Frost the top of one cake layer, place the second layer on top, and frost the entire cake.
Notes
- Let cakes cool completely before frosting.
- Use a serrated knife to level cake layers if needed.
- Store covered at room temperature for up to 3 days.
- Prep Time: 20 minutes
- Cook Time: 30 minutes
- Category: Dessert
- Method: Baking
- Cuisine: American
Nutrition
- Serving Size: 1 slice
- Calories: 350
- Sugar: 25g
- Sodium: 200mg
- Fat: 12g
- Saturated Fat: 7g
- Unsaturated Fat: 4g
- Trans Fat: 0g
- Carbohydrates: 55g
- Fiber: 1g
- Protein: 5g
- Cholesterol: 70mg
Keywords: layer cake, sponge cake, frosting, dessert, baking


