You know those nights when you need dinner on the table fast, but you still want something that actually tastes good? That’s where my Melty Garlic Chicken Wraps with Cheese come in—they’re my go-to lifesaver! I swear, the first time I whipped these up, my husband thought I’d spent hours in the kitchen. Nope! Just 20 minutes and a handful of simple ingredients, and you’ve got golden, garlicky chicken tucked into a warm tortilla with cheese so gooey it practically begs to be eaten. The best part? The garlic doesn’t just sit in the background—it’s front and center, giving every bite that cozy, savory punch we all crave. Trust me, once you try these, you’ll keep the recipe on speed dial for busy weeknights (and lazy weekends… and basically anytime at all).
Why You’ll Love These Melty Garlic Chicken Wraps with Cheese
Listen, I don’t blame you if you’re skeptical about anything that comes together this fast—but these wraps? They’re the real deal. Here’s why they’ve earned a permanent spot in my dinner rotation:
- Quick as lightning: 20 minutes from fridge to plate. No kidding. (Perfect for when hunger strikes and patience is thin.)
- Garlic lover’s dream: That golden, fragrant punch in every bite? Yes, please. It’s the kind of flavor that makes you close your eyes and savor it.
- Kid-approved magic: Even my picky eater licks the plate clean. Melty cheese is the ultimate peace treaty.
- Weeknight warrior: Uses pantry staples—no fancy ingredients, no fuss. Just pure, cheesy comfort.
Trust me, one bite and you’ll be hooked. These wraps don’t just feed your family—they make you look like a kitchen rockstar.
Ingredients for Melty Garlic Chicken Wraps with Cheese
Okay, let’s talk ingredients—because these wraps are only as good as what you put in them. I’m a stickler for fresh garlic here (none of that jarred stuff if we can help it), and I promise, the little extra effort makes all the difference. Here’s exactly what you’ll need:
- 2 boneless, skinless chicken breasts – sliced thin (about 1/4-inch pieces so they cook fast and stay juicy)
- 2 tbsp olive oil – for that perfect golden sizzle
- 3 garlic cloves – minced fresh (go ahead and add an extra if you’re a garlic fiend like me)
- 1 tsp paprika – for that warm, smoky whisper in the background
- 1/2 tsp salt – to make all those flavors pop
- 1/2 tsp black pepper – freshly cracked if you’ve got it
- 4 large flour tortillas – burrito-sized, warmed up so they don’t crack when you fold ’em
- 1 cup shredded cheddar – packed! (This is a cheese pull situation—no skimping)
- 1/2 cup shredded mozzarella – for that ooey-gooey melt factor
- 1/4 cup chopped fresh parsley – because everything’s better with a little green confetti on top
See? Nothing fussy—just good, honest ingredients that work their magic together. Now let’s get cooking!
Equipment You’ll Need
No fancy gadgets here—just the basics every kitchen should have:
- A trusty skillet (nonstick or cast iron works great)
- Spatula for flipping those wraps without casualties
- Sharp knife (safety first when slicing chicken!)
- Cutting board for prepping ingredients
That’s it! If you’ve got these, you’re minutes away from melty, garlicky bliss.
How to Make Melty Garlic Chicken Wraps with Cheese
Alright, let’s get down to business—this is where the magic happens. Follow these steps, and you’ll have wraps so melty and flavorful, you’ll wonder why you ever ordered takeout.
Step 1: Cook the Garlic Chicken
First things first: heat up that olive oil in your skillet over medium heat. (Trust me, medium is the sweet spot—too hot, and your garlic will turn bitter faster than you can say “oops.”) Toss in your thin chicken slices and let them sizzle for about 5-6 minutes, flipping halfway through, until they’re golden and just cooked through. Now, here’s the star of the show: add your minced garlic, paprika, salt, and black pepper. Stir it all together and let it cook for just 2 more minutes—long enough for the garlic to mellow out and infuse the chicken with its cozy, savory goodness. Remove it from the heat and set it aside. (Pro tip: don’t skip the garlic timing—it’s the difference between “wow” and “why does this taste burnt?”)
Step 2: Assemble the Wraps
Now, grab your tortillas and warm them up for about 20 seconds in the microwave or a dry pan. (This keeps them pliable and prevents cracks when folding—nobody wants a wrap explosion.) Divide that garlicky chicken evenly among the tortillas, spreading it out in a single layer. Next, sprinkle on your cheeses—cheddar first, then mozzarella. Be generous here; we’re aiming for that Instagram-worthy cheese pull. Fold the sides of the tortilla in, then roll it up tightly from the bottom. (Think burrito-style—tight enough to hold everything together but not so tight it bursts at the seams.)
Step 3: Melt the Cheese
Here’s where it all comes together: heat up your skillet again over medium heat. Place each wrap seam-side down and let it cook for 1-2 minutes per side, flipping carefully with your spatula. You’re looking for that golden-brown exterior and the cheese inside to get all oozy and irresistible. (Don’t rush this step—it’s worth the extra minute for that perfect melt.) Once they’re done, sprinkle with fresh parsley for a pop of color and freshness. And there you have it—wraps so good, they’ll disappear before you can say “seconds, please!”
Tips for Perfect Melty Garlic Chicken Wraps with Cheese
Want to take these wraps from “good” to “can’t-stop-eating-them” level? Here are my tried-and-true tricks—learned from many (many) batches:
- Fresh garlic is non-negotiable. That jarred stuff just doesn’t give the same punch. Mince it fine so it melds into every bite without overpowering.
- Warm your tortillas! 20 seconds in the microwave or a dry pan keeps them flexible. Cold tortillas crack and make folding a messy nightmare.
- Let wraps rest 1 minute before cutting. I know it’s hard to wait, but this lets the cheese set slightly so it doesn’t ooze out everywhere.
- Medium heat is your friend. Too high, and you’ll burn the garlic; too low, and the cheese won’t melt properly.
Follow these, and you’ll nail it every time—pinky promise!
Ingredient Substitutions & Variations
Look, I get it—sometimes you gotta work with what’s in the fridge. The beauty of these wraps? They’re crazy adaptable. Here’s how to switch things up when needed:
- Short on time? Grab rotisserie chicken instead—just shred it and toss with the garlic and spices. (No shame in this game!)
- Gluten-free? Swap in your favorite GF tortillas—they crisp up just as nicely.
- Want more kick? Pepper jack cheese brings the heat, while feta adds a salty tang.
- Sneak in greens: Toss a handful of baby spinach or arugula into each wrap before folding. It wilts perfectly from the warm chicken.
See? Dinner just got even easier.
Serving Suggestions
These wraps are delicious solo, but if you want to turn them into a full meal, here’s how I love to serve them:
- Crisp green salad: Toss some romaine with cherry tomatoes and a light vinaigrette—the freshness balances the richness perfectly.
- Cooling sides: A dollop of sour cream or scoop of chunky salsa adds a nice contrast to the garlicky chicken.
- Roasted potatoes: Golden, crispy wedges make it feel like a hearty takeout meal—without the guilt.
Honestly? Sometimes I just eat two wraps and call it a day. No judgment here!
Storage & Reheating
Got leftovers? (Lucky you!) Wrap them tightly in foil and they’ll keep in the fridge for up to 2 days. When you’re ready for round two, skip the microwave—reheat them in a dry skillet over medium-low heat for that perfect crispy exterior and gooey interior. They’ll taste just-made every time!
Nutrition Information
Let’s keep it real—nutrition info can vary depending on the brands and ingredients you use. But here’s the gist: these Melty Garlic Chicken Wraps with Cheese are a solid balance of protein, carbs, and fats. The chicken keeps you full, the tortillas give you energy, and the cheese? Well, that’s just pure joy in every bite. If you’re watching your intake, consider using low-fat cheese or swapping in whole wheat tortillas. And remember, portion size matters—so enjoy, but maybe don’t eat all four wraps in one sitting (unless it’s that kind of day—I’ve been there!).
FAQs About Melty Garlic Chicken Wraps with Cheese
Can I use pre-cooked chicken?
Absolutely! Rotisserie chicken is a lifesaver here. Just shred it, toss it with the garlic and spices, and heat it through before assembling. It’s a shortcut that still tastes amazing.
How can I make these wraps spicier?
If you like heat, swap the cheddar for pepper jack cheese or add a pinch of cayenne pepper to the chicken. A drizzle of hot sauce before folding the wraps works wonders too!
Can I make these ahead of time?
You can prep the chicken filling a day in advance and store it in the fridge. Assemble and cook the wraps just before serving for that fresh, melty cheese effect.
What’s the best way to reheat leftovers?
Skip the microwave! Reheat them in a skillet over medium-low heat for 1-2 minutes per side. It keeps the tortilla crispy and the cheese gooey—just like the first time.
Can I use a different type of cheese?
Of course! Try mozzarella for extra meltiness, feta for a tangy twist, or even a blend of Mexican cheeses. The key is to use something that melts well and complements the garlicky chicken.
Final Thoughts
There you have it—my foolproof recipe for Melty Garlic Chicken Wraps with Cheese, the ultimate quick meal that never lets me down. I’d love to hear how yours turns out! Did you add extra garlic? Try a fun cheese combo? Tag me or leave a comment—nothing makes me happier than seeing your kitchen wins. Now go forth and make those wraps (and maybe hide one for yourself before the family spots them). Happy cooking!
Print
20Minute Melty Garlic Chicken Wraps with Cheese Perfection
- Total Time: 20 minutes
- Yield: 4 wraps 1x
- Diet: Low Lactose
Description
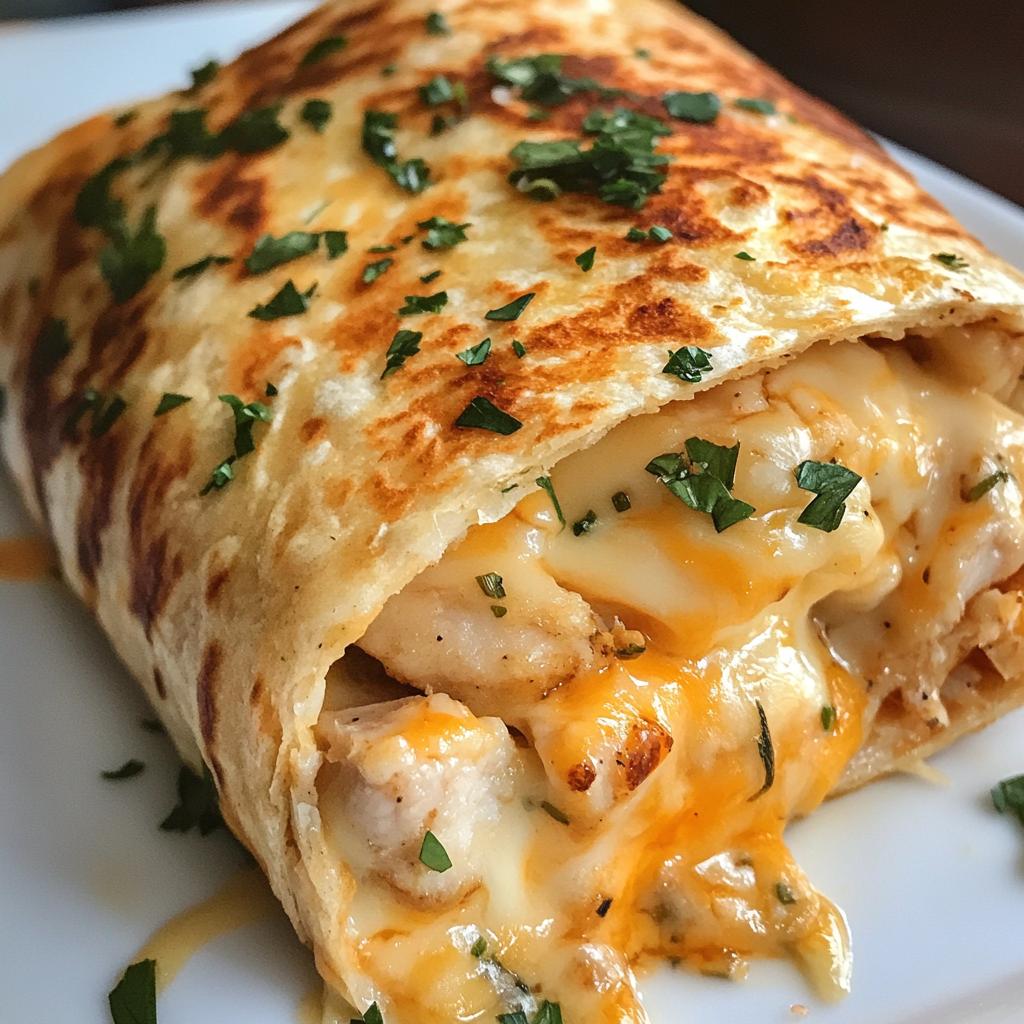
Melty Garlic Chicken Wraps with Cheese are a quick and delicious meal. They combine tender chicken, melted cheese, and a garlicky kick in a soft tortilla wrap.
Ingredients
- 2 boneless, skinless chicken breasts, sliced
- 2 tbsp olive oil
- 3 garlic cloves, minced
- 1 tsp paprika
- 1/2 tsp salt
- 1/2 tsp black pepper
- 4 large flour tortillas
- 1 cup shredded cheddar cheese
- 1/2 cup shredded mozzarella cheese
- 1/4 cup chopped fresh parsley
Instructions
- Heat olive oil in a pan over medium heat.
- Add chicken slices and cook for 5-6 minutes until browned.
- Add minced garlic, paprika, salt, and black pepper. Stir and cook for 2 more minutes.
- Remove from heat and set aside.
- Warm tortillas for 20 seconds in a dry pan or microwave.
- Divide the cooked chicken evenly among the tortillas.
- Sprinkle cheddar and mozzarella cheese over the chicken.
- Fold the tortillas tightly into wraps.
- Heat the wraps in the pan for 1-2 minutes per side until cheese melts.
- Sprinkle with fresh parsley before serving.
Notes
- Use fresh garlic for the best flavor.
- Adjust spices to your taste.
- Serve with a side of sour cream or salsa if desired.
- Prep Time: 10 minutes
- Cook Time: 10 minutes
- Category: Main Course
- Method: Stovetop
- Cuisine: American
Nutrition
- Serving Size: 1 wrap
- Calories: 350
- Sugar: 2g
- Sodium: 550mg
- Fat: 18g
- Saturated Fat: 7g
- Unsaturated Fat: 9g
- Trans Fat: 0g
- Carbohydrates: 25g
- Fiber: 2g
- Protein: 24g
- Cholesterol: 70mg
Keywords: garlic chicken wrap, melty cheese wrap, quick chicken recipe


