If you’re looking for a dinner that feels like a warm hug, let me introduce you to my beloved Korean beef bowl. Imagine tender, juicy ground beef swimming in a savory sauce that’s sweet, salty, and just a hint of umami. It’s a dish that brings all the comfort without the fuss, perfect for those busy weeknights when you want something delicious yet quick. Trust me, the moment you take a bite, you’ll be transported to a bustling Korean street market, where the scents of sesame and garlic fill the air.
This recipe has become my go-to because it’s not only super easy to whip up in about 25 minutes, but it’s also incredibly versatile. I love that I can throw in whatever veggies I have on hand, making it a fantastic way to clean out the fridge. Plus, my kids can’t resist it—especially when I top it with a fried egg! So, grab your skillet, and let’s get ready to dive into a bowl of savory goodness that you’ll want to make again and again. You won’t regret it!
Ingredients List
Gathering the right ingredients is key to achieving that authentic flavor in your Korean beef bowl. Here’s what you’ll need:
- 1 pound ground beef: I always go for lean ground beef for a nice balance of flavor and health.
- 1/4 cup soy sauce: This adds that deep, savory umami kick to the dish. Use low-sodium if you prefer!
- 2 tablespoons brown sugar: This brings a wonderful sweetness that balances the saltiness of the soy sauce. Adjust to your taste!
- 2 cloves garlic, minced: Fresh garlic makes all the difference! It’s aromatic and adds a punch of flavor.
- 1 tablespoon sesame oil: This is essential for that nutty, rich flavor—don’t skip it!
- 1/2 teaspoon ginger, minced: Fresh ginger adds a lovely warmth that complements the beef beautifully.
- 2 green onions, chopped: These add a fresh crunch and a pop of color on top of your bowl.
- 2 cups cooked rice: I usually use white or brown rice, but feel free to use whatever you love!
- 1 cup steamed broccoli: This not only adds nutrition but also brings a nice green color to your dish.
With these ingredients on hand, you’re all set to create a Korean beef bowl that’s bursting with flavor!
How to Prepare Korean Beef Bowl
Now that you’ve got your ingredients all lined up, let’s get cooking! This part is really straightforward, and I promise it’ll make your kitchen smell absolutely amazing. Follow these steps, and you’ll have a delicious Korean beef bowl ready in no time!
Step 1 – Heat the Skillet
First things first, grab a skillet and pour in that luscious tablespoon of sesame oil. Heat it over medium heat until it shimmers—this usually takes about a minute. Be careful not to let it smoke! The aroma will start to fill your kitchen, and you’ll know it’s time for the next step.
Step 2 – Cook the Ground Beef
Next, add your pound of ground beef to the hot skillet. Use a spatula to break it apart as it cooks. You want it to turn a lovely brown color, which should take about 5 to 7 minutes. Keep an eye on it, stirring occasionally. When it’s no longer pink and has a nice brown crust, you’re ready to move on!
Step 3 – Add Aromatics
Now, it’s time to add that fragrant minced garlic and ginger. Stir them into the beef, letting them cook for just about 1 minute. You’ll want to keep stirring so nothing burns—just until the garlic is fragrant. Trust me, this step is where the magic begins!
Step 4 – Combine Sauce Ingredients
Once those lovely aromas are wafting around, it’s time to pour in the 1/4 cup of soy sauce and sprinkle in the 2 tablespoons of brown sugar. Mix it all together really well. The sugar will start to dissolve and create that beautiful sauce that’s going to coat your beef perfectly!
Step 5 – Thicken the Sauce
Let everything simmer together for about 2 to 3 minutes. This will allow the sauce to thicken up a bit and become extra flavorful. You’ll know it’s ready when it clings nicely to the beef. Just keep stirring occasionally so nothing sticks to the bottom of the pan!
Step 6 – Serve the Dish
Finally, it’s time to plate up! Serve the savory beef over a generous scoop of cooked rice, and don’t forget to top it with steamed broccoli and those vibrant green onions. It’s like a little masterpiece in a bowl! Now dig in and enjoy every single bite of your homemade Korean beef bowl!
Nutritional Information
It’s always good to know what you’re putting into your body, especially when it’s as delicious as this Korean beef bowl! Here’s the estimated nutritional breakdown per serving, based on typical ingredients used:
- Calories: 450
- Fat: 20g
- Saturated Fat: 7g
- Unsaturated Fat: 10g
- Trans Fat: 0g
- Cholesterol: 70mg
- Sodium: 800mg
- Carbohydrates: 40g
- Fiber: 2g
- Sugar: 5g
- Protein: 30g
Keep in mind, these values are approximate and can vary based on the specific ingredients and brands you choose. It’s a hearty meal that packs a punch of protein and flavor, making it a satisfying option for any night of the week!
Why You’ll Love This Recipe
- Quick to prepare: In just 25 minutes, you can have a delicious meal on the table, perfect for those busy weeknights!
- Packed with flavor: The combination of savory soy sauce, sweet brown sugar, and aromatic garlic makes every bite a taste explosion.
- Customizable with different proteins: Feel free to switch things up! Ground turkey or chicken work beautifully if you want to try something different.
- Healthy option with vegetables: With steamed broccoli and your choice of rice, this dish is not just tasty but also nutritious, making it a well-rounded meal.
Ingredient Notes/Substitutions
When it comes to making your Korean beef bowl, understanding your ingredients can really elevate the dish. Here are some notes and substitutions to consider:
- Ground Beef: While I love using lean ground beef for its rich flavor, you can easily swap it for ground turkey or chicken if you’re looking for a lighter option. Just keep in mind that the flavor profile will change slightly, so adjust seasonings as needed!
- Soy Sauce: If you’re watching your sodium intake, low-sodium soy sauce is a great alternative. You can also use tamari for a gluten-free option. Just remember, it might require slight adjustments in flavor since tamari can be a bit thicker and richer.
- Brown Sugar: For a healthier twist, consider using honey or maple syrup instead. They’ll add a different dimension of sweetness, but be cautious with the amounts, as these can be sweeter than brown sugar!
- Garlic and Ginger: Fresh is always best! But if you’re in a pinch, you can use garlic and ginger powders. Just remember to use about 1/4 teaspoon of each powder in place of the fresh minced versions.
- Sesame Oil: This ingredient is key for that nutty flavor, but if you don’t have it on hand, you can use vegetable oil or olive oil. You’ll lose some of the authentic taste, but it’ll still be delicious!
- Vegetables: Don’t hesitate to get creative! While I recommend steamed broccoli, you can use any veggies you love or have on hand—think bell peppers, snap peas, or even carrots. Just toss them in during the last few minutes of cooking.
These substitutions can help you tailor your Korean beef bowl to your taste and dietary preferences while keeping all the yummy flavors intact!
Tips for Success
Now that you’re ready to whip up your Korean beef bowl, I want to share some pro tips that’ll help you nail it every single time. Trust me, these little nuggets of wisdom can make all the difference!
Adjusting Sweetness
If you find that the sauce is a bit too sweet for your taste, you can easily dial it back. Just reduce the brown sugar by a tablespoon or two. On the flip side, if you like it sweeter, feel free to add a tad more sugar, but do it gradually! A little goes a long way, and you can always taste it as you mix.
Cooking the Beef to Perfection
When cooking your ground beef, aim for that beautiful browned finish. Not only does it enhance the flavor, but it also gives the sauce something to cling to. Don’t rush this step—let it sear nicely in the pan! And remember, there’s no need to overcook it; just look for that deep brown color with no pink remaining. If you use turkey or chicken, keep an eye on it, as they can cook faster than beef!
Using Leftovers Creatively
If you happen to have leftovers (which is rare in my house!), think about using them in a different way. You can make a quick stir-fry by tossing the beef with some extra veggies and serving it over noodles or lettuce wraps for a fresh take. It’s a tasty way to keep things exciting!
Don’t Skip the Toppings
Lastly, don’t forget about those toppings! Green onions add a fresh crunch, and if you’re feeling adventurous, a fried egg on top is a game-changer. The runny yolk will meld beautifully with the savory beef and rice. Trust me, it’s worth the extra step!
With these tips in your back pocket, you’re all set to create a Korean beef bowl that will impress everyone around your dinner table. Happy cooking!
Variations
One of the best things about this Korean beef bowl is its versatility! You can easily mix things up to keep it exciting and cater to your taste buds. Here are some fun variations to consider:
- Protein Swaps: While ground beef is delicious, you can swap it for ground turkey or chicken for a lighter option. If you’re feeling adventurous, try using ground pork or even diced tofu for a vegetarian twist!
- Veggie Mix-Ins: Don’t hesitate to customize your bowl with different vegetables. Bell peppers, snap peas, carrots, or even bok choy can add a fresh crunch and extra nutrients. Just toss them in during the last few minutes of cooking for the perfect texture.
- Spice It Up: If you love a little heat, add some red pepper flakes or a dash of sriracha to the sauce for a spicy kick. You can also stir in some gochujang (Korean chili paste) for authentic flavor and more depth.
- Grains Galore: Instead of rice, try serving your beef over quinoa, cauliflower rice, or even a bed of lettuce for a low-carb option. The flavors will still shine through, and you’ll get a different texture!
- Herb Infusion: To elevate the dish even further, consider adding fresh herbs like cilantro or basil right before serving. They’ll give your bowl a burst of freshness that brightens up the savory flavors.
- Asian Slaw: For a crunchy topping, try adding a simple Asian slaw made from shredded cabbage, carrots, and a splash of rice vinegar. It adds a refreshing contrast to the rich beef and sauce.
Experimenting with these variations will not only keep your Korean beef bowl interesting but also allow you to cater it to your dietary preferences and what you have on hand. Enjoy getting creative in the kitchen!
Serving Suggestions
To make your Korean beef bowl a complete meal, it’s all about those perfect pairings! Here are some delightful ideas to elevate your dining experience:
- Kimchi: This fermented side dish adds a spicy, tangy crunch that complements the savory beef beautifully. It’s a staple in Korean cuisine and will bring an authentic touch to your meal!
- Pickled Vegetables: A side of pickled cucumbers or radishes offers a refreshing contrast to the rich flavors of the beef bowl. The acidity helps balance the dish and adds a delightful crunch.
- Sesame Spinach: Steamed or sautéed spinach with sesame oil and sesame seeds makes for a nutritious and tasty side. It’s quick to prepare and packs in extra greens!
- Egg Soup: A warm bowl of Korean egg drop soup (Gyeran-guk) can be a comforting addition. It’s light yet flavorful, making it a wonderful accompaniment to your hearty beef bowl.
- Asian Noodle Salad: A chilled noodle salad tossed with sesame dressing, crunchy veggies, and herbs can add a refreshing element to your meal. It’s light, vibrant, and full of flavor!
- Fruit Salad: For a sweet finish, consider a simple fruit salad with seasonal fruits like watermelon, cantaloupe, and berries. The natural sweetness is a perfect way to cleanse your palate.
These serving suggestions not only round out your meal but also create a colorful and flavorful spread that everyone will love. So go ahead, mix and match, and enjoy your Korean beef bowl with these delightful sides!
Storage & Reheating Instructions
Now that you’ve enjoyed your Korean beef bowl, you might have some delicious leftovers! Trust me, this dish is just as good the next day, making it perfect for meal prep or a quick lunch. Here’s how to store and reheat it properly to maintain all that amazing flavor and texture.
Storing Leftovers
First, let your beef bowl cool down to room temperature before storing. This is super important to prevent condensation, which can make things soggy. Once it’s cooled, transfer the beef, rice, and veggies into an airtight container. I like to keep the rice separate from the beef to avoid it getting mushy. You can store it in the fridge for up to 3-4 days.
Freezing for Later
If you want to keep it for longer, you can freeze the beef mixture in an airtight container or a freezer-safe bag. Just be sure to label it with the date! It can last up to 3 months in the freezer. However, I recommend freezing the beef and veggies separately from the rice, as cooked rice can become a bit chewy once frozen and reheated.
Reheating Instructions
When it’s time to enjoy your leftovers, reheating is a breeze! If you’re using the microwave, just pop the beef and rice in a microwave-safe bowl, cover it with a damp paper towel (this helps retain moisture), and heat in 1-minute intervals, stirring in between until it’s heated through. This usually takes about 2-3 minutes.
If you prefer the stovetop, heat a skillet over medium heat and add a splash of water or a drizzle of sesame oil to keep things from drying out. Add the beef and rice, stirring occasionally, until warmed through—this should take about 5-7 minutes.
And there you have it! With these storage and reheating tips, your Korean beef bowl will taste just as delicious as the first time you made it. Enjoy!
Print
Korean Beef Bowl: 7 Comforting Ways to Savor It
- Total Time: 25 minutes
- Yield: 4 servings 1x
- Diet: Gluten Free
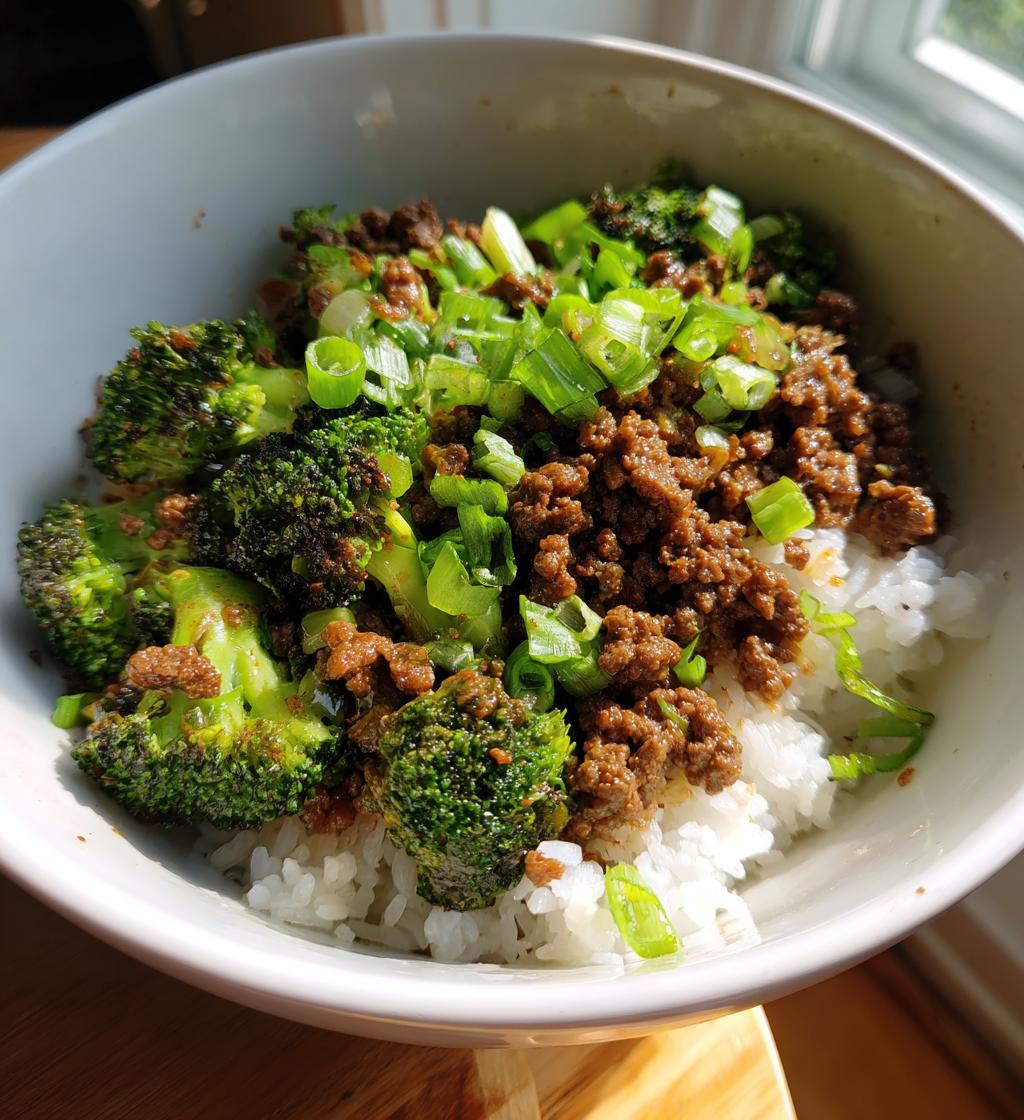
Description
A flavorful Korean beef bowl with tender beef and savory sauce.
Ingredients
- 1 pound ground beef
- 1/4 cup soy sauce
- 2 tablespoons brown sugar
- 2 cloves garlic, minced
- 1 tablespoon sesame oil
- 1/2 teaspoon ginger, minced
- 2 green onions, chopped
- 2 cups cooked rice
- 1 cup steamed broccoli
Instructions
- In a skillet, heat sesame oil over medium heat.
- Add ground beef and cook until browned.
- Stir in garlic and ginger, cooking for 1 minute.
- Add soy sauce and brown sugar, mixing well.
- Cook for an additional 2-3 minutes until sauce thickens.
- Serve beef over rice and top with broccoli and green onions.
Notes
- Adjust the sweetness by adding more or less sugar.
- You can substitute ground beef with ground turkey or chicken.
- Serve with a fried egg on top for added flavor.
- Prep Time: 10 minutes
- Cook Time: 15 minutes
- Category: Main Dish
- Method: Stovetop
- Cuisine: Korean
Nutrition
- Serving Size: 1 bowl
- Calories: 450
- Sugar: 5g
- Sodium: 800mg
- Fat: 20g
- Saturated Fat: 7g
- Unsaturated Fat: 10g
- Trans Fat: 0g
- Carbohydrates: 40g
- Fiber: 2g
- Protein: 30g
- Cholesterol: 70mg
Keywords: korean beef bowl, beef bowl, quick dinner


