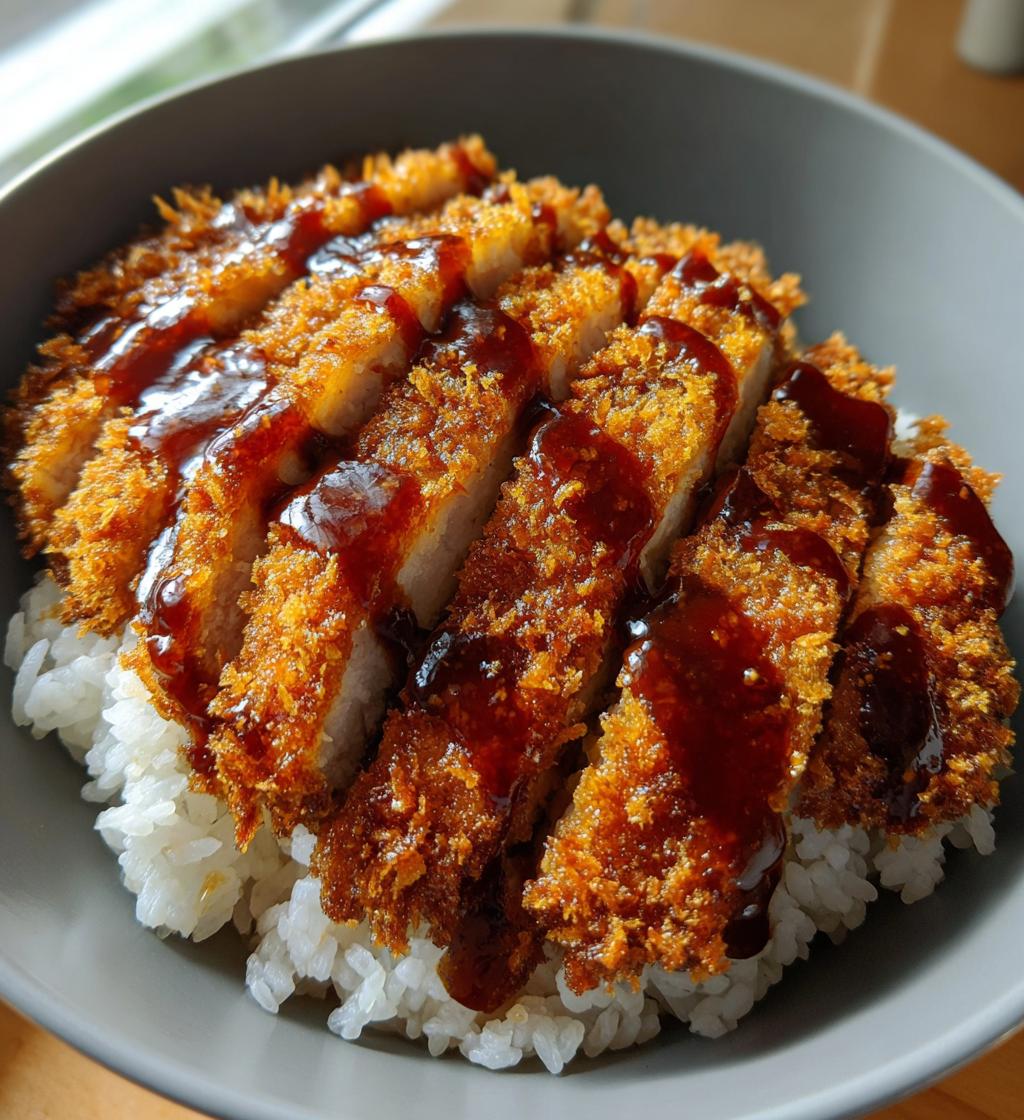
There’s something magical about that first bite of Japanese katsu bowls with tonkatsu sauce – the crunch of golden panko crust giving way to juicy pork, all drizzled with that sweet-savory sauce that makes your taste buds dance. I fell in love with this dish during my first trip to Tokyo, where tiny restaurants served it with such care that I knew I had to recreate it at home.
What makes these katsu bowls special is how simple ingredients transform into pure comfort. The contrast of crispy cutlet against fluffy rice, the tangy punch of the sauce – it’s the kind of meal that makes you close your eyes and just enjoy. My version comes together in under 30 minutes, but tastes like you spent hours perfecting it.
Why You’ll Love Japanese Katsu Bowls with Tonkatsu Sauce
Let me tell you why these katsu bowls became my weeknight hero:
- That addicting crunch – The panko breading stays crispy even after you drizzle on the sauce, giving you texture perfection in every bite
- Quick comfort food – From fridge to table in 25 minutes flat (yes, I’ve timed it!)
- Balanced flavors – The rich tonkatsu sauce cuts through the crispy pork beautifully
- Endless options – Use pork chops when you’re feeling fancy or chicken breasts when you want something lighter
- Kid-approved – My picky eaters go crazy for these (just call them “Japanese chicken nuggets”)
Trust me, once you try homemade Japanese katsu bowls with tonkatsu sauce, takeout just won’t compare.
Ingredients for Japanese Katsu Bowls with Tonkatsu Sauce
Here’s everything you’ll need to make these crispy, saucy bowls of joy:
- 2 boneless pork chops (about 6 oz each, pounded to ½-inch thickness)
- 1 cup panko breadcrumbs (packed lightly – this gives that signature crunch)
- 1 large egg (beaten well – this is your glue!)
- ¼ cup all-purpose flour
- ½ tsp salt (I use kosher)
- ¼ tsp black pepper (freshly ground if you’ve got it)
- 1 cup cooked white rice (short-grain is traditional, but any works)
- ¼ cup tonkatsu sauce (more for drizzling if you’re like me)
- 1 tbsp vegetable oil (or any neutral oil for frying)
Ingredient Notes & Substitutions
Panko is non-negotiable – those big, flaky crumbs make the perfect crispy jacket. Regular breadcrumbs just won’t give you that airy crunch. If you’re gluten-free, look for GF panko (yes, it exists!).
Chicken breasts work beautifully if you’re not into pork – pound them to the same ½-inch thickness. And while homemade tonkatsu sauce is amazing, bottled works great in a pinch (my secret is adding a splash of Worcestershire to amp it up).
Equipment You’ll Need
Gathering your tools before starting makes this katsu bowl process a breeze. Here’s what I always have ready:
- Meat mallet (or rolling pin in a pinch) to pound those cutlets to perfection
- 3 shallow bowls for the flour, egg, and panko breading station
- Heavy-bottomed skillet – my trusty cast iron gives the best even browning
- Tongs for flipping the cutlets without losing precious breading
- Paper towel-lined plate to drain excess oil (crispness is key!)
That’s it! No fancy gadgets needed – just simple tools to create crispy magic.
How to Make Japanese Katsu Bowls with Tonkatsu Sauce
Now for the fun part – let’s turn these simple ingredients into crispy, saucy perfection. I’ll walk you through each step just like my Tokyo neighbor taught me, with all the little tricks that make this dish sing.
Preparing the Cutlets
First, grab those pork chops and place them between two sheets of plastic wrap (this keeps the mess contained). Pound them gently but firmly with your meat mallet until they’re an even ½-inch thick – this ensures quick, even cooking. Season both sides with salt and pepper like you mean it.
Set up your breading station: flour in one shallow bowl, beaten egg in another, and panko in the third. Here’s my golden rule: one hand for dry ingredients, one for wet. Dip each cutlet in flour first (shake off excess), then egg (let the excess drip off), then press firmly into the panko to coat completely. The secret? Let them rest 5 minutes while your oil heats – this helps the coating stick better.
Frying to Perfection
Heat your oil in the skillet over medium heat until a panko crumb sizzles immediately when dropped in. Carefully add the breaded cutlets – don’t crowd the pan or they’ll steam instead of crisp up. Cook for 3-4 minutes per side until they’re that perfect golden-brown color that makes your stomach growl.
Resist the urge to peek too soon! Let that beautiful crust form before flipping. When done, transfer to your paper towel-lined plate to drain. Pro tip: sprinkle with a tiny pinch of salt while hot to make every bite pop.
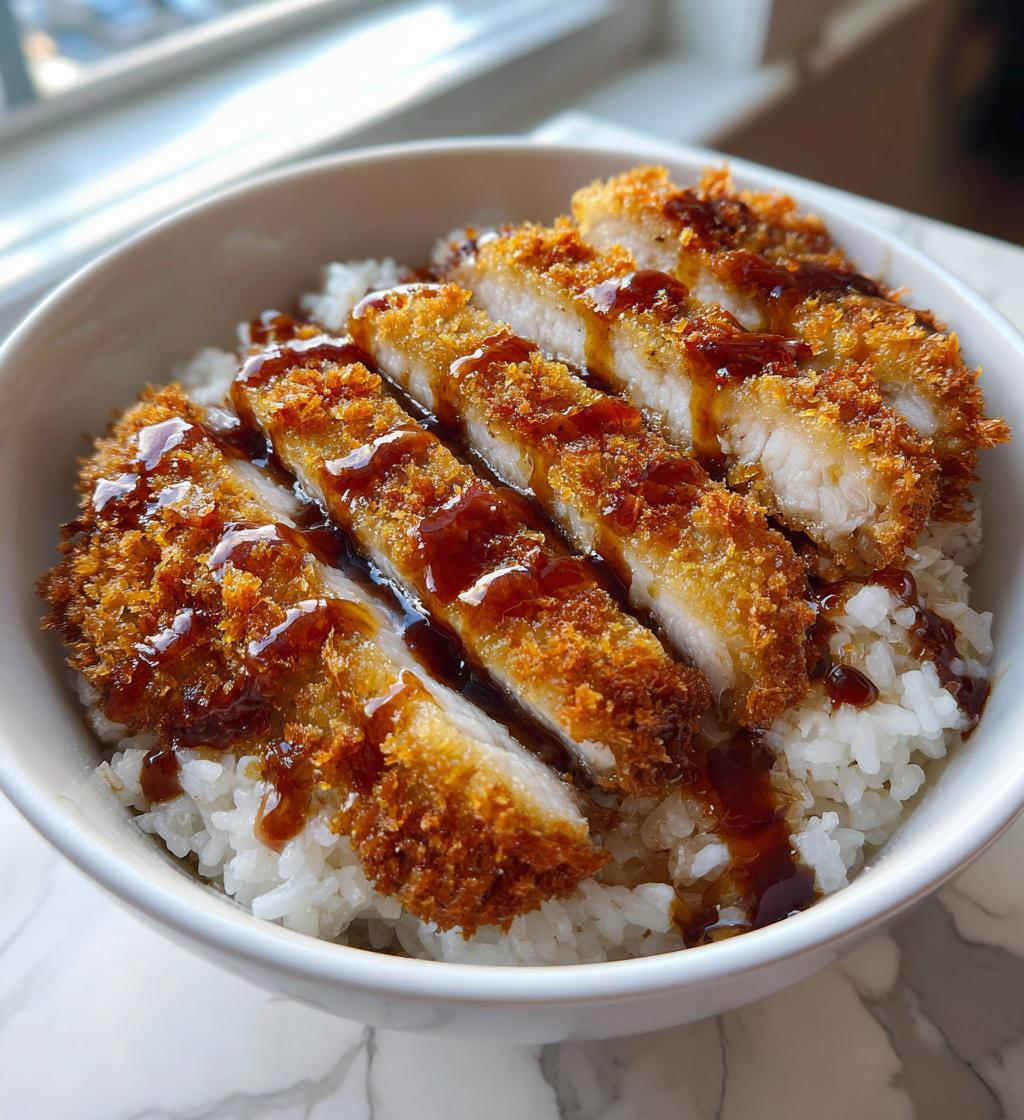
Assembling the Bowls
Let the cutlets rest for 2 minutes (this keeps them juicy), then slice against the grain into thick strips. Pile fluffy rice into bowls and arrange the crispy katsu on top. Now the magic touch – drizzle generously with tonkatsu sauce so it cascades down the crispy ridges.
For that authentic touch, add a simple shredded cabbage salad on the side (tossed with a bit of rice vinegar). The fresh crunch balances the rich katsu perfectly. Grab your chopsticks and dig in while it’s hot – that first crispy bite is pure bliss!
Tips for the Best Japanese Katsu Bowls
After making these katsu bowls more times than I can count, here are my can’t-skip tips for perfection:
- Keep panko dry – Store it in an airtight container and give it a quick toast in a dry pan if it feels damp
- Rest before slicing – Letting cutlets sit 2 minutes after frying keeps all those juices inside
- Double-dip for extra crunch – For ultra-crispy results, do a second dip in egg and panko
- Oil temperature is key – Too hot and the outside burns before the inside cooks; too cool and you get greasy breading
- Serve sauce on the side – If you’re meal prepping, keep sauce separate to maintain that perfect crispiness
Follow these simple tricks and you’ll have restaurant-quality katsu bowls every single time!
Serving Suggestions
These Japanese katsu bowls shine brightest with simple sides that complement their crispy richness. I love serving mine with a small bowl of miso soup – the salty umami broth cuts through the fried goodness perfectly. A side of tangy pickled vegetables (think cucumbers or radishes) adds bright contrast too.
For lunchboxes? Just slice the katsu into strips and pack separately from rice – it makes the cutest bento box! Add some sesame seeds and extra tonkatsu sauce in a tiny container for dipping. My kids go wild when they open their lunch to find this crispy surprise waiting.
Storing and Reheating
Here’s the hard truth – microwaving ruins that beautiful crispy crust! To keep your Japanese katsu bowls tasting fresh, store the cutlets separately from rice and sauce. When ready to eat, pop them in a 375°F oven or toaster oven for 5-7 minutes until hot and crisp again. Trust me, it’s worth the extra effort!
Nutrition Information
Just a heads up – these numbers are estimates and can change based on your exact ingredients. For one serving (half the recipe): about 650 calories, 35g protein, and 25g fat. It’s got that perfect combo of protein-packed pork and energizing rice to keep you satisfied!
FAQs About Japanese Katsu Bowls with Tonkatsu Sauce
You’ve got questions – I’ve got answers! Here are the most common things people ask me about making perfect Japanese katsu bowls with tonkatsu sauce at home:
Can I use store-bought tonkatsu sauce?
Absolutely! While homemade sauce is delicious, quality store-bought versions work great in a pinch. My favorite trick is to doctor it up with a splash of Worcestershire or a squeeze of lemon to brighten the flavor. The Bulldog brand is my go-to when I’m short on time.
How do I prevent soggy breading?
Two words: dry hands! When breading, keep one hand for dry ingredients and one for wet. Also, make sure to let the breaded cutlets rest for 5 minutes before frying – this helps the coating set properly. And never skip draining them on paper towels right after frying!
Can I make this gluten-free?
Yes! Just use gluten-free panko (it exists!) and substitute cornstarch or GF flour for the all-purpose flour. Double-check your tonkatsu sauce ingredients too – some brands contain wheat.
What’s the best oil for frying?
I swear by peanut oil for its high smoke point, but any neutral oil like canola or vegetable works. Just avoid olive oil – that flavor fights with the delicate katsu taste.
Why pound the meat to ½-inch thickness?
This ensures even cooking – no burnt edges with raw centers! The thin cut also gives you that perfect ratio of crispy coating to juicy meat in every bite. Trust me, it’s worth the extra minute of pounding.
Japanese Katsu Bowls with Tonkatsu Sauce – 30-Min Crunchy Bliss
- Total Time: 25 minutes
- Yield: 2 servings 1x
- Diet: Low Lactose
Description
A delicious Japanese dish featuring crispy breaded cutlets served over rice with savory tonkatsu sauce.
Ingredients
- 2 boneless pork chops (or chicken breasts)
- 1 cup panko breadcrumbs
- 1 egg
- 1/4 cup flour
- 1/2 tsp salt
- 1/4 tsp black pepper
- 1 cup cooked white rice
- 1/4 cup tonkatsu sauce
- 1 tbsp vegetable oil
Instructions
- Pound the pork chops to 1/2 inch thickness.
- Season with salt and pepper.
- Coat each chop in flour, then egg, then panko.
- Heat oil in a pan over medium heat.
- Fry cutlets for 3-4 minutes per side until golden brown.
- Drain on paper towels.
- Slice cutlets and arrange over rice.
- Drizzle with tonkatsu sauce.
Notes
- Use chicken if you prefer.
- Serve with shredded cabbage.
- Adjust frying time based on thickness.
- Prep Time: 15 minutes
- Cook Time: 10 minutes
- Category: Main Dish
- Method: Pan-frying
- Cuisine: Japanese
Nutrition
- Serving Size: 1 bowl
- Calories: 650
- Sugar: 8g
- Sodium: 900mg
- Fat: 25g
- Saturated Fat: 6g
- Unsaturated Fat: 15g
- Trans Fat: 0g
- Carbohydrates: 75g
- Fiber: 3g
- Protein: 35g
- Cholesterol: 150mg
Keywords: Japanese katsu, tonkatsu, pork cutlet, rice bowl


