You know those nights when you’re craving fast food but don’t want to leave the house? That’s exactly how my obsession with these homemade Taco Melts started! I was scrolling through my phone, drooling over Taco Bell’s Beefy Melt Burrito, when I thought—why not make it myself? Turns out, it’s even better at home. Seriously, the first bite took me right back to my college days, but without the soggy tortilla or lukewarm fries. The secret? A perfectly seasoned beef filling, melty cheese, and those crispy golden fries tucked inside—just like the original, but fresher and way more satisfying. And the best part? It’s ready in 30 minutes flat. Trust me, once you try this copycat version, you might just say goodbye to the drive-thru for good.
Taco Melts Ingredients
Okay, let’s talk ingredients! The magic of these Taco Melts comes down to simple, fresh components that pack a punch. I’ve made this enough times to know – quality matters here. Here’s what you’ll need, grouped so you can shop and prep like a pro:
For the beef filling (the star of the show!)
- 1 lb ground beef (80/20 blend for perfect juiciness)
- 1 packet taco seasoning (or 2 tbsp homemade blend if you’re feeling fancy)
- 1/4 cup water (to bring that seasoning to life)
The melty, crunchy toppings
- 1 cup shredded cheddar cheese (packed – we want serious coverage!)
- 1/4 cup diced tomatoes (finely chopped – nobody wants chunky spills)
- 1/4 cup shredded lettuce (iceberg for that perfect crunch)
- 1/2 cup sour cream (full-fat for maximum creaminess)
The wrap & sidekick
- 4 large flour tortillas (burrito-sized, about 10″ – warm them and they won’t crack)
- 1 cup cooked golden fries (freshly baked or air-fried for maximum crispness)
Pro tip from my many trials: measure your cheese packed and tomatoes finely chopped before starting. It makes assembly so much smoother when everything’s prepped and ready to go!
How to Make Taco Melts
Alright, let’s get cooking! I’ve made these Taco Melts more times than I can count, and I’ve perfected every step. Follow along and you’ll have melty, beefy perfection in no time. Just remember – the secret’s in the details!
Cooking the Beef Filling
First things first – that glorious beef filling. Grab your favorite skillet (I swear by my cast iron for this) and crank the heat to medium. Toss in your ground beef and break it up with a wooden spoon – you want nice, small crumbles. Here’s my trick: don’t stir constantly! Let it get a little crispy on one side before flipping. Once it’s browned (about 5-7 minutes), tilt the pan and spoon out most of the fat. Nobody wants a greasy burrito!
Now for the flavor bomb – add your taco seasoning and water. Stir it all together and let it simmer for about 5 minutes. You’ll know it’s ready when your kitchen smells like a Tex-Mex dream and the sauce clings perfectly to the beef.
Assembling the Taco Melts
While the beef simmers, warm those tortillas! I microwave mine between damp paper towels for 30 seconds – makes them flexible without drying out. Lay one flat and spread about 2 tablespoons of sour cream in the center (leave a 2-inch border).
Here’s how I layer for maximum flavor in every bite:
- Beef (about 1/2 cup – don’t skimp!)
- Cheese (it’ll melt into the warm beef – yes please!)
- Tomatoes and lettuce
- A handful of those golden fries (trust me on this)
Now for the fold: bring up the bottom, fold in the sides, then roll tightly away from you. If it tears? No worries – just wrap it in foil and nobody will know!
Serving with Golden Fries
Those crispy golden fries make this meal! I usually bake frozen fries (425°F for 15-20 minutes) while prepping the filling. Air fryer fans – you’re golden (pun intended)! 12 minutes at 400°F gets them perfectly crisp. For extra indulgence, toss the cooked fries with a sprinkle of taco seasoning before serving.
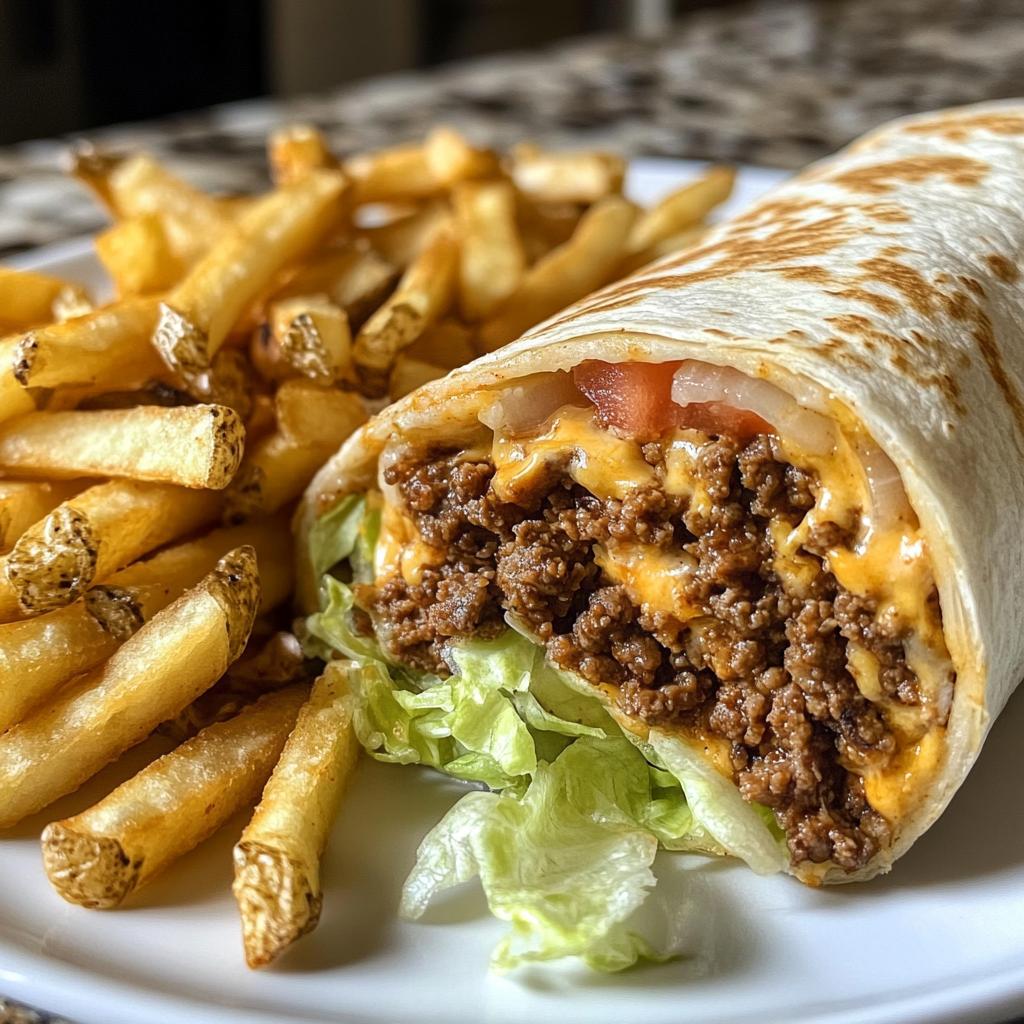
Plate your Taco Melts with a generous side of fries and maybe an extra dollop of sour cream for dipping. The contrast of the warm, melty burrito with those crispy fries? Absolute perfection.
Why You’ll Love These Taco Melts
Listen, I get it – sometimes fast food just hits the spot. But once you try making these Taco Melts at home, you’ll wonder why you ever bothered with the drive-thru. Here’s why they’ve become a staple in my kitchen (and probably will in yours too):
- Faster than delivery – 30 minutes from fridge to plate means you’ll be eating before the delivery app even estimates your order would arrive.
- Way cheaper than takeout – This whole recipe costs less than two combo meals, and you get quadruple the portion size (plus way better ingredients).
- Totally customizable – Swap beef for chicken, add jalapeños, go wild with guac – it’s your kitchen, your rules! My kids love when I add a sprinkle of crushed Doritos for extra crunch.
- That perfect texture combo – The melty beef and cheese against the crisp lettuce and fries is like a party in your mouth. The first bite will have you hooked!
Seriously, I’ve converted so many takeout addicts with this recipe. Last week my neighbor texted me at 9pm saying she was making her third batch that week. That’s the power of the Taco Melt!
Ingredient Substitutions & Notes
Listen, I’m all about making recipes work with what you’ve got. Some nights you’re out of ground beef, other times you’ve got dietary restrictions to consider. Here’s how to tweak these Taco Melts without losing that crave-worthy flavor:
Protein swaps that actually work
Ground beef not your thing? No problem! I’ve tried every alternative under the sun:
- Ground turkey or chicken – Just add an extra tablespoon of oil when browning since they’re leaner. Bonus: it soaks up the taco seasoning beautifully.
- Plant-based crumbles – The texture’s perfect for this! Cook according to package, then season as usual. My vegan sister swears this is even better than the original.
- Shredded chicken or pork – Got leftovers? Toss about 2 cups with the seasoning and a splash of broth to keep it moist.
Tortilla talk and cheese choices
Flour tortillas tearing you up? Here’s how to adapt:
- Corn tortillas – Use two per burrito, warmed until pliable. They’re sturdier than you think when layered right!
- Low-carb wraps – Just microwave for 10 seconds before filling – they crack less when warm.
- Dairy-free? Vegan cheddar shreds melt surprisingly well, or try a creamy avocado mash instead of sour cream.
The golden fries situation
Here’s the deal – “golden fries” just means crispy potato perfection. If you’re out of fries, try:
- Tater tots – Crush them slightly for easier wrapping (my kids’ favorite version)
- Hash brown patties – Break them into chunks for a diner-style twist
- Sweet potato fries – Adds a delicious sweet-savory contrast
- Crispy roasted potatoes – Dice ’em small and roast at 425°F until golden
Pro tip: Whatever potato form you choose, season them with a pinch of the taco seasoning before adding to the burrito – takes the flavor up a notch!
Tips for Perfect Taco Melts
Alright, let me spill all my hard-earned secrets for Taco Melt mastery! After countless batches (some disasters included), I’ve nailed down exactly what takes these from “pretty good” to “oh wow, I made this?!” Here are my can’t-skip tips:
Tortilla tricks that save tears (literally)
Cold tortillas equal broken burritos – trust me on this. My foolproof method? Dampen two paper towels, sandwich your tortillas between them, and microwave for 30 seconds. Steam makes them pliable without drying out. Working with multiple tortillas? Keep them wrapped in a clean kitchen towel while you assemble – they’ll stay warm and flexible.
Beef handling like a pro
That grease is the enemy of structural integrity! After browning your beef, tilt the pan and use a spoon to remove as much fat as possible. Better yet – transfer it to a strainer and give it a quick press with a paper towel. Your burrito will hold together better, and your stomach will thank you later. Also, let the filling cool slightly before assembling – piping hot beef turns tortillas gummy.
The art of the perfect fill
Ever bitten into a burrito only to get all lettuce in one bite and all beef in another? Avoid the dreaded ingredient clumping with this layering method: spread sour cream first (acts like glue!), then beef, then cheese (so it melts into everything), followed by veggies and fries. Keep fillings centered but leave a 2-inch border at the top – this gives you room to roll without explosions.
Bonus tip: If your burrito keeps unraveling, wrap it in parchment paper first, then foil. The parchment sticks just enough to hold everything together until that first glorious bite!
Storage & Reheating
Okay, let’s talk leftovers – because let’s be real, these Taco Melts are so good you might want to make extras! Here’s exactly how I store and reheat them to keep that fresh-made magic:
The best way to store your Taco Melts
First rule: wrap those babies tight! I individually wrap each burrito in foil (shiny side in) while they’re still slightly warm – this prevents condensation from making the tortilla soggy. They’ll keep beautifully in the fridge for up to 2 days. Pro tip: Write the date on the foil with a sharpie so you don’t play the “is this still good?” guessing game.
Reheating for maximum deliciousness
Microwaving is tempting, but resist! Here’s how to bring back that perfect texture:
- Oven method: Keep the foil on and pop into a 350°F oven for 15-20 minutes. The foil keeps the moisture in while the heat revives the crispness.
- Air fryer magic: Remove foil, wrap in parchment paper, and air fry at 375°F for 8-10 minutes. This gives you that just-made crispness!
What about freezing?
Yes, you can freeze these! Wrap tightly in foil, then slide into a freezer bag. They’ll keep for up to 1 month. To reheat, don’t thaw – just add 5 extra minutes to your oven time (about 25 minutes at 350°F). The fries might lose some crispness, but the melty filling stays perfect!
One last tip: If you’re meal prepping, store the fries separately and reheat them separately – they’ll stay crispier that way. Trust me, it’s worth the extra dish!
Taco Melts Nutritional Information
Now let’s talk about what’s actually in these delicious Taco Melts – because let’s be honest, we all do that quick mental math between “this tastes amazing” and “how many miles do I need to run tomorrow?” Here’s the breakdown per serving (that’s one loaded burrito with fries, because who could stop at half?):
- Calories: Around 650 (but totally worth every single one!)
- Protein: 30g – thanks to that beef and cheese combo
- Carbohydrates: 55g (those tortillas and fries add up, but they’re the best part)
- Fat: 35g (12g saturated – hey, cheese and beef gotta have some fun)
- Fiber: 4g (not bad for something this indulgent!)
- Sugar: 4g (just what’s naturally in the tomatoes and fries)
- Sodium: 950mg (mostly from the taco seasoning – you can use low-sodium if you prefer)
Important note: These numbers can vary depending on your specific ingredients. Different brands of tortillas, cheese, and fries can change things up. I always say – if you’re counting macros strictly, plug your exact brands into a nutrition calculator. But for most of us? This gives you a solid ballpark so you can enjoy your Taco Melts without any guilt!
Pro tip: Want to lighten it up? Swap in lean ground turkey, reduced-fat cheese, and bake your own fries – you can easily shave off 150 calories while keeping all the flavor!
FAQs About Taco Melts
I get questions about these Taco Melts all the time from friends and family who’ve tried them (or just stared hungrily at my Instagram posts). Here are the answers to everything you might be wondering:
Can I freeze Taco Melts?
Absolutely! But here’s my hard-learned tip – skip freezing the fries inside. Wrap your assembled burritos tightly in foil, then slip them into freezer bags. They’ll keep beautifully for up to a month. When you’re ready, bake frozen at 350°F for about 25 minutes (no thawing needed!). Make fresh fries separately – they’ll stay crispier that way.
How can I make these spicier?
Oh, I love this question! My go-to moves:
- Toss in diced jalapeños (fresh or pickled) with your toppings
- Use hot taco seasoning instead of mild
- Add a drizzle of sriracha or your favorite hot sauce before rolling
- Sprinkle with crushed red pepper flakes – the heat sticks to the melty cheese perfectly!
What can I use instead of golden fries?
Tater tots are my favorite swap! Just slightly crush them before adding so they’re easier to wrap. Other great options:
- Crispy hash brown patties (break them up)
- Crumbled tortilla chips for that extra crunch
- Even roasted potato cubes if you’re feeling fancy
Can I make these ahead?
You bet! Assemble everything except the lettuce and tomatoes (they get wilty). Wrap tightly and refrigerate up to 24 hours. When ready, bake at 375°F for 15 minutes to melt everything, then add your fresh toppings. Perfect for game day or meal prep!
Why do my tortillas keep tearing?
Been there! Two tricks: 1) Always warm your tortillas first (damp paper towel + 30 sec in microwave), and 2) Don’t overfill! Leave about a 2-inch border at the top for rolling room. If they still crack? No shame in the foil-wrap game – taste is what matters!
Alright, that’s everything you need to know to become a Taco Melt master in your own kitchen! I’m telling you, once you get that perfect, melty, crispy bite, you’ll be hooked. I’d love to hear how they turn out for you! Did you add something wild like pickled onions or a secret sauce? **Try this recipe and share your twist in the comments!**
Print
Spicy Taco Melts in 30 Minutes: Copycat Beefy Melt Burrito Bliss
- Total Time: 30 minutes
- Yield: 4 servings 1x
- Diet: Low Lactose
Description
Make your own Taco Bell Beefy Melt Burrito at home with this easy recipe. Enjoy a flavorful beef and cheese filling wrapped in a soft tortilla, served with golden fries.
Ingredients
- 1 lb ground beef
- 1 packet taco seasoning
- 1 cup shredded cheddar cheese
- 4 large flour tortillas
- 1 cup cooked golden fries
- 1/2 cup sour cream
- 1/4 cup diced tomatoes
- 1/4 cup shredded lettuce
Instructions
- Cook the ground beef in a skillet over medium heat until browned. Drain excess fat.
- Add taco seasoning and water according to the packet instructions. Simmer for 5 minutes.
- Warm the tortillas in a microwave or skillet.
- Spread a layer of sour cream on each tortilla.
- Add the cooked beef, shredded cheese, diced tomatoes, and lettuce to the center of each tortilla.
- Fold the sides of the tortilla inward and roll it tightly to form a burrito.
- Serve with golden fries on the side.
Notes
- Use fresh ingredients for the best flavor.
- Customize with your favorite toppings like guacamole or jalapeños.
- Store leftovers in an airtight container in the fridge for up to 2 days.
- Prep Time: 10 minutes
- Cook Time: 20 minutes
- Category: Main Course
- Method: Stovetop
- Cuisine: Mexican-American
Nutrition
- Serving Size: 1 burrito with fries
- Calories: 650
- Sugar: 4g
- Sodium: 950mg
- Fat: 35g
- Saturated Fat: 12g
- Unsaturated Fat: 18g
- Trans Fat: 1g
- Carbohydrates: 55g
- Fiber: 4g
- Protein: 30g
- Cholesterol: 85mg
Keywords: Taco Melts, Beefy Melt Burrito, Taco Bell Copycat, Homemade Burrito, Golden Fries


