There’s something undeniably special about heart-shaped desserts, isn’t there? They instantly elevate any occasion, especially romantic ones, with their charming shape and sweet flavors. When I first made these delightful treats, I was surprised at how a simple twist could make such a big impact. Picture this: a cozy evening with your loved one, a candlelit dinner, and these heart-shaped delights waiting to steal the show. It’s like a little piece of love on a plate! This recipe is not only easy to whip up but also packs a punch in taste, making it perfect for anniversaries, Valentine’s Day, or just because. Trust me, your special someone will be swooning over these gorgeous heart-shaped desserts, and you’ll find yourself wanting to make them again and again!
Why You’ll Love This Recipe
Oh, let me tell you why heart-shaped desserts are an absolute game changer! First off, they’re incredibly easy to make, so you don’t have to be a pro in the kitchen to impress your loved ones. This recipe combines simple ingredients that come together quickly, making it perfect for those spontaneous romantic moments. And the taste? Wow! The rich cocoa flavor paired with light whipped cream creates a delightful contrast that will have your taste buds dancing with joy. Plus, heart-shaped desserts are perfect for any occasion that celebrates love—be it anniversaries, Valentine’s Day, or even just a sweet surprise on an ordinary day. Honestly, there’s just something magical about serving up a dessert shaped like a heart that makes every bite feel extra special. You’ll fall in love with this recipe, and so will everyone you share it with!
Ingredients List
Gathering your ingredients for these heart-shaped desserts is half the fun! Here’s everything you’ll need to create these sweet, cocoa-infused delights:
- 1 cup all-purpose flour: Make sure to spoon it into your measuring cup and level it off for accuracy.
- 1/2 cup unsweetened cocoa powder: This will bring that rich chocolate flavor that makes these desserts irresistible.
- 1 cup sugar: Regular granulated sugar works beautifully here to sweeten up the cake.
- 1/2 cup butter, softened: Leave it out at room temperature until it’s nice and soft, perfect for creaming!
- 2 large eggs: They should be at room temperature for the best mixing results.
- 1 teaspoon vanilla extract: A splash of vanilla adds warmth and depth to the flavor.
- 1/2 teaspoon baking powder: This is essential for helping your cake rise just right.
- 1/4 teaspoon salt: A little salt enhances the sweetness and balances the flavors.
- 1 cup heavy cream: This will become your luscious frosting, adding a delightful creaminess.
- 1/4 cup powdered sugar: For sweetening the whipped cream and giving it that silky texture.
With these ingredients at your fingertips, you’re all set to create something magical! Trust me, the aroma that fills your kitchen while these are baking will be heavenly!
How to Prepare Heart-shaped Desserts
Now that you’ve gathered your ingredients, let’s dive into the delightful process of making these heart-shaped desserts! I promise it’s easier than you think, and oh-so rewarding when you see that lovely heart shape emerge from the oven!
Step 1: Preheat and Prepare
First things first, preheat your oven to 350°F (175°C). This step is crucial because you want your cake to bake evenly and rise beautifully! While that’s heating up, take your heart-shaped pan and grease it generously with butter or a non-stick spray. I like to use a little bit of flour dusted on top for extra insurance against sticking. You want those gorgeous shapes to pop right out when they’re done!
Step 2: Mix Dry Ingredients
In a large bowl, combine your all-purpose flour, unsweetened cocoa powder, baking powder, and salt. Whisk it all together until it’s well blended—this helps ensure that the baking powder is evenly distributed, which is key for a nice rise. You’re aiming for a smooth mixture with no lumps, so take your time with this step!
Step 3: Cream Butter and Sugar
Next up, grab another bowl and cream the softened butter and sugar together. Use a hand mixer or a sturdy wooden spoon—whatever feels right for you. Beat it until it’s light and fluffy, about 3-5 minutes. This step is super important because it incorporates air into the batter, giving your cake that delightful texture. You want it to look pale and fluffy, almost like whipped cream!
Step 4: Combine Wet Ingredients
Now it’s time to add in the eggs and vanilla extract to your creamed butter mixture. Mix them in one at a time, ensuring each egg is fully incorporated before adding the next. This will help bind everything together and create a lovely, cohesive batter. The aroma of the vanilla will fill your kitchen—trust me, it’s divine!
Step 5: Combine Mixtures
Now comes the fun part—combining the dry ingredients with the wet mixture! Gradually add the dry mixture to the butter mixture, stirring gently until just combined. Be careful not to overmix; a few flour streaks are perfectly okay! This will keep your cake light and fluffy rather than dense.
Step 6: Baking
Pour your beautifully mixed batter into the prepared heart-shaped pan, smoothing it out with a spatula if needed. Pop it in the preheated oven and let it bake for about 25-30 minutes. To check for doneness, stick a toothpick in the center—if it comes out clean or with just a few moist crumbs, you’re golden! If it’s still gooey, give it a few more minutes.
Step 7: Cooling and Frosting
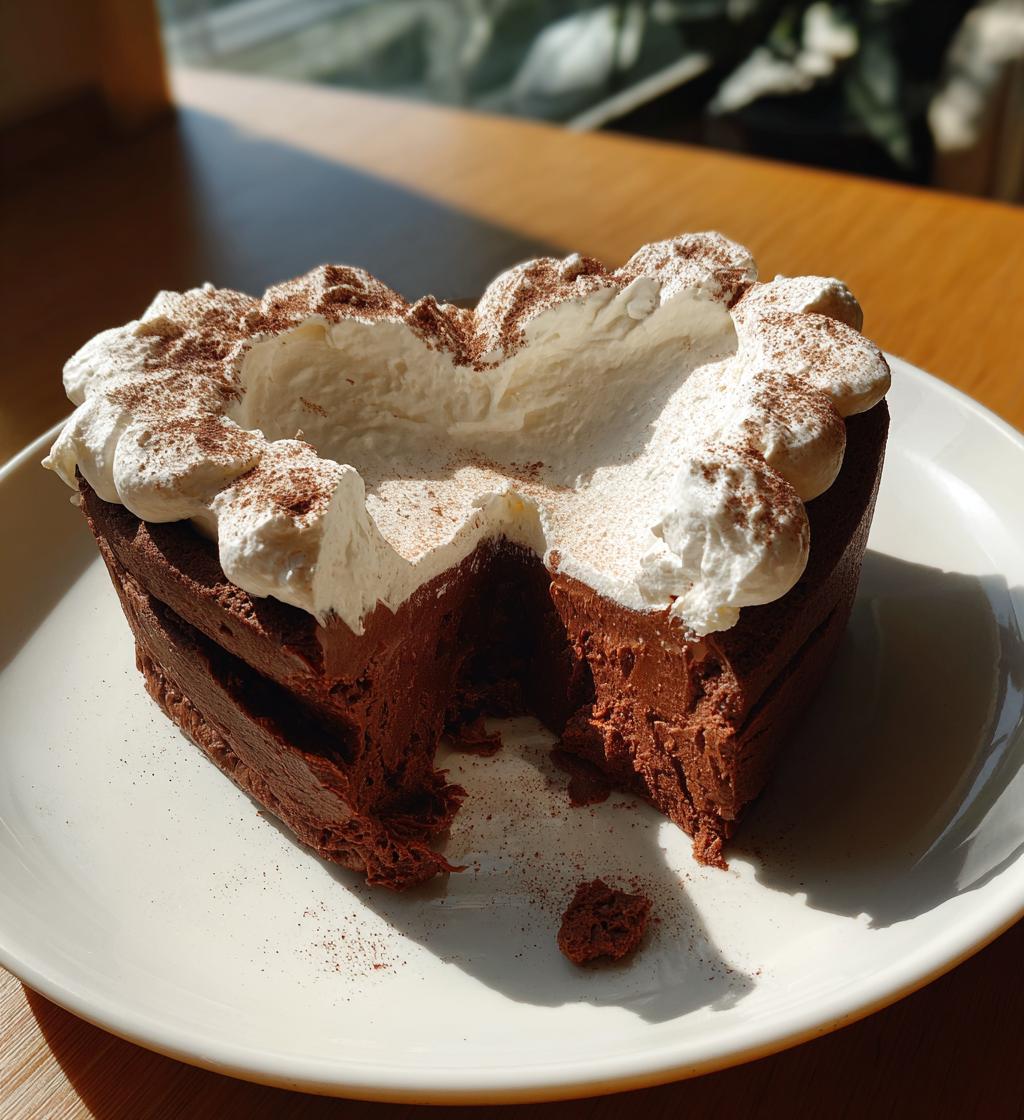
Once your cake is done, remove it from the oven and let it cool in the pan for about 10 minutes. This will make it easier to turn out without breaking. After that, gently invert it onto a wire rack to cool completely. While it’s cooling, whip up your heavy cream with the powdered sugar until soft peaks form. This fluffy frosting is the perfect finishing touch! Once the cake is cool, generously frost it with the whipped cream, and voilà! Your heart-shaped desserts are ready to impress!
Tips for Success
To ensure your heart-shaped desserts are nothing short of perfection, I’ve got some great tips for you! First, make sure your butter is at the right temperature—soft but not melted. This is crucial for that fluffy texture we all love. Also, when measuring your flour, spoon it into the cup and level it off rather than scooping it directly. This little trick prevents an overly dense cake!
If you’re feeling adventurous, try adding a splash of almond extract or a hint of orange zest to the batter for a unique twist. You can also mix in chocolate chips or chopped nuts for added texture. Just remember, if you add too many extras, it might affect the cake’s structure, so keep it balanced!
And don’t skip the cooling step—frosting a warm cake can lead to a gooey mess. Trust me, letting it cool completely will make your frosting look stunning. Lastly, if you’re in a hurry, you can make mini heart-shaped desserts in muffin tins instead of a larger pan. They’ll bake faster and still be adorable! Happy baking!
Nutritional Information
When it comes to heart-shaped desserts, it’s good to keep in mind that nutritional values can vary based on the specific ingredients and brands you use. While I can’t provide precise numbers, here’s a general idea of what you might expect per slice:
- Calories: Approximately 350
- Fat: About 18g (with 10g of saturated fat)
- Sugar: Around 25g
- Protein: Approximately 4g
- Carbohydrates: About 45g
These little delights are a sweet treat to enjoy during special occasions, but as always, moderation is key! Whether you’re counting calories or just indulging in a special moment, these heart-shaped desserts are sure to bring joy to your table.
Storage & Reheating Instructions
So, you’ve made these adorable heart-shaped desserts, and now you’ve got some leftovers—lucky you! To keep them fresh, make sure to store any uneaten cake in an airtight container at room temperature for up to three days. If you want to extend their life, you can refrigerate them, but be warned, the whipped cream frosting might lose some of its fluffiness. If you plan to keep them longer, consider wrapping individual slices in plastic wrap and then placing them in a freezer-safe bag; they’ll last up to three months in the freezer!
When you’re ready to enjoy them again, just let the cake sit at room temperature for about 30 minutes to soften up. If you want to bring back that whipped cream fluffiness, you can whip up a bit more cream to top it off fresh again. Trust me, a little extra whipped cream never hurt anyone! Enjoy every last bite!
FAQ Section
Can I use a different pan shape?
Absolutely! While heart-shaped desserts are super cute, you can easily use other shapes without affecting the recipe. If you have round or square cake pans, those will work just fine. Just keep an eye on the baking time, as different pan shapes may require slight adjustments. For cupcakes, a muffin tin is perfect, and they’ll bake up just as lovely! The key is to make sure your pan is well-greased to ensure easy release when you’re ready to devour your creations!
How can I make these gluten-free?
Making these heart-shaped desserts gluten-free is a piece of cake—pun intended! Simply swap out the all-purpose flour for a gluten-free blend that measures cup-for-cup. Look for one that contains xanthan gum, which helps mimic the structure that gluten normally provides. If you’re feeling adventurous, you can also try almond flour or coconut flour, but remember, those will require adjustments to the other ingredients and may change the texture a bit. Just be sure to check the packaging for any specific baking instructions!
What can I serve with heart-shaped desserts?
The options are endless when it comes to pairing! Fresh strawberries or raspberries add a lovely touch of color and flavor that complements the chocolate perfectly. A drizzle of chocolate sauce or a dollop of extra whipped cream can elevate your dessert to another level of indulgence. For a more decadent experience, consider serving it with a scoop of vanilla ice cream or a side of chocolate ganache. Honestly, anything that adds a little sweetness will pair beautifully with your heart-shaped desserts!
Final Thoughts
So there you have it—your guide to creating the most delightful heart-shaped desserts! I can’t wait for you to try this recipe and see how it brings a little extra love to your table. Whether it’s for a special occasion or just a sweet surprise, I know these treats will leave a lasting impression. Don’t forget to share your results with me! I’d love to hear about your baking adventures and see those gorgeous heart shapes. Happy baking, and may your kitchen be filled with love and laughter!
Print
Heart-shaped desserts that will steal your heart today
- Total Time: 50 minutes
- Yield: 8 servings 1x
- Diet: Vegetarian
Description
A delightful collection of heart-shaped desserts perfect for any romantic occasion.
Ingredients
- 1 cup all-purpose flour
- 1/2 cup unsweetened cocoa powder
- 1 cup sugar
- 1/2 cup butter, softened
- 2 large eggs
- 1 teaspoon vanilla extract
- 1/2 teaspoon baking powder
- 1/4 teaspoon salt
- 1 cup heavy cream
- 1/4 cup powdered sugar
Instructions
- Preheat your oven to 350°F (175°C).
- In a bowl, mix flour, cocoa powder, baking powder, and salt.
- In another bowl, cream butter and sugar until light.
- Add eggs and vanilla to the butter mixture, then mix well.
- Combine dry ingredients with the wet mixture.
- Pour batter into a greased heart-shaped pan.
- Bake for 25-30 minutes or until a toothpick comes out clean.
- Let the cake cool completely.
- Whip heavy cream with powdered sugar until soft peaks form.
- Frost the cooled cake with whipped cream.
Notes
- Use food coloring for a more festive look.
- Store leftovers in an airtight container.
- Pair with fresh strawberries for garnish.
- Prep Time: 20 minutes
- Cook Time: 30 minutes
- Category: Dessert
- Method: Baking
- Cuisine: American
Nutrition
- Serving Size: 1 slice
- Calories: 350
- Sugar: 25g
- Sodium: 150mg
- Fat: 18g
- Saturated Fat: 10g
- Unsaturated Fat: 8g
- Trans Fat: 0g
- Carbohydrates: 45g
- Fiber: 2g
- Protein: 4g
- Cholesterol: 60mg
Keywords: Heart-shaped desserts, romantic desserts, baking, sweet treats


