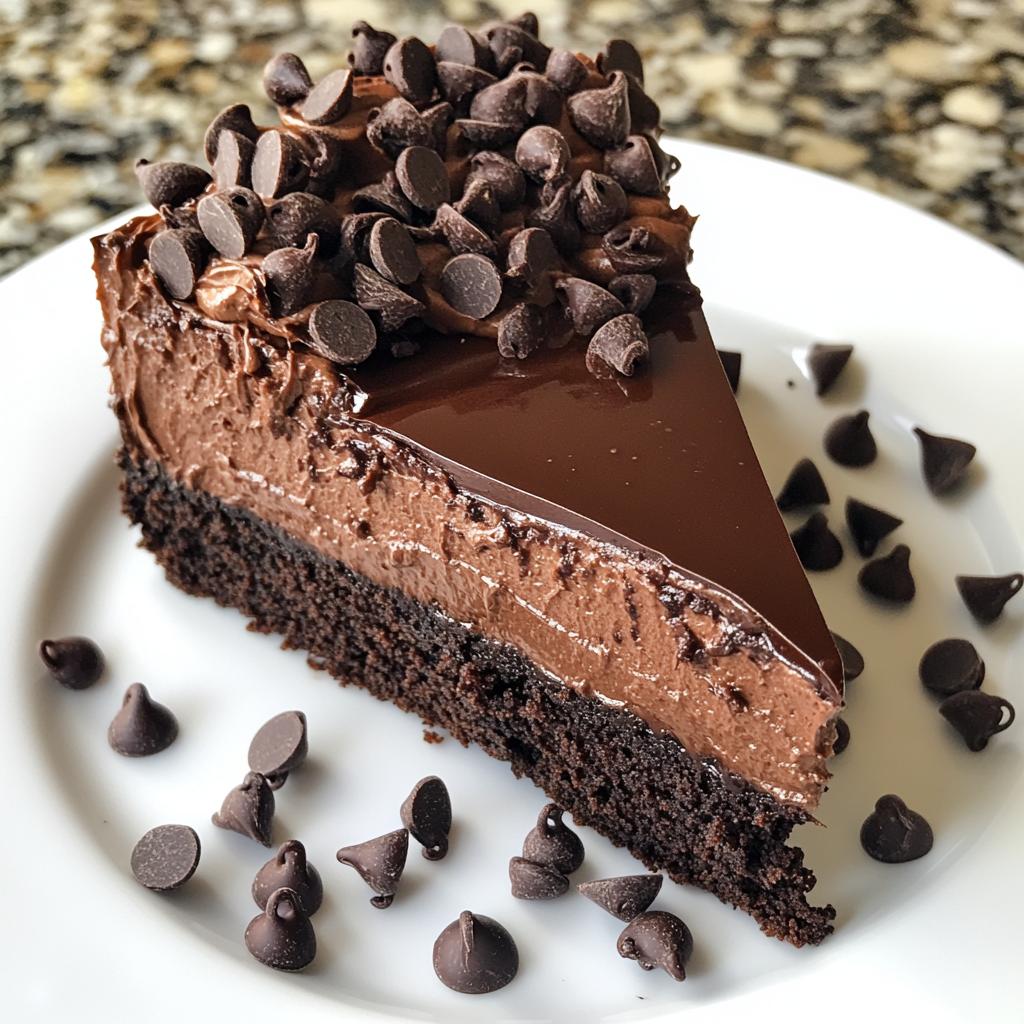
If you’re looking for a dessert that truly earns its name, this Death by Chocolate Cheesecake is the stuff of chocolate lovers’ dreams. I first made this showstopper for my husband’s birthday—one bite and he declared it his favorite dessert ever (and this from a man who usually prefers pie!). The magic happens when rich cream cheese meets double doses of chocolate—both melted and cocoa powder—creating a smooth, decadent filling that sits atop buttery chocolate cookie crumbs. What I love most? It’s surprisingly simple to make, yet tastes like you spent all day in a fancy bakery. Just wait till you see how the chocolate chips on top glisten when you slice into it—pure heaven!
Why You’ll Love This Death by Chocolate Cheesecake
Trust me, once you try this cheesecake, it’ll become your go-to dessert for every special occasion (and let’s be honest—Tuesday nights count too). Here’s why it’s a winner:
- Decadent to the max: Double the chocolate means every bite is rich, fudgy, and downright addictive
- Creamy dreamy texture: The sour cream and eggs create a velvety smooth filling that melts on your tongue
- Surprisingly easy: No fancy techniques—just mix, bake, and chill (the hardest part is waiting!)
- Crowd-pleaser magic: I’ve yet to meet anyone who can resist a slice of this Death by Chocolate Cheesecake
Ingredients for Death by Chocolate Cheesecake
Gathering the right ingredients is half the battle with this recipe—but don’t worry, everything’s easy to find. Just promise me one thing: splurge on the chocolate. Since it’s the star of the show, cheap stuff just won’t give you that deep, luxurious flavor. Here’s what you’ll need:
- 2 cups chocolate cookie crumbs (about 24 Oreo cookies with filling scraped out)
- 1/2 cup unsalted butter, melted (and slightly cooled—you don’t want it piping hot)
- 24 oz cream cheese, softened (this is three standard blocks—leave them out for 2 hours)
- 1 cup granulated sugar (yes, the full cup—we’re celebrating here!)
- 3 large eggs, room temperature (cold eggs can make the batter lumpy)
- 1 tsp pure vanilla extract (imitation just won’t cut it)
- 1 cup sour cream (full-fat makes the creamiest texture)
- 1 cup semi-sweet chocolate, melted and cooled (I use Ghirardelli bars)
- 1/4 cup cocoa powder (Dutch-processed gives richer color)
- 1/2 cup heavy cream (for optional ganache topping)
- 1/2 cup chocolate chips for garnish (mini chips look extra fancy)
Pro tip: When melting chocolate, do it slowly—either in a double boiler or microwave at 50% power stirring every 30 seconds. Burnt chocolate is heartbreaking!
Equipment You’ll Need
No fancy gadgets required here—just the basics every baker should have. Grab your trusty 9-inch springform pan (the removable sides are lifesavers!), a couple mixing bowls, an electric mixer (handheld works fine), a sturdy spatula, and your measuring cups and spoons. That’s it—you’re ready to create chocolate magic!
How to Make Death by Chocolate Cheesecake
Now for the fun part—bringing this chocolate masterpiece to life! Don’t let the layers intimidate you; each step is straightforward if you follow my grandma’s golden rule: patience is your best ingredient. I’ve broken it down into three simple phases that’ll guide you to cheesecake glory.
Step 1: Prepare the Crust
First things first—that buttery chocolate foundation! In a medium bowl, mix your chocolate cookie crumbs with the melted butter until it looks like wet sand. (Pro tip: If the mixture doesn’t hold together when squeezed, add another tablespoon of butter.) Pour this into your springform pan and press firmly with the bottom of a glass or measuring cup—get it nice and compact, especially around the edges where it likes to crumble.
Pop it in your preheated 325°F oven for exactly 10 minutes—this quick bake sets the crust so it won’t turn soggy under that luscious filling. Let it cool on the counter while you make the filling. (No cheating—a warm crust makes for a weepy cheesecake!)
Step 2: Make the Cheesecake Filling
Here’s where the magic happens! Beat your softened cream cheese and sugar together on medium speed until completely smooth—about 2-3 minutes. Scrape down the bowl (those sneaky lumps hide in the corners!) and add eggs one at a time, mixing just until each disappears. Overbeating here invites too much air, which leads to cracks—we want velvet, not volcanoes!
Now the chocolatey goodness: gently stir in vanilla, sour cream, that glorious melted chocolate, and cocoa powder. I fold these in by hand with a spatula—it gives me more control and prevents overmixing. The batter should look like the richest chocolate pudding you’ve ever seen. Pour it over your cooled crust and smooth the top with an offset spatula (a butter knife works too).
Step 3: Bake and Chill
Slide your creation into the oven’s center rack and set a timer for 50 minutes. The cheesecake is done when the edges look set but the center still jiggles slightly—like firm Jell-O—when you nudge the pan. Turn off the oven, crack the door open with a wooden spoon, and let it cool gradually for an hour. This slow cooldown prevents dramatic cracks (though if one appears, we’ll cover it with chocolate chips later!).
Here’s the hardest part: patience! Move the cheesecake to the fridge—uncovered—for at least 4 hours, but overnight is even better. I know it’s tempting to peek, but that chill time lets the flavors deepen and the texture firm up for perfect slices. Trust me, it’s worth the wait!
Tips for the Perfect Death by Chocolate Cheesecake
After making this cheesecake more times than I can count (okay, maybe I can count—it’s a lot!), I’ve learned a few tricks that guarantee perfection every time:
- Room temp is key: Cold cream cheese lumps ruin the smooth texture—leave it out for 2 hours before mixing
- Mix gently: Once eggs are added, switch to hand mixing—overbeating causes cracks and air pockets
- Water bath magic: For extra insurance against cracks, bake the pan in a roasting pan with 1 inch hot water
- Slow cooling: That hour in the turned-off oven isn’t optional—it prevents dramatic sinking
- Chill time matters: Cutting into a warm cheesecake is like slicing soup—wait those full 4 hours!
Follow these simple rules, and you’ll get that dreamy smooth texture every chocolate lover craves!
Variations for Death by Chocolate Cheesecake
While the classic version is pure perfection, sometimes I love mixing things up—especially when I’m craving different flavors or want to impress guests with something extra special. Here are my favorite twists on this Death by Chocolate Cheesecake that still honor its rich, decadent soul:
- White Chocolate Drizzle: Melt 1/2 cup white chocolate with 1 tbsp heavy cream and zigzag it over the chilled cheesecake—the sweet contrast makes those chocolate flavors pop!
- Raspberry Swirl: Before baking, dollop 1/2 cup seedless raspberry jam in spoonfuls over the batter, then swirl gently with a knife for gorgeous marbled ribbons.
- Espresso Boost: Add 1 tbsp instant espresso powder to the filling—it doesn’t make it taste like coffee, just intensifies the chocolate flavor like magic.
- Peppermint Patty: Stir 1/2 tsp peppermint extract into the batter and top with crushed candy canes for a festive holiday version.
- Salted Caramel: Drizzle warm caramel sauce over each slice and sprinkle with flaky sea salt—the sweet-salty combo is unreal!
The best part? You can mix and match these ideas—last Christmas I did espresso powder and white chocolate drizzle. Let’s just say the plates were licked clean!
Serving and Storing Death by Chocolate Cheesecake
Now comes the best part—showing off your masterpiece! I always take this cheesecake straight from the fridge to the table—cold slices hold their shape beautifully when cut. For those picture-perfect pieces, run a sharp knife under hot water, wipe it dry, then slice in one smooth motion (repeat between cuts). Here’s how to make it extra special:
Garnish game strong: Right before serving, shower the top with chocolate shavings (a vegetable peeler works great on a chocolate bar) or dust with cocoa powder. For birthdays, I pipe little whipped cream rosettes around the edge—the fluffy contrast with the dense cheesecake is heavenly. Fresh raspberries or a drizzle of warm caramel sauce never hurt either!
Storage smarts: Leftovers? (As if!) Cover any remaining cheesecake tightly with plastic wrap—press it right against the surface to prevent drying. It’ll keep happily in the fridge for up to 5 days. Pro tip: For individual portions, pre-slice and store pieces between parchment paper in an airtight container—perfect for sneaky midnight snacks!
One warning—don’t freeze this cheesecake unless you’ve tested your freezer’s temperature. Chocolate can develop weird textures when frozen and thawed. But honestly, between you and me? This dessert never lasts long enough to worry about long-term storage!
Nutrition Information
Let’s be real—this Death by Chocolate Cheesecake isn’t diet food, but every bite is worth it! These are estimated values per slice—nutrition varies based on brands and measurements. Here’s the delicious breakdown:
- Calories: 450 (but who’s counting when it’s this good?)
- Fat: 30g (18g saturated—that’s where the creamy magic happens)
- Carbohydrates: 40g (30g sugar—it’s a celebration!)
- Protein: 6g (eggs and cream cheese pack a protein punch)
- Sodium: 200mg (not bad for such a decadent treat)
- Fiber: 3g (thank you, cocoa powder!)
Pro tip: If you’re watching portions, cut thinner slices—but good luck stopping at just one! Remember, these numbers are guidelines—your exact results may vary slightly depending on ingredients. But honestly? When something tastes this amazing, the numbers hardly matter!
Frequently Asked Questions
Over the years, I’ve gotten so many questions about this Death by Chocolate Cheesecake—and I love helping fellow bakers nail it on their first try! Here are the answers to the questions I hear most often:
Can I use dark chocolate instead of semi-sweet?
Absolutely! Dark chocolate (70% cacao works beautifully) will give your cheesecake an even richer, deeper chocolate flavor. Just remember—the higher the cacao percentage, the less sweet your dessert will be. You might want to add an extra tablespoon of sugar if you go super dark.
How do I prevent cracks in my cheesecake?
Oh, the dreaded cracks! My three golden rules: 1) Don’t overmix the batter after adding eggs, 2) Cool it slowly in the turned-off oven, and 3) Never skip the refrigeration step. If a crack does appear? No stress—just cover it with chocolate chips or whipped cream. It’ll still taste amazing!
Can I make this gluten-free?
You bet! Simply swap the chocolate cookies for gluten-free chocolate wafers (I like Kinnikinnick brand) and check that your cocoa powder is gluten-free (most are). The filling is naturally gluten-free, so just that crust swap does the trick.
Why does my cheesecake filling look lumpy?
Nine times out of ten, this happens when the cream cheese isn’t fully softened. Leave those blocks out for a good 2 hours! If you’re in a pinch, microwave them for 10-second bursts—but be careful not to melt them. Also, scrape the bowl often while mixing to catch any sneaky lumps.
Can I make this without a springform pan?
A 9-inch deep cake pan lined with parchment paper (with overhanging edges) can work in a pinch—but be extra careful when removing it. The springform’s removable sides really are the MVP here for clean slices. Worth the investment if you bake cheesecakes often!
Try this Death by Chocolate Cheesecake and share your results in the comments! I’d love to hear about your chocolatey triumphs (and any new questions that pop up). Happy baking!
Print
5-Star Death by Chocolate Cheesecake to Die For
- Total Time: 5 hours 20 minutes
- Yield: 12 servings 1x
- Diet: Vegetarian
Description
A rich and decadent chocolate cheesecake that combines creamy cheesecake with intense chocolate flavors.
Ingredients
- 2 cups chocolate cookie crumbs
- 1/2 cup unsalted butter, melted
- 24 oz cream cheese, softened
- 1 cup granulated sugar
- 3 large eggs
- 1 tsp vanilla extract
- 1 cup sour cream
- 1 cup semi-sweet chocolate, melted
- 1/4 cup cocoa powder
- 1/2 cup heavy cream
- 1/2 cup chocolate chips for garnish
Instructions
- Preheat oven to 325°F (165°C).
- Mix cookie crumbs and melted butter, press into a 9-inch springform pan.
- Bake crust for 10 minutes, then let cool.
- Beat cream cheese and sugar until smooth.
- Add eggs one at a time, mixing well after each.
- Stir in vanilla, sour cream, melted chocolate, and cocoa powder.
- Pour filling over crust and smooth the top.
- Bake for 50-60 minutes until center is set.
- Let cool, then refrigerate for at least 4 hours.
- Garnish with chocolate chips before serving.
Notes
- Use high-quality chocolate for best results.
- Let cheesecake cool completely before slicing.
- Store leftovers in the refrigerator.
- Prep Time: 20 minutes
- Cook Time: 60 minutes
- Category: Dessert
- Method: Baking
- Cuisine: American
Nutrition
- Serving Size: 1 slice
- Calories: 450
- Sugar: 30g
- Sodium: 200mg
- Fat: 30g
- Saturated Fat: 18g
- Unsaturated Fat: 10g
- Trans Fat: 0g
- Carbohydrates: 40g
- Fiber: 3g
- Protein: 6g
- Cholesterol: 120mg
Keywords: chocolate cheesecake, death by chocolate, dessert recipe, chocolate dessert


