Okay, let me tell you about my latest obsession: Crack Chicken Tenders. These little beauties are the ultimate weeknight lifesaver—crispy, golden, and packed with flavor, all without the hassle of deep frying. I first stumbled on this recipe during one of those “what’s for dinner?” panic moments, and let me tell you, it’s been a game-changer ever since. The secret? A buttery cracker crust that’s so crunchy, you’ll hear it with every bite. Plus, they’re baked, not fried, so you can feel a little better about indulging.
What I love most is how versatile they are. Need a quick family dinner? Done. Hosting a last-minute game night? These are the perfect finger food. Even my picky eater kids can’t resist them. And the best part? They’re ready in about 30 minutes, start to finish. Trust me, once you try these Crack Chicken Tenders, they’ll become a regular in your rotation too. Let’s get cooking!
Why You’ll Love These Crack Chicken Tenders
Honestly, these tenders check all the boxes for me—quick, delicious, and fuss-free. Here’s why they’re a total win:
- Crispy perfection without deep frying: That golden, crackly crust? It’s all thanks to the buttery crackers and Parmesan combo. No greasy mess, just crunch you can hear.
- Ready in a flash: From fridge to table in 35 minutes flat. Even on my most chaotic nights, these save dinner.
- Kid-approved (and adult-loved): My littles gobble these up, but let’s be real—I’ve caught myself sneaking extras straight from the baking sheet.
- One-pan wonder: Line your sheet with parchment, and cleanup is literally a 30-second job. More time for second helpings.
- Crave-worthy leftovers: They reheat like a dream in the air fryer—next-day lunch just got an upgrade.
Seriously, what’s not to love? Even my “I don’t cook” friends nail this recipe every time.
Ingredients for Crack Chicken Tenders
Okay, let’s talk ingredients – because getting these right makes all the difference between “good” and “oh-my-goodness-I-need-another-bite” tenders. Here’s exactly what you’ll need (and yes, I’ve learned the hard way that substitutions can wait until later!):
- 1 lb chicken tenders – about 8-10 pieces, or you can slice breasts into strips if that’s what you’ve got
- 1 cup crushed buttery crackers – I’m talking Ritz or Club crackers here, crushed until they’re somewhere between sand and small pebbles (pro tip: toss them in a bag and roll with a rolling pin – stress relief and prep in one!)
- 1/2 cup grated Parmesan cheese – the green can stuff works fine here, but if you’ve got fresh, by all means use it
- 1 tsp garlic powder – not garlic salt, we’ll add our own salt separately
- 1 tsp paprika – regular sweet paprika gives that gorgeous golden color
- 1/2 tsp salt – I use kosher, but table salt works too (just use a tiny bit less)
- 1/4 tsp black pepper – freshly ground if you’re feeling fancy
- 1/2 cup melted butter – unsalted is my preference since we control the salt separately
- 1 egg, beaten – just a quick fork whisk to blend yolk and white
See? Nothing crazy or hard to find. I always keep these basics on hand for those “what’s for dinner?” emergencies. Now let me tell you about the one time I tried to skip the butter… let’s just say the crackers didn’t stick and we ended up with naked chicken and a very sad dinner. Lesson learned!
How to Make Crack Chicken Tenders
Alright, let’s get down to business! Making these tenders is seriously easy, but I’ve picked up a few tricks over dozens of batches that take them from “pretty good” to “can’t-stop-eating-them” territory. Follow these steps closely – your taste buds will thank you.
Step 1: Prep the Coating
First things first – that magical crunchy coating. Grab your biggest mixing bowl (trust me, you’ll want room to maneuver) and toss in your crushed crackers, Parmesan, garlic powder, paprika, salt, and pepper. Now here’s my secret: mix it with your fingers! Sounds weird, but breaking up any Parmesan clumps ensures every bite gets evenly seasoned. You’ll know it’s ready when the mixture smells like cheesy, garlicky heaven.
Step 2: Coat the Chicken
Time for the messy (but fun!) part. Set up your assembly line: melted butter in one shallow bowl, cracker mix in another, and chicken tenders waiting patiently nearby. Dip each tender in butter first – let the excess drip off for about 3 seconds (this prevents a soggy bottom). Then roll it aggressively in the crumbs, pressing gently so they really stick. Pro tip: use one hand for wet ingredients and one for dry to avoid “breadcrumb fingers” syndrome!
Step 3: Bake to Perfection
Arrange your coated beauties on a parchment-lined baking sheet – don’t let them touch or they’ll steam instead of crisp up. Pop them in your preheated 400°F oven for 10 minutes, then flip them carefully with tongs (this is when that golden crust starts forming). Bake another 10-15 minutes until they’re deep golden brown and register 165°F internally. Want extra crunch? Hit them with the broiler for the last 2 minutes, but WATCH CLOSELY – they go from perfect to burnt alarmingly fast!
Now comes the hardest part: letting them rest for 5 minutes before devouring. This lets the crust set so it doesn’t all fall off at first bite. The wait builds anticipation… and gives you time to choose your dipping sauce!
Tips for the Best Crack Chicken Tenders
After making these tenders more times than I can count (okay, maybe I should keep count – they’re that good), I’ve picked up some game-changing tricks. These little tweaks take your tenders from “nice” to “where have these been all my life?” territory.
Broiler magic for that extra crunch: If you’re like me and live for that audible crunch, hit them with the broiler for just 1-2 minutes at the end. But stay right by the oven – I learned the hard way when I got distracted by my phone and turned my beauties into little charcoal briquettes. Oops!
Parchment paper is non-negotiable: That first time I skipped it because I ran out? Let’s just say I spent more time scrubbing the pan than eating. The parchment not only prevents sticking but gives you that perfect even browning underneath.
Give them space to breathe: Crowding the baking sheet is the enemy of crispiness. I leave about an inch between each tender – if I have to bake in batches, so be it. A little patience means maximum crunch in every bite.
Butter temperature matters: Melt your butter but let it cool slightly before dipping. Too hot and it makes the coating slide right off. I wait until it’s warm but not scalding – about the temperature of a nice bath.
The flip is your friend: That midway flip isn’t just for show – it ensures even browning on both sides. I use sturdy tongs and do it quickly but gently to keep all that delicious coating intact.
One last thing – resist the urge to move them around while baking! Let them do their thing undisturbed until flip time. Trust me, the crispy payoff is worth it.
Ingredient Substitutions & Variations
Listen, I’m all about sticking to the original recipe (because it’s perfect), but life happens! Here’s how to adapt these crack chicken tenders when your pantry rebels or dietary needs change – without sacrificing that glorious crunch.
Cracker emergencies: Out of buttery crackers? Panko breadcrumbs make a great swap – just add an extra tablespoon of melted butter to the mix for that rich flavor. Cornflakes crushed super fine work too, or even crushed pretzels for a salty twist. My cousin swears by Cheez-Its when she’s feeling extra.
Cheese situations: No Parmesan? Pecorino Romano or even Asiago can step in. For dairy-free, nutritional yeast gives that umami punch, though you’ll miss some crispiness.
Spice it up: Swap regular paprika for smoked paprika to add depth, or throw in 1/4 teaspoon cayenne if you like heat. I sometimes add a pinch of onion powder when I’m feeling fancy. My sister adds a teaspoon of ranch seasoning to the mix – controversial but delicious.
Butter alternatives: For my lactose-sensitive friends, olive oil works in a pinch, though the flavor changes slightly. Ghee is my top choice for keeping that rich taste without the lactose.
Chicken options: No tenders? Boneless thighs cut into strips stay juicier (just bake 3-5 minutes longer). For a lighter version, turkey tenders work beautifully too.
Remember: every substitution changes the final product a bit. My golden rule? Only swap one ingredient at a time until you know how it behaves. That disastrous “healthy” version where I tried almond flour AND olive oil? We don’t talk about that.
Serving Suggestions
Now for the fun part – how to serve these golden beauties! My family devours these tenders straight off the baking sheet (who can blame them?), but here are my favorite ways to turn them into a full meal that always gets rave reviews:
- The classic trio: Honey mustard and ranch are obvious but perfect dipping partners. For something different, mix equal parts BBQ sauce and mayo with a squeeze of lime – it’s weirdly addictive.
- Salad superstar: Slice cooled tenders over crisp romaine with cherry tomatoes, avocado, and a buttermilk dressing. Leftovers make the BEST lunch salad – the crust stays surprisingly crisp!
- Comfort food plate: Pair with roasted garlic mashed potatoes and roasted broccoli (toss the broccoli with olive oil and the same seasonings as the chicken – it ties everything together).
- Game night spread: Skewer bite-sized pieces with toothpicks next to small cups of different sauces. Bonus points if you make a trio like sriracha mayo, blue cheese, and sweet chili.
- Next-level sandwich: Pile them on a toasted brioche bun with slaw and pickles. Pro tip: lightly toast the bun with garlic butter first. You’re welcome.
My kids’ current obsession? Cutting them into “chips” and dipping in ketchup mixed with hot sauce. Not my first choice, but hey – they’re eating protein without complaint! The beauty of these tenders is how they work with literally anything. Even just a squeeze of lemon over the top makes them feel fancy.
Storage & Reheating
Okay, let’s talk leftovers – because if you somehow don’t finish these crack chicken tenders in one sitting (no judgment if you do!), you’ll want to know how to keep that glorious crunch intact. I’ve had my share of sad, soggy reheated chicken, so believe me when I say these methods actually work!
The fridge situation: Let the tenders cool completely before storing – trapping steam leads to sogginess. I use an airtight container with parchment between layers, and they stay perfect for up to 3 days. That one time I left them in a ziplock? Let’s just say we had chicken-flavored crackers instead of crack chicken.
Reheating magic: Your oven or air fryer is your best friend here. For oven: 375°F on a wire rack (so air circulates) for about 5-7 minutes. Air fryer? Even better – 350°F for 3-4 minutes brings back that just-baked crispiness. Microwave is emergency-only – it’ll taste fine but lose all texture. Pro tip: spritz with a tiny bit of oil before reheating for extra crisp revival!
Freezer hack: These freeze surprisingly well! Place baked-and-cooled tenders on a parchment-lined sheet, freeze solid (about 2 hours), then transfer to a freezer bag. They’ll keep for 2 months. Reheat straight from frozen in a 400°F oven for 12-15 minutes – no thawing needed. Perfect for last-minute lunches when you’re running late (which, let’s be real, is always).
The best part? These taste almost as good reheated as fresh. Just between us, I sometimes make extra just to have them ready for those “too tired to cook” nights. Shh, our secret!
Crack Chicken Tenders FAQs
I get questions about these tenders all the time – here are the answers to everything you might wonder (plus a few things you didn’t know you needed to ask!):
Can I use chicken breasts instead of tenders?
Absolutely! Just slice boneless, skinless breasts into 1-inch thick strips. They’ll take about 2-4 minutes longer to bake – use a meat thermometer to check for that perfect 165°F inside. Pro tip: pound slightly uneven pieces to even thickness so they cook uniformly.
How do I prevent sogginess?
Three secrets: 1) Let excess butter drip off before coating, 2) Don’t overcrowd the baking sheet (steam is the enemy!), and 3) That midway flip is non-negotiable. If they still seem soft, 2 minutes under the broiler fixes everything – just watch like a hawk!
Can I make these ahead of time?
You can prep the coating mixture up to 3 days in advance (store in an airtight container), but coat and bake right before serving for maximum crispiness. The one time I pre-coated and refrigerated? The crackers got weirdly soggy – learn from my mistake!
Why isn’t my coating sticking?
Usually means your butter was too hot (let it cool slightly) or you didn’t press firmly enough when coating. For stubborn pieces, I sometimes do a quick second dip in butter and crumbs – messy but effective!
Can I air fry these instead?
Yes! 375°F for 10-12 minutes, flipping halfway. They cook faster so check early – and you might need to work in batches. The air fryer gives insane crunch, though I miss the golden evenness of oven-baked sometimes.
Still have questions? Drop them in the comments – I test every variation so you don’t have to! (And yes, that includes the disastrous “gluten-free breadcrumb” experiment we don’t discuss at family dinners.)
Nutritional Information
Now, I’m no nutritionist (shocking, I know!), but here’s what you should know about these crack chicken tenders nutrition-wise. First off – they’re packed with protein from all that chicken, and the Parmesan adds a calcium boost too. That said, between the buttery crackers and, well, the butter, these are definitely an “enjoy in moderation” kind of treat.
The exact numbers can vary wildly depending on your ingredients – like did you use full-fat or reduced-fat crackers? How heavy-handed were you with the Parmesan? (No judgment, I’ve been there.) That’s why I don’t obsess over precise counts – life’s too short to measure every gram when you’re craving something delicious!
Here’s my philosophy: these are way better for you than deep-fried versions since they’re baked, and you’re getting real ingredients without any weird preservatives. Pair them with a big salad or roasted veggies, and you’ve got yourself a balanced meal that satisfies the crunch craving without going overboard.
Remember: Nutritional values are estimates and will vary based on specific ingredients/brands used. When in doubt, check your packaging or consult a nutrition calculator if you’re tracking closely.
Now go enjoy your tenders without overthinking it – sometimes the soul needs crispy, cheesy comfort food more than the body needs perfect macros!
Ready to Make Some Magic in the Kitchen?
Alright, my fellow crunch enthusiasts – it’s go time! I’ve shared all my hard-earned secrets for perfect crack chicken tenders, from the life-changing broiler trick to my parchment paper obsession. Now it’s your turn to experience the crispy, cheesy joy for yourself. Seriously, what are you waiting for? That chicken isn’t going to coat itself!
When you make these (notice I said “when,” not “if”), promise me you’ll come back and tell me how they turned out. Did you stick to the classic recipe or try one of the fun variations? Any brilliant new dipping sauce discoveries? Spill all the juicy details in the comments – I read every single one and love hearing your kitchen adventures!
Oh, and don’t forget to take a quick pic before they disappear (because they will). Tag me if you share it – nothing makes me happier than seeing your crispy creations! Now grab those crackers and get baking. Your new favorite chicken tender experience awaits…
Print
30-Minute Crack Chicken Tenders: Irresistibly Crunchy Bliss
- Total Time: 35 mins
- Yield: 4 servings 1x
- Diet: Low Lactose
Description
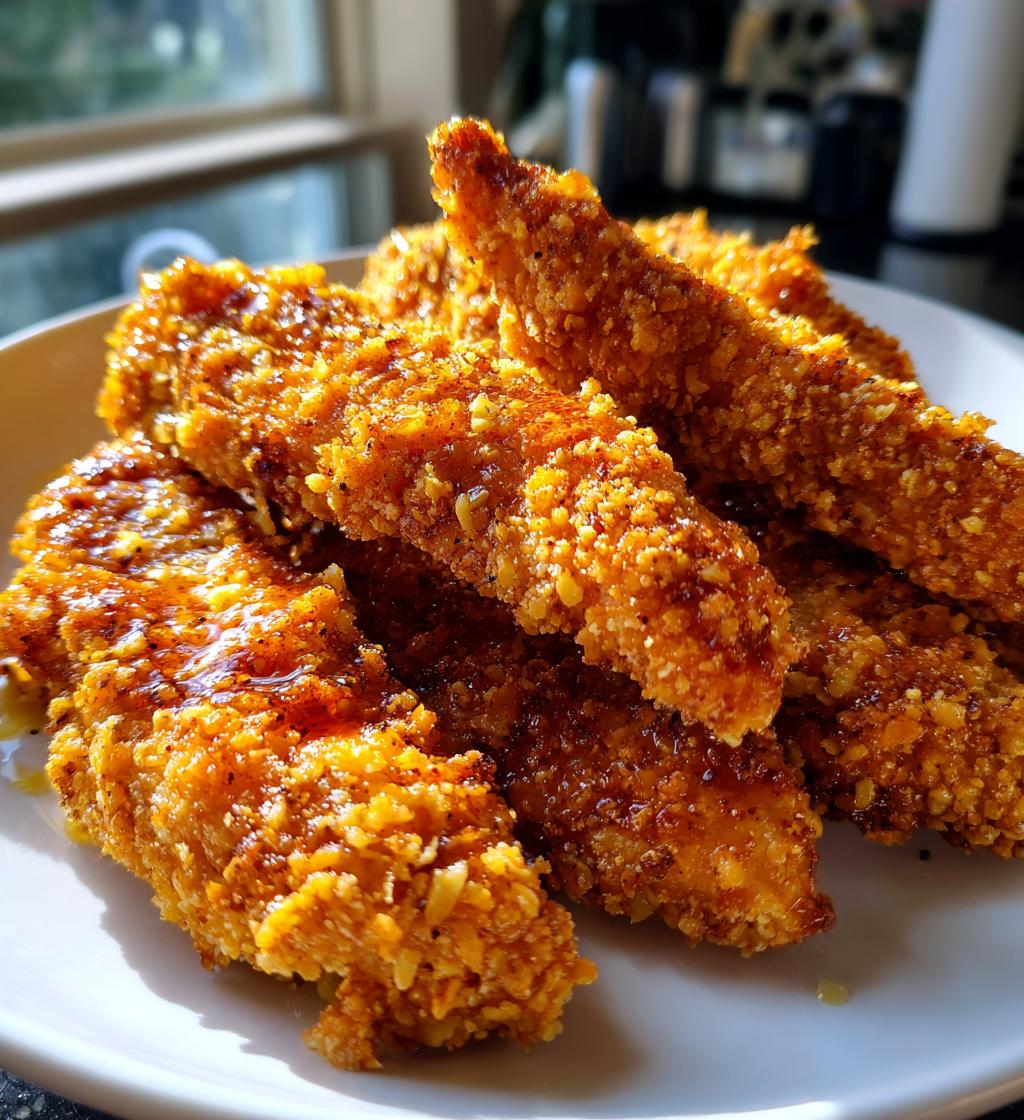
Crispy and flavorful chicken tenders coated with a crunchy cracker crust, perfect for a quick meal or snack.
Ingredients
- 1 lb chicken tenders
- 1 cup crushed buttery crackers
- 1/2 cup grated Parmesan cheese
- 1 tsp garlic powder
- 1 tsp paprika
- 1/2 tsp salt
- 1/4 tsp black pepper
- 1/2 cup melted butter
- 1 egg, beaten
Instructions
- Preheat oven to 400°F (200°C). Line a baking sheet with parchment paper.
- In a shallow bowl, mix crushed crackers, Parmesan, garlic powder, paprika, salt, and pepper.
- Dip each chicken tender in melted butter, then coat evenly in the cracker mixture.
- Place coated tenders on the baking sheet. Bake for 20-25 minutes, flipping halfway, until golden and cooked through.
- Serve hot with your favorite dipping sauce.
Notes
- For extra crispiness, broil for the last 2 minutes.
- Replace crackers with panko breadcrumbs for a different texture.
- Store leftovers in an airtight container for up to 3 days.
- Prep Time: 10 mins
- Cook Time: 25 mins
- Category: Main Dish
- Method: Baked
- Cuisine: American
Nutrition
- Serving Size: 3 tenders
- Calories: 320
- Sugar: 1g
- Sodium: 550mg
- Fat: 18g
- Saturated Fat: 9g
- Unsaturated Fat: 7g
- Trans Fat: 0g
- Carbohydrates: 12g
- Fiber: 1g
- Protein: 28g
- Cholesterol: 120mg
Keywords: Crack Chicken Tenders, Baked Chicken, Easy Dinner, Crunchy Chicken


