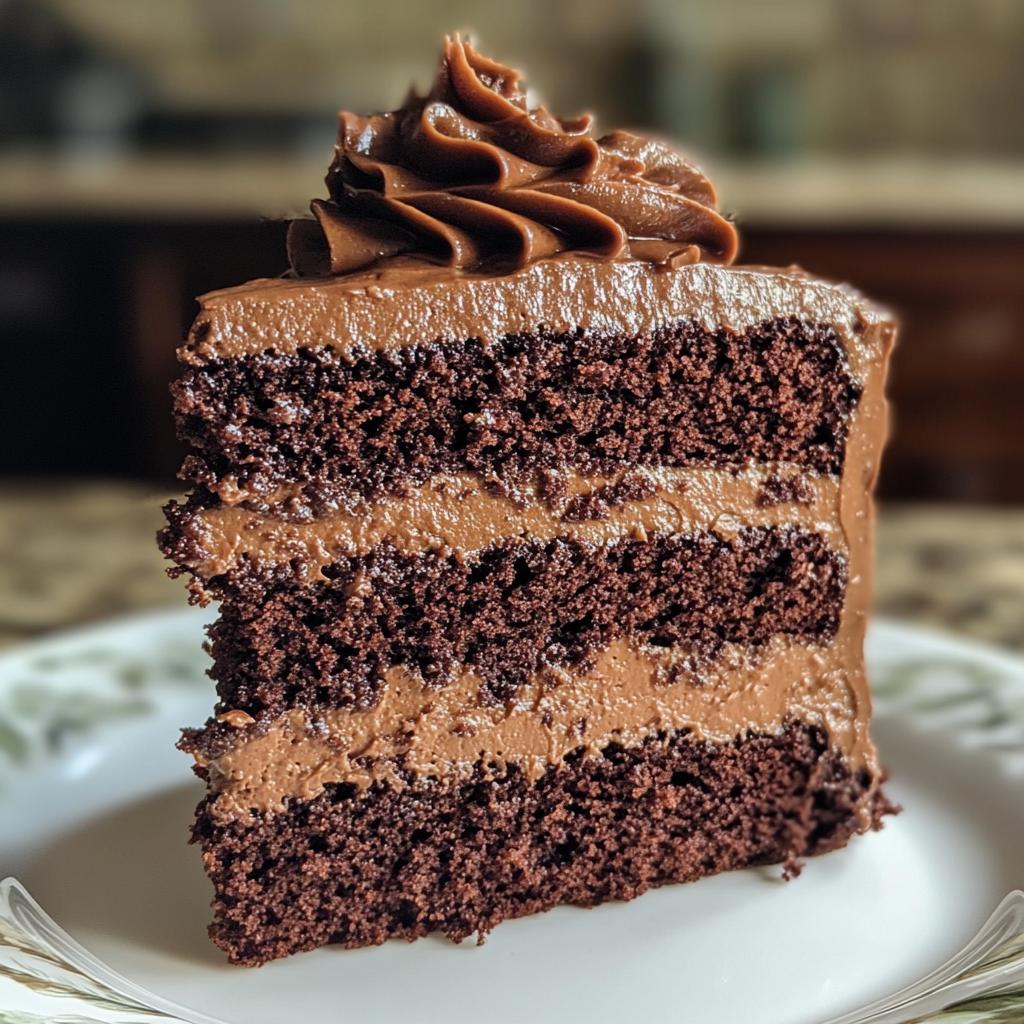
There’s something magical about a Classic Chocolate Layer Cake, isn’t there? I’ve baked hundreds of cakes in my time, but this one—oh, this one’s special. That first bite of rich, moist chocolate cake layered with velvety frosting is pure nostalgia for me. My mom used to make it for birthdays, and now I get to share that same joy with my own family. The best part? It’s surprisingly simple to whip up, yet impressive enough to make any occasion feel like a celebration. Trust me, once you taste this cake with its deep cocoa flavor and tender crumb, you’ll understand why it’s been my go-to recipe for years.
Why You’ll Love This Classic Chocolate Layer Cake
Oh, where do I even start? This cake has been my secret weapon for birthdays, potlucks, and those “I just need chocolate” moments. Here’s why it’s absolutely foolproof:
- Rich, deep chocolate flavor – thanks to that generous amount of cocoa powder and the sneaky trick of using boiling water to intensify the chocolate
- Moist crumb that stays tender for days – no dry cake here, just pure indulgence
- Simple pantry ingredients – I bet you have everything right now except maybe the cocoa
- Forgiving recipe – even if you overmix a little (we’ve all been there), it still turns out amazing
Seriously, this cake never lets me down – and it won’t let you down either!
Ingredients for Classic Chocolate Layer Cake
Alright, let’s gather our chocolatey treasures! Here’s what you’ll need to make this dreamy cake – and I promise, every single ingredient plays a special role:
- 2 cups all-purpose flour – spooned and leveled, not packed
- 2 cups granulated sugar – yes, the full amount, it balances the cocoa’s bitterness
- 3/4 cup unsweetened cocoa powder – get the good stuff, not the dutch-processed kind
- 2 tsp baking powder – check that expiration date!
- 1 1/2 tsp baking soda – fresh is best
- 1 tsp salt – just regular table salt works fine
- 1 cup milk – whole milk makes it extra rich
- 1/2 cup vegetable oil – canola works great too
- 2 large eggs – room temperature! Take them out an hour before
- 2 tsp vanilla extract – pure, not imitation
- 1 cup boiling water – this is the secret to that moist texture
Pro tip: Measure everything before you start – trust me, it makes the whole process so much smoother when you’re not scrambling for ingredients mid-mix!
How to Make Classic Chocolate Layer Cake
Okay, let’s get baking! This cake comes together beautifully when you follow these steps – I’ve learned through trial and error (and maybe a few cake disasters) exactly what works best.
Preparing the Cake Pans
First things first – let’s prep those pans so our cakes don’t stick! I grease mine with butter (or shortening if I’m out), then dust with flour, tapping out the excess. For extra insurance, you can line the bottoms with parchment circles – just trace the pan and cut it out. This step takes two minutes but saves so much heartache later!
Mixing the Batter
Now the fun part! Whisk all dry ingredients together first – this ensures even distribution of leaveners. In another bowl, mix milk, oil, eggs and vanilla until smooth. Gradually add wet to dry, beating just until combined – don’t go crazy here! Then comes the magic: slowly pour in that boiling water while mixing. The batter will look alarmingly thin – that’s perfect! It creates that moist texture we love.
Baking and Cooling
Pour the batter evenly between pans and pop them in the oven. Bake until a toothpick comes out with moist crumbs – about 30-35 minutes. Let cakes cool in pans for 10 minutes (this prevents crumbling), then flip onto racks. Wait until completely cool before frosting – warm cakes make runny frosting! Pro tip: level the tops with a serrated knife for perfect stacking.
Tips for the Perfect Classic Chocolate Layer Cake
After baking this cake more times than I can count, I’ve picked up some foolproof tricks that make all the difference:
- Room temp is key! Cold eggs don’t incorporate as well – take them out at least an hour before baking.
- Don’t peek! That oven door opening lets heat escape and can cause uneven baking.
- The toothpick lie: Pull cakes when tester has moist crumbs – if it’s completely clean, you’ve overbaked!
- Level with care: A serrated knife and gentle sawing motion gives you flat layers without wasting cake.
- Patience pays: Rushing the cooling process leads to melted frosting tears – trust me, I’ve been there!
Follow these simple tricks and you’ll be amazed how professional your homemade cake turns out!
Frosting and Decorating Ideas
Now for the best part – dressing up our chocolate beauty! My go-to is classic chocolate buttercream – just beat butter until fluffy, then alternate powdered sugar and cocoa with a splash of milk. For something richer, try a glossy chocolate ganache (equal parts cream and chocolate). If you’re feeling fancy, cream cheese frosting adds a lovely tang. Keep it simple with smooth sides and piped borders, or go wild with chocolate shavings, sprinkles, or fresh berries. Honestly? A messy swirl with the back of a spoon looks effortlessly gorgeous!
Storing and Serving Classic Chocolate Layer Cake
Here’s the scoop on keeping your masterpiece fresh! Store leftover cake (ha – as if there’ll be leftovers!) airtight at room temperature for up to 3 days. If it’s frosted with cream cheese or whipped cream, pop it in the fridge. For longer storage, freeze unfrosted layers wrapped tightly in plastic – they’ll keep beautifully for 3 months. Let refrigerated cake sit out for 30 minutes before serving – trust me, chocolate tastes richer at room temperature!
Nutritional Information for Classic Chocolate Layer Cake
Let’s be real – we’re not eating chocolate cake for our health! But if you’re curious, here’s the scoop per slice (based on 12 servings): About 350 calories, 12g fat (3g saturated), 55g carbs (3g fiber, 30g sugar), and 5g protein. Remember, these numbers can vary based on your exact ingredients and frosting choices. My philosophy? Life’s too short to stress over cake calories – just savor every delicious bite!
Frequently Asked Questions About Classic Chocolate Layer Cake
Q1. Can I make this cake without eggs?
You can try substituting each egg with 1/4 cup applesauce or 1 tablespoon vinegar + 1 teaspoon baking powder, but honestly? The texture won’t be quite the same. Eggs give this cake its perfect structure – I’d stick with them if you can!
Q2. Why does the recipe call for boiling water?
That boiling water is my secret weapon! It “blooms” the cocoa powder, intensifying the chocolate flavor, and creates that signature moist texture. Don’t skip it – just be careful pouring!
Q3. My oven runs hot/cold – how do I adjust baking time?
Every oven lies a little! If yours runs hot, start checking at 25 minutes. For slower ovens, give it up to 40 minutes. Always use the toothpick test – moist crumbs mean it’s done!
Q4. Can I freeze the baked layers?
Absolutely! Wrap cooled layers tightly in plastic wrap, then foil. They’ll keep beautifully for 3 months. Thaw overnight in the fridge before frosting – easy as pie (or should I say cake)!
Q5. What’s the best frosting for this cake?
My heart belongs to classic chocolate buttercream, but cream cheese frosting or even a simple dusting of powdered sugar works wonders. For special occasions, try a chocolate ganache drizzle – pure heaven!
Irresistible Classic Chocolate Layer Cake in 35 Minutes
- Total Time: 55 minutes
- Yield: 12 servings 1x
- Diet: Vegetarian
Description
A rich and moist chocolate cake layered with creamy frosting. Perfect for celebrations or a sweet treat.
Ingredients
- 2 cups all-purpose flour
- 2 cups granulated sugar
- 3/4 cup unsweetened cocoa powder
- 2 teaspoons baking powder
- 1 1/2 teaspoons baking soda
- 1 teaspoon salt
- 1 cup milk
- 1/2 cup vegetable oil
- 2 large eggs
- 2 teaspoons vanilla extract
- 1 cup boiling water
Instructions
- Preheat your oven to 350°F (175°C). Grease and flour two 9-inch round cake pans.
- In a large bowl, mix flour, sugar, cocoa, baking powder, baking soda, and salt.
- Add milk, oil, eggs, and vanilla. Beat on medium speed for 2 minutes.
- Stir in boiling water. The batter will be thin.
- Pour batter evenly into the prepared pans.
- Bake for 30 to 35 minutes, or until a toothpick inserted comes out clean.
- Cool in pans for 10 minutes, then transfer to a wire rack to cool completely.
- Frost and layer the cake once cooled.
Notes
- Use room temperature eggs for better mixing.
- Do not overmix the batter after adding boiling water.
- The cake can be stored in an airtight container for up to 3 days.
- Prep Time: 20 minutes
- Cook Time: 35 minutes
- Category: Dessert
- Method: Baking
- Cuisine: American
Nutrition
- Serving Size: 1 slice
- Calories: 350
- Sugar: 30g
- Sodium: 400mg
- Fat: 12g
- Saturated Fat: 3g
- Unsaturated Fat: 7g
- Trans Fat: 0g
- Carbohydrates: 55g
- Fiber: 3g
- Protein: 5g
- Cholesterol: 35mg
Keywords: chocolate cake, layer cake, dessert, homemade cake


