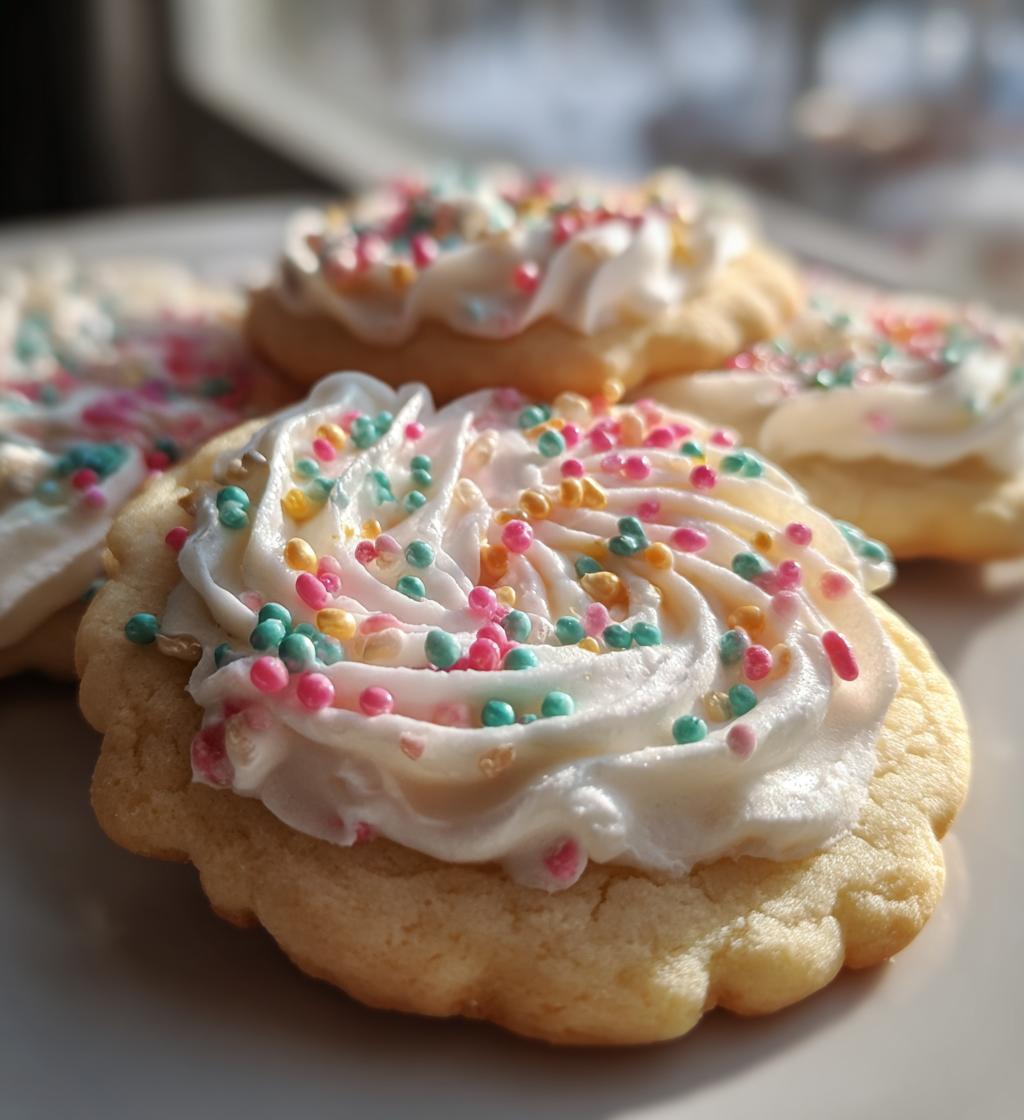
Nothing says “holiday magic” like decorating Christmas cookies with my grandma’s foolproof icing recipe. I still remember standing on a chair at her kitchen counter, carefully swirling this sweet glaze onto sugar cookies with a butter knife. This simple Christmas cookies icing transforms basic treats into festive masterpieces with its smooth finish and endless color options. After years of testing fancy royal icings that crack or dry too fast, I always come back to this easy version—it’s forgiving for kids, dries perfectly, and tastes delicious!
Why You’ll Love This Christmas Cookies Icing
Trust me, this icing is a game-changer for holiday baking! Here’s why:
- Quick & easy – Just 3 ingredients and 5 minutes to make
- Perfect smooth finish – No lumps, no cracks, just glossy perfection
- Endless color options – Customize with food coloring for any holiday theme
- Kid-friendly – Thick enough for little hands to decorate without mess
It’s the secret weapon my family swears by every December!
Christmas Cookies Icing Ingredients
Here’s everything you’ll need to whip up this magical icing – and yes, every single ingredient matters! I’ve learned the hard way that substitutions can change the texture completely.
- 1 cup powdered sugar – Spoon it into your measuring cup and level it off (no packing!) for the perfect consistency
- 2 tablespoons milk – Whole milk gives the richest consistency, but 2% works in a pinch
- ½ teaspoon pure vanilla extract – The real stuff makes all the difference in flavor
- Food coloring (optional) – Gel colors give vibrant hues without thinning the icing, but liquid drops work if you go easy
Pro tip from my cookie-decorating fails: if you’re using liquid food coloring, reduce the milk by ½ teaspoon to account for the extra liquid. Those red and green colors can really sneak up on you!
How to Make Christmas Cookies Icing
Okay, let’s get our hands sticky! This process is so simple even my 6-year-old nephew can do it (with supervision, of course). The key is taking it step by step—rush the mixing, and you’ll end up with lumpy icing that ruins all your cookie masterpieces. Trust me, I’ve been there!
Mixing the Base
First things first: grab a medium bowl and your trusty whisk. Here’s how Grandma taught me to avoid those pesky sugar lumps:
Start by adding about half your powdered sugar to the bowl, then drizzle in one tablespoon of milk. Whisk gently—you’re not trying to build muscle here! Add the remaining sugar and milk gradually, whisking until you get a smooth, glossy mixture that ribbons off your whisk. Now comes the magic: stir in that vanilla extract. Oh, that smell! It instantly makes my kitchen feel like Christmas.
Watch out! If you dump all the sugar and milk in at once, you’ll spend forever battling stubborn lumps. Slow and steady wins the race with icing.
Coloring the Icing
This is where the real fun begins. Divide your icing into small bowls—one for each color you want. I use those little ramekins from my crème brûlée phase (we all have kitchen gadget phases, right?).
Now, about food coloring: gel is my absolute favorite because it gives super vibrant colors without watering down the icing. But if you only have liquid drops, no worries! Just add them one drop at a time, mixing well between each. Remember, you can always add more color, but you can’t take it away!
Pro tip from my disastrous red icing incident: red and black colors need extra drops to show up bright. Start with 3-4 drops of gel or 5-6 of liquid, then adjust.
Decorating and Drying
Time for the artistic part! You’ve got options here:
For precise lines (like writing “Ho Ho Ho” on Santa cookies), spoon your icing into a piping bag with a small round tip. No piping bag? No problem! A ziplock bag with the corner snipped off works wonders. For flooded designs (those smooth, shiny surfaces), just use a spoon to spread the icing—it should be thin enough to settle smoothly but thick enough not to run off the cookie.
Now the hardest part: waiting! Let those decorated cookies dry completely for at least one hour. I know it’s tough when they smell amazing, but touching them too soon will smudge all your hard work. I set mine on a cooling rack and distract myself with… well, usually by eating the broken cookies!
Tips for Perfect Christmas Cookies Icing
After decorating thousands of cookies (and making plenty of mistakes!), here are my can’t-live-without tips:
- Adjust that milk! Too thick? Add milk ½ teaspoon at a time. Too runny? Sprinkle in more powdered sugar until it ribbons off your spoon.
- Store it right – Press plastic wrap directly on the icing’s surface in an airtight container to prevent crusting. It keeps beautifully for 3 days!
- Gel colors FTW – That grocery store liquid coloring? It’ll thin your icing. Invest in gel for bold, bakery-worthy hues without sacrificing texture.
- The toothpick trick – For intricate designs, dip a toothpick in darker icing and swirl it through wet base colors for marbled magic.
Remember: perfect icing isn’t about fancy tools—it’s about knowing these little tricks that make all the difference!
Christmas Cookies Icing Variations
Once you’ve mastered the basic recipe, try these fun twists! Swap vanilla for almond extract for a nutty flavor, or add a pinch of cinnamon for warmth. For extra sparkle, mix in edible glitter or sprinkle decorations while the icing’s still wet. My kids love stirring in mini chocolate chips for “reindeer cookie” eyes!
Storing Christmas Cookies Icing
Okay, confession time: I once left my beautiful red icing uncovered overnight. Woke up to what looked like a candy apple crust—total disaster! Now I always press plastic wrap directly onto the icing’s surface before sealing the container. This little trick keeps it perfectly soft for decorating cookies all weekend long.
Pop it in the fridge if you won’t use it within a day—it’ll stay fresh for up to 3 days. When you’re ready to decorate again, just give it a good stir. If it’s thickened up, don’t panic! Add just one drop of milk at a time until it smooths back out. (I learned the hard way that adding too much turns it into a runny mess!)
Pro tip from my cookie marathon days: portion your icing into small containers if you’re using multiple colors. That way you’re not constantly reheating and cooling the whole batch. Your future self will thank you during those late-night cookie decorating sessions!
Nutritional Information
Now, let’s be real—we’re not decorating Christmas cookies for their health benefits! But since you asked, here’s the scoop: each tablespoon of this icing contains roughly what you’d expect from powdered sugar and milk. The exact numbers can vary based on your specific ingredients (especially if you’re using whole vs. skim milk or different vanilla brands).
Just remember—a little icing goes a long way in making your cookies beautiful! I always tell my kids we’re making “edible art,” and that’s permission enough for me to enjoy every sweet bite. After all, ’tis the season for sprinkles and smiles!
Common Questions About Christmas Cookies Icing
After years of sharing this recipe at cookie swaps and family gatherings, I’ve heard every question under the Christmas tree about this icing! Here are the ones that come up most often—with answers straight from my messy, sugar-dusted experience.
Can I use water instead of milk?
Oh honey, I’ve tried—and trust me, you can, but you’ll miss out on that rich, creamy texture milk gives. Water makes the icing more translucent and slightly less stable. If you absolutely must substitute (for dairy allergies, etc.), try using the same amount of almond milk or even orange juice for extra flavor! Just know it won’t dry quite as smooth.
How do I fix runny icing?
We’ve all been there—one extra drop of milk and suddenly your snowflakes look like snow puddles! Don’t panic. Gradually whisk in more powdered sugar (about 1 tablespoon at a time) until it thickens. If you accidentally go too far the other way, a few drops of milk will loosen it up again. Pro tip: Always test your icing consistency on a practice cookie before decorating your masterpieces!
Can I freeze this icing?
Absolutely! I always make a double batch in early December and freeze half for last-minute cookie emergencies. Scoop it into an airtight container (leave about ½ inch space at the top), press plastic wrap directly on the surface, and freeze for up to 1 month. Thaw overnight in the fridge, then give it a vigorous stir—you might need to add a drop or two of milk to bring it back to the perfect decorating texture.
Now I want to see your cookie creations! There’s nothing more joyful than a kitchen covered in sprinkles and smiles during the holidays. Snap a photo of your iced masterpieces and share them with us—we’d love to celebrate your sweet holiday moments together. Just remember: even the “messy” cookies taste delicious, so have fun with it!
Print
1-Hour Magical Christmas Cookies Icing Recipe for Kids
- Total Time: 5 minutes
- Yield: 1/2 cup 1x
- Diet: Vegetarian
Description
Simple icing recipe for decorating Christmas cookies with a smooth finish.
Ingredients
- 1 cup powdered sugar
- 2 tablespoons milk
- 1/2 teaspoon vanilla extract
- Food coloring (optional)
Instructions
- Mix powdered sugar and milk in a bowl.
- Add vanilla extract and stir until smooth.
- Divide into smaller bowls if using food coloring.
- Add a few drops of food coloring and mix well.
- Use a spoon or piping bag to decorate cookies.
- Let icing dry for at least 1 hour before serving.
Notes
- Adjust milk for thicker or thinner consistency.
- Store extra icing in an airtight container.
- Use gel food coloring for vibrant colors.
- Prep Time: 5 minutes
- Cook Time: 0 minutes
- Category: Dessert
- Method: No-Cook
- Cuisine: American
Nutrition
- Serving Size: 1 tablespoon
- Calories: 30
- Sugar: 7g
- Sodium: 1mg
- Fat: 0g
- Saturated Fat: 0g
- Unsaturated Fat: 0g
- Trans Fat: 0g
- Carbohydrates: 8g
- Fiber: 0g
- Protein: 0g
- Cholesterol: 0mg
Keywords: Christmas cookies, icing, cookie decoration, easy icing recipe


