Ah, Christmas time! It’s that magical season filled with twinkling lights, the scent of pine, and delicious treats that bring us all together. One of my absolute favorite traditions is baking and sharing *christmas cookies decorated* with family and friends. There’s something so special about rolling up your sleeves and getting flour all over the counter, all while listening to carols in the background. The joy of mixing the dough, stamping out adorable shapes, and, of course, decorating them with bright icing and sprinkles is unmatched. I can still remember the thrill of pulling warm cookies from the oven, the anticipation of waiting for them to cool before diving into decorating. Whether you’re making them for a festive gathering or simply to enjoy at home, these cookies are sure to spread holiday cheer. Trust me, there’s nothing quite like the smiles that come from sharing a plate of beautifully decorated cookies with loved ones, creating memories that will last a lifetime!
Ingredients List
- 2 cups all-purpose flour – Make sure to spoon it into your measuring cup and level it off for accuracy.
- 1 cup granulated sugar – This will add just the right sweetness to your cookies.
- 1/2 cup unsalted butter, softened – Let it sit at room temperature for about an hour before you start. Trust me, it makes a difference!
- 1 large egg – This binds everything together beautifully.
- 1 teaspoon vanilla extract – Go for pure vanilla for that extra depth of flavor; it’s worth it!
- 1 teaspoon baking powder – This is the secret to making your cookies rise just right.
- 1/2 teaspoon salt – A pinch of salt enhances all the flavors; don’t skip it!
- Icing for decoration – You can prepare your favorite royal icing or store-bought, whichever you prefer.
- Sprinkles for decoration – Use a variety of colors and shapes to make your cookies festive and fun!
How to Prepare Christmas Cookies Decorated
Preheat and Prepare
Let’s get that oven preheated to 350°F (175°C). This step is crucial because you want your cookies to bake evenly and perfectly! While that’s warming up, grab your baking sheets and line them with parchment paper. This little trick makes cleanup a breeze and helps prevent sticking, so you can focus on the fun part – decorating!
Mixing the Ingredients
Now, it’s time to bring everything together! In a large bowl, cream the softened butter and granulated sugar using a hand mixer or a sturdy wooden spoon. You want this mixture to become light and fluffy, which takes about 2-3 minutes of mixing. Once you see that lovely texture, add in your egg and vanilla extract, blending until everything is well combined.
In a separate bowl, whisk together the flour, baking powder, and salt. It’s important to mix these dry ingredients to ensure even distribution. Now, gradually add the dry mix to the wet mixture, stirring gently until everything is just combined. Don’t overdo it – we want to keep that dough nice and tender!
Shaping and Baking
With your dough ready, roll it into small balls about the size of a tablespoon and place them on your prepared baking sheet. Don’t worry about spacing them too far apart; they’ll spread a little while baking. Gently flatten each ball with your palm, giving them a nice shape. Pop them in the oven for about 8-10 minutes. The cookies should be lightly golden around the edges but still soft in the center. Once they’re done, let them cool on the baking sheet for a few minutes before transferring them to a wire rack. Trust me, cooling is key before you unleash your decorating skills!
Decorating Your Cookies
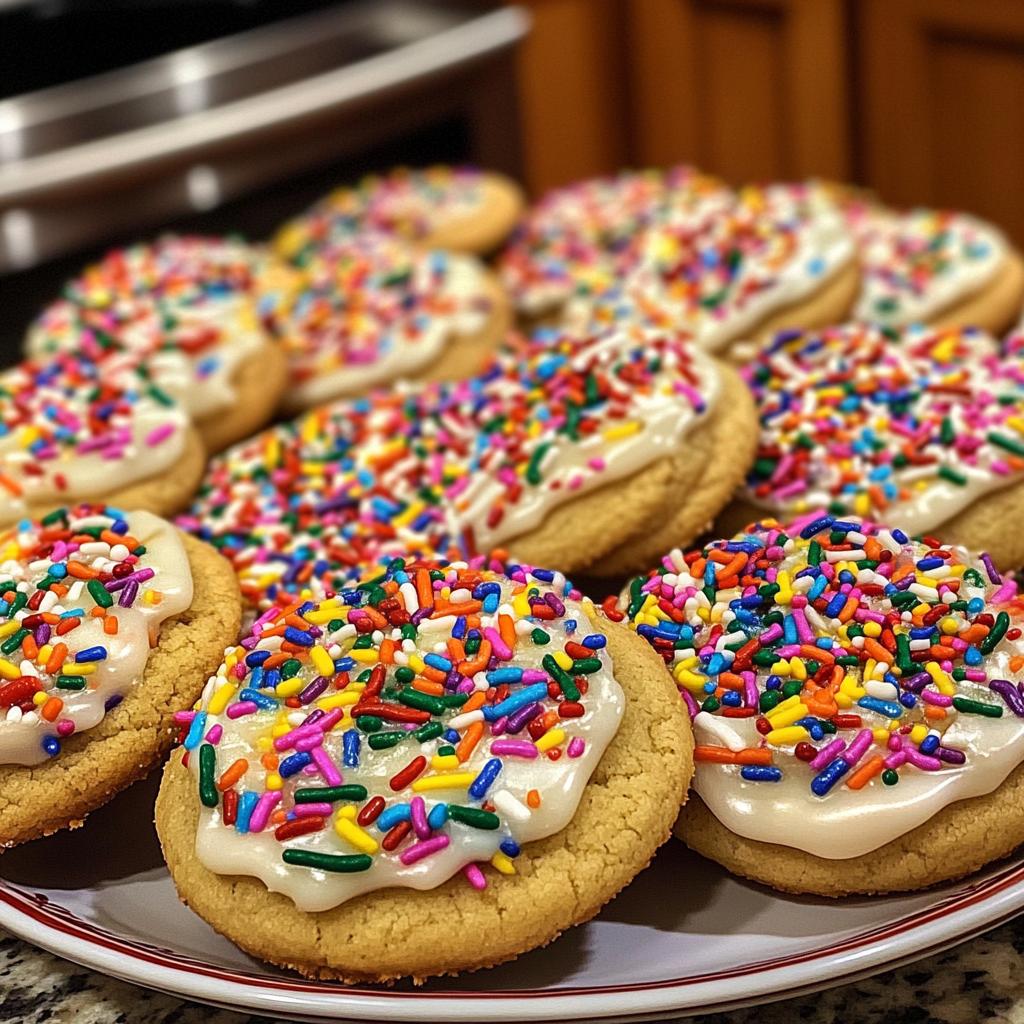
Here comes the best part! Once your cookies are completely cool, grab your icing and sprinkles. You can use a piping bag or a simple zip-top bag with a corner snipped off to pipe the icing onto your cookies. Get creative here! Use different colors for icing and sprinkle on your favorite toppings. From colorful sugar sprinkles to festive edible glitter, the sky’s the limit! Make each cookie a work of art, and don’t forget to have fun with it!
Why You’ll Love This Recipe
- Easy Preparation: This recipe is straightforward, making it perfect for bakers of all skill levels. You’ll be whipping up a batch in no time!
- Festive Appearance: With colorful icing and sprinkles, these cookies are a feast for the eyes and will brighten any holiday gathering.
- Delicious Taste: The combination of buttery goodness and sweet vanilla makes every bite a delightful treat that everyone will love.
- Memorable Moments: Baking and decorating together with family and friends creates cherished holiday memories that last a lifetime.
- Customizable: You can easily adapt the decorations to suit any theme or occasion, making these cookies versatile for any celebration!
Tips for Success
To ensure your *christmas cookies decorated* turn out perfect every time, here are some of my favorite tips! First, make sure your butter is softened but not melted – this helps achieve that fluffy texture when creaming it with sugar. If your dough feels too sticky, don’t hesitate to pop it in the fridge for about 30 minutes; this makes it much easier to handle and shape.
When rolling out your dough, lightly flour your work surface to prevent sticking, but don’t go overboard. A little flour goes a long way! For decorating, keep your icing at the right consistency. If it’s too thick, it won’t spread nicely; if it’s too runny, it’ll lose its shape. A good rule of thumb is to aim for a toothpaste-like consistency. Lastly, don’t be afraid to get creative! Layer your sprinkles, try different colors, and have fun with your designs – it’s all about spreading joy during the holiday season!
Storage & Reheating Instructions
Once your delicious *christmas cookies decorated* are all set and ready to share, you’ll want to store them properly to keep them fresh. Place the cooled cookies in an airtight container, layering them with parchment paper between each layer to prevent sticking. They’ll stay delightful for up to a week at room temperature!
If you find yourself with leftovers (which is rare, trust me!), you can also freeze them! Just make sure they’re completely cool, then wrap them tightly in plastic wrap and store in a freezer-safe bag. When you’re ready to enjoy them again, let them thaw at room temperature. Reheating isn’t necessary, but if you want that fresh-baked feel, pop them in a 300°F (150°C) oven for about 5 minutes. Enjoy every festive bite!
Nutritional Information
These delightful *christmas cookies decorated* are not just a treat for the eyes but also come with some nutritional facts to keep in mind. Each cookie is approximately 150 calories, with 7 grams of fat and 2 grams of protein. They contain about 20 grams of carbohydrates, including 10 grams of sugar. While these cookies are a festive indulgence, they can fit into your holiday celebrations nicely! Just remember, these values are estimates and can vary based on your specific ingredients and decorations. So enjoy them in moderation while spreading that holiday cheer!
FAQ Section
Q1. Can I use different flavors for the icing?
Absolutely! You can mix things up by adding extracts like almond or lemon to your icing for a fun twist. Just remember to adjust the sugar to keep the right consistency.
Q2. What’s the best way to store my decorated cookies?
To keep your *christmas cookies decorated* fresh, store them in an airtight container at room temperature. If you’ve used a lot of icing, consider placing parchment paper between layers to prevent sticking.
Q3. How long do these cookies stay fresh?
These cookies can last up to a week when stored properly. If you want to enjoy them longer, you can freeze them for up to three months!
Q4. Can I make the dough ahead of time?
Definitely! You can prepare the dough ahead of time and refrigerate it for up to 3 days. Just let it sit at room temperature for a few minutes before rolling.
Q5. What if my icing is too runny?
If your icing is too runny, simply add a little more powdered sugar until it thickens to a toothpaste-like consistency. This will help it hold its shape better on the cookies!

Christmas Cookies Decorated: 5 Tips for Perfect Joy
- Total Time: 30 minutes
- Yield: 24 cookies 1x
- Diet: Vegetarian
Description
Delicious and festive Christmas cookies decorated with icing and sprinkles.
Ingredients
- 2 cups all-purpose flour
- 1 cup granulated sugar
- 1/2 cup unsalted butter, softened
- 1 large egg
- 1 teaspoon vanilla extract
- 1 teaspoon baking powder
- 1/2 teaspoon salt
- Icing for decoration
- Sprinkles for decoration
Instructions
- Preheat your oven to 350°F (175°C).
- In a bowl, cream together the butter and sugar until fluffy.
- Add the egg and vanilla extract, mixing well.
- In another bowl, combine flour, baking powder, and salt.
- Gradually add the dry ingredients to the wet mixture, stirring until combined.
- Roll the dough into small balls and place them on a baking sheet.
- Flatten each ball slightly and bake for 8-10 minutes.
- Let the cookies cool before decorating with icing and sprinkles.
Notes
- Store cookies in an airtight container.
- Use food coloring for icing to match your theme.
- Experiment with different sprinkles for variety.
- Prep Time: 20 minutes
- Cook Time: 10 minutes
- Category: Dessert
- Method: Baking
- Cuisine: American
Nutrition
- Serving Size: 1 cookie
- Calories: 150
- Sugar: 10g
- Sodium: 50mg
- Fat: 7g
- Saturated Fat: 4g
- Unsaturated Fat: 2g
- Trans Fat: 0g
- Carbohydrates: 20g
- Fiber: 0g
- Protein: 2g
- Cholesterol: 20mg
Keywords: christmas cookies decorated


