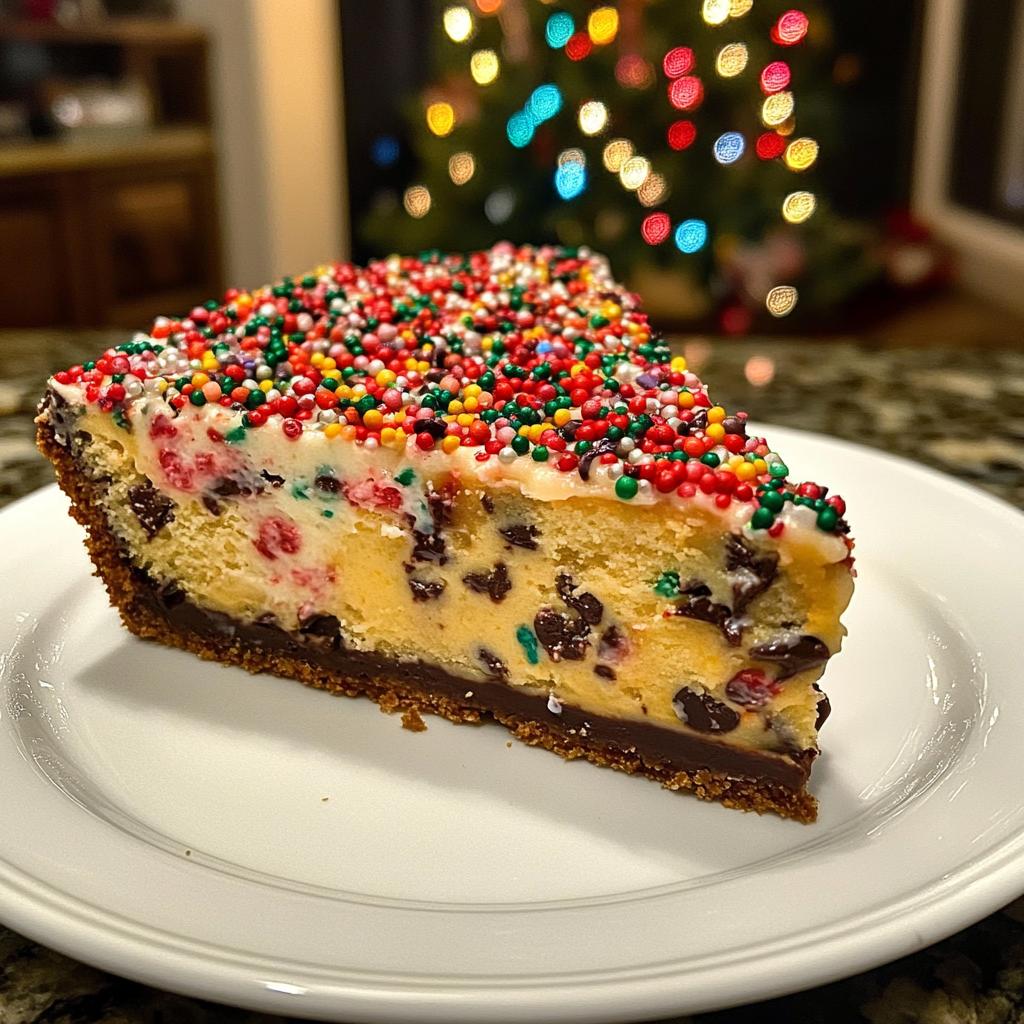
Oh, the joy of the holiday season! There’s something truly magical about gathering with loved ones, and nothing brings people together quite like a festive dessert. Enter my delightful Christmas cookie cake! This beauty combines the comforting flavors of classic cookies into a luscious cake that’s perfect for any holiday celebration. Picture this: a soft, chewy cake studded with chocolate chips and colorful sprinkles that practically scream “celebration!” It’s a showstopper that will have everyone coming back for seconds (or thirds!).
In my family, holiday baking is a cherished tradition. We gather in the kitchen, laughter filling the air while we mix, pour, and decorate. This Christmas cookie cake has become a staple at our gatherings, alongside Grandma’s famous peppermint bark. I love how easy it is to whip up, making it a go-to when I’m short on time but still want that festive flair. So, let’s bring out your inner baker and dive into this sweet treat that’s sure to spread joy and cheer at your holiday festivities!
Ingredients List
- 2 1/2 cups all-purpose flour
- 1 teaspoon baking soda
- 1/2 teaspoon salt
- 1 cup unsalted butter, softened to room temperature
- 1 cup granulated sugar
- 1 cup packed brown sugar
- 2 large eggs, at room temperature
- 2 teaspoons vanilla extract
- 2 cups chocolate chips, semi-sweet or milk chocolate, your choice!
- 1 cup holiday-themed sprinkles, because we all need a little sparkle!
How to Prepare Instructions
Preheat the Oven
First things first, let’s get that oven preheating to 350°F (175°C). This step is crucial because it ensures your Christmas cookie cake bakes evenly, giving you that perfect soft, chewy texture we all crave. While you’re at it, take a moment to soak in the anticipation—there’s nothing quite like the smell of fresh-baked goods filling your home!
Mix Dry Ingredients
Next up, grab a bowl and whisk together 2 1/2 cups of all-purpose flour, 1 teaspoon of baking soda, and 1/2 teaspoon of salt. This step is key because it helps to evenly distribute the baking soda and salt throughout the flour, which ensures that every bite of your cake will be perfectly balanced. Plus, whisking aerates the flour a bit, making for a lighter cake!
Cream the Butter and Sugars
Now, let’s move on to the fun part—creaming the butter and sugars! In a large mixing bowl, beat together 1 cup of softened unsalted butter, 1 cup of granulated sugar, and 1 cup of packed brown sugar until the mixture becomes light and fluffy. This process is essential for creating that delightful texture we all love in a cookie cake. Trust me, you want to cream it well; it’ll take about 2-3 minutes. It should look pale and almost whipped—just like magic!
Combine Wet Ingredients
Once you’ve got that lovely butter and sugar mixture, it’s time to add in the wet ingredients! Crack in 2 large eggs, ensuring they’re at room temperature, and pour in 2 teaspoons of vanilla extract. Mix everything together until it’s beautifully combined—about another minute should do it. This step adds richness and flavor that takes your cake to the next level!
Incorporate Dry Ingredients
Now, it’s time to bring the dry ingredients into the party! Gradually add the flour mixture to the butter mixture, mixing on low speed. I like to do this in three parts, starting and ending with the flour. This helps maintain a smooth batter and prevents overmixing, which can make your cake dense. Just mix until you see the last streaks of flour disappear—don’t worry if it’s not perfectly smooth!
Fold in Chocolate Chips and Sprinkles
Next, gently fold in those delicious chocolate chips and holiday-themed sprinkles. Use a spatula and be careful not to overmix—just enough to combine everything. This way, you’ll have pockets of chocolate and bursts of color throughout your cake, making it look as festive as it tastes!
Bake the Cake
Now, spread the dough evenly into a greased cake pan. I like to use a 9×13 inch pan for a nice, thick cake. Pop it into your preheated oven and let it bake for about 25-30 minutes. You’ll know it’s done when the edges are golden brown and a toothpick inserted into the center comes out clean or with just a few moist crumbs clinging to it. The anticipation is half the fun, right?
Cooling and Slicing
Once your cake is out of the oven, let it cool in the pan for about 10-15 minutes. This helps it set up perfectly. After that, transfer it to a wire rack to cool completely before slicing. I know it’s tempting to dig in right away, but letting it cool ensures that each slice is a beautiful, clean cut. Plus, the flavors have a chance to meld together, making it all the more delicious!
Nutritional Information
As with any homemade treat, the nutritional values can vary based on the specific ingredients and brands you use, so keep that in mind! Here’s a general idea of what to expect per slice of this delightful Christmas cookie cake:
- Calories: 320
- Fat: 15g
- Saturated Fat: 9g
- Unsaturated Fat: 5g
- Trans Fat: 0g
- Sodium: 150mg
- Carbohydrates: 44g
- Fiber: 2g
- Sugar: 25g
- Protein: 4g
- Cholesterol: 50mg
These values are approximate and can change depending on how you customize your cake. So, whether you opt for extra chocolate chips or switch up the sprinkles, just know that each slice will be packed with holiday cheer—both in flavor and in fun!
FAQ Section
Q1: Can I use different types of chips?
Absolutely! Feel free to swap in white chocolate chips, peanut butter chips, or even butterscotch chips for a fun twist. The beauty of this Christmas cookie cake is its versatility—mix it up with whatever you love!
Q2: How do I store leftovers?
To keep your Christmas cookie cake fresh, store any leftovers in an airtight container at room temperature. It should stay delicious for about 3-4 days. You can also refrigerate it for longer freshness, but be aware that it might lose a bit of that perfect chewy texture.
Q3: Can I freeze this cake?
Yes, you can! Once the cake has cooled completely, wrap it tightly in plastic wrap and then in aluminum foil before freezing. It should be good for about 2-3 months. When you’re ready to enjoy it, just let it thaw at room temperature.
Q4: Is there a way to make this cake gluten-free?
You can certainly try using a gluten-free all-purpose flour blend. Just make sure it includes xanthan gum, which helps mimic the elasticity of regular flour. The taste and texture may vary slightly, but it should still be delicious!
Q5: Can I decorate this cake with icing?
Of course! A simple glaze or cream cheese frosting can elevate your Christmas cookie cake even more. Just allow the cake to cool completely before adding any icing to ensure it doesn’t melt or slide off. Get creative with your decorations—it’s all about making it festive!
Why You’ll Love This Recipe
- Easy to Make: With simple steps and easy-to-find ingredients, this Christmas cookie cake is a breeze to whip up, even for novice bakers!
- Festive Appearance: The vibrant holiday-themed sprinkles make this cake a showstopper on any dessert table, bringing that joyful holiday spirit.
- Perfect for Gatherings: Whether it’s a holiday party or a cozy family get-together, this cake is sure to impress your guests and leave them wanting more.
- Customizable: Feel free to mix and match your favorite chocolate chips or add nuts and dried fruits for a personal touch!
- Deliciously Chewy Texture: It’s the perfect combination of cake and cookie, resulting in a delightful chewy texture that everyone will love.
- Great for Leftovers: This cake stays fresh for days, making it a fantastic treat to enjoy throughout the holiday season.
Tips for Success
Alright, let’s make sure your Christmas cookie cake turns out absolutely perfect! Here are my top tips to achieve that delightful, chewy texture and festive flavor:
- Use Room Temperature Ingredients: Make sure your butter and eggs are at room temperature before you start mixing. This helps them blend together more easily, creating a smooth batter and giving you that light and airy texture. Trust me, it makes a difference!
- Don’t Overmix the Batter: When you’re combining the dry and wet ingredients, be gentle! Overmixing can lead to a dense cake, and we want it to be soft and chewy. Mix just until you see the last streaks of flour disappear—that’s your sweet spot!
- Measure Flour Correctly: When measuring your flour, fluff it up in the container first, then spoon it into your measuring cup and level it off with a knife. This prevents you from packing too much flour, which can make your cake heavy. A light hand is key!
- Check for Doneness: Keep an eye on your cake in the oven! Every oven is different, so start checking for doneness a couple of minutes before the recommended time. The cake should be golden brown around the edges, and a toothpick should come out clean or with a few moist crumbs.
- Let It Cool: Resist the urge to slice into your cake right away! Letting it cool in the pan for about 10-15 minutes, then transferring it to a wire rack, helps the cake set and makes for cleaner slices. Plus, it gives those yummy flavors time to mingle!
- Get Creative with Toppings: Feel free to decorate your cake with icing, extra sprinkles, or even a scoop of ice cream for serving. This adds that extra festive touch and makes it even more fun to enjoy!
With these tips in your back pocket, you’re all set to create a Christmas cookie cake that’ll spread joy and deliciousness at your holiday celebrations!
Serving Suggestions
Now that you’ve baked this scrumptious Christmas cookie cake, let’s talk about how to elevate your dessert experience! This cake is delicious on its own, but pairing it with the right accompaniments can take it to a whole new level. Here are a few delightful serving suggestions:
- Coffee or Hot Chocolate: A warm cup of coffee or a rich mug of hot chocolate makes the perfect complement to your cake. The cozy flavors of chocolate and coffee enhance the cake’s sweetness, creating a warm, comforting treat.
- Whipped Cream: A dollop of freshly whipped cream on top of each slice adds a light and airy texture, balancing the cake’s density. You can even sprinkle a little cinnamon or nutmeg on the cream for that extra festive flair!
- Ice Cream: Who can resist a scoop of vanilla or peppermint ice cream alongside a slice of warm cake? The creamy coldness contrasts beautifully with the chewy cake, making every bite a delightful experience.
- Holiday-Themed Drinks: Serve your cake with some fun holiday-themed drinks! Think spiced apple cider, eggnog, or even a festive punch. These drinks will not only enhance the holiday spirit but also keep your guests refreshed.
- Fruit Compote: Drizzle a warm fruit compote made from berries or apples over the cake for a fruity twist. The tartness of the fruit pairs wonderfully with the sweet cake, adding a burst of flavor that’s simply delightful.
With these serving suggestions, your Christmas cookie cake will be the star of the dessert table, bringing joy and deliciousness to every holiday gathering!
Print
Christmas Cookie Cake: 7 Steps to Holiday Joy
- Total Time: 45 minutes
- Yield: 12 servings 1x
- Diet: Vegetarian
Description
A festive and delicious Christmas cookie cake perfect for holiday celebrations.
Ingredients
- 2 1/2 cups all-purpose flour
- 1 teaspoon baking soda
- 1/2 teaspoon salt
- 1 cup unsalted butter, softened
- 1 cup granulated sugar
- 1 cup brown sugar, packed
- 2 large eggs
- 2 teaspoons vanilla extract
- 2 cups chocolate chips
- 1 cup holiday-themed sprinkles
Instructions
- Preheat your oven to 350°F (175°C).
- In a bowl, whisk together flour, baking soda, and salt.
- In another bowl, cream the butter, granulated sugar, and brown sugar.
- Add eggs and vanilla to the butter mixture, mixing well.
- Gradually add the dry ingredients to the wet mixture.
- Fold in chocolate chips and sprinkles.
- Spread the dough evenly in a greased cake pan.
- Bake for 25-30 minutes or until golden brown.
- Let it cool before slicing.
Notes
- Store leftovers in an airtight container.
- Can be decorated with icing for a festive touch.
- Prep Time: 15 minutes
- Cook Time: 30 minutes
- Category: Dessert
- Method: Baking
- Cuisine: American
Nutrition
- Serving Size: 1 slice
- Calories: 320
- Sugar: 25g
- Sodium: 150mg
- Fat: 15g
- Saturated Fat: 9g
- Unsaturated Fat: 5g
- Trans Fat: 0g
- Carbohydrates: 44g
- Fiber: 2g
- Protein: 4g
- Cholesterol: 50mg
Keywords: christmas cookie cake


