Oh, the joy of *Christmas baking*! There’s something truly magical about filling your kitchen with the warm, inviting scents of sugar, butter, and chocolate as the festive season rolls around. I can still remember the sound of my grandmother’s laughter mingling with the clinking of mixing bowls as we whipped up batches of cookies together. It was our special tradition, a time when the world outside felt cold and frosty, but inside, we were surrounded by warmth and love.
Every year, we would gather as a family, rolling out dough, decorating cookies with colorful sprinkles, and sneaking a few chocolate chips here and there (who could resist?). It wasn’t just about the treats; it was about creating memories that would last a lifetime. Now, as I continue this tradition with my own family, I feel that same excitement bubbling up each time we bake. This recipe I’m about to share with you is simple yet delightful, perfect for bringing everyone together and filling your home with the festive spirit of Christmas. So, let’s get ready to bake some sweet magic!
Ingredients List
Gathering the right ingredients is key to making this festive treat a success! Here’s what you’ll need:
- 2 cups all-purpose flour: Make sure to spoon and level the flour for accurate measurements.
- 1 cup sugar: Regular granulated sugar works perfectly for that sweet touch.
- 1/2 cup butter: Use unsalted butter, softened to room temperature for easy creaming.
- 2 eggs: Large eggs are best; they help bind everything together.
- 1 teaspoon vanilla extract: Pure vanilla extract enhances the overall flavor of the cookies.
- 1 teaspoon baking powder: This helps the cookies rise, giving them that lovely soft texture.
- 1/2 teaspoon salt: A pinch of salt balances the sweetness and brings out the flavors.
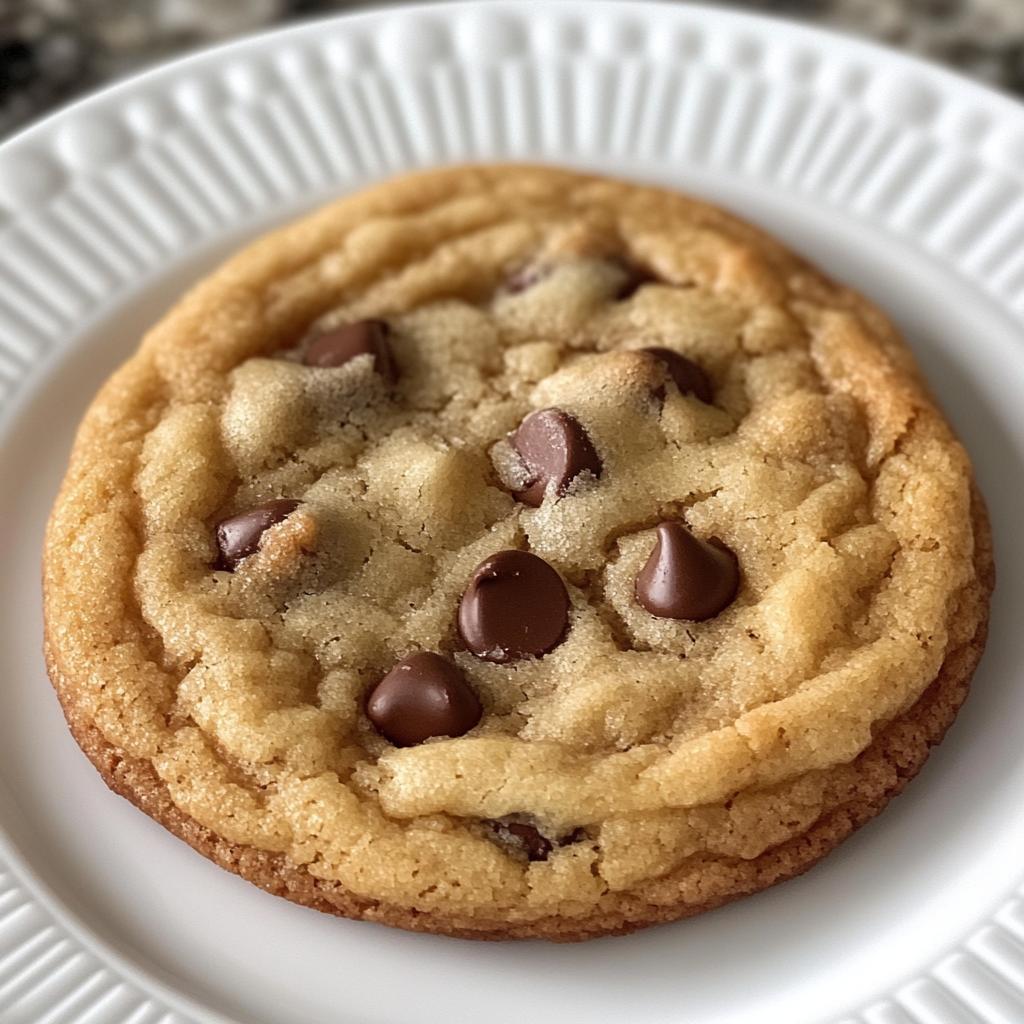
- 1 cup chocolate chips: Semi-sweet chocolate chips are my favorite, but feel free to mix it up with dark or milk chocolate!
With these ingredients on hand, you’re just a few steps away from creating a delightful addition to your holiday celebrations. Let the fun begin!
How to Prepare Instructions
Now that you’ve got your ingredients ready, let’s dive into the fun part—baking these scrumptious cookies! Trust me, the process is as enjoyable as the end result. Here’s how to make it happen:
- Preheat your oven: Start by preheating your oven to 350°F (175°C). This step is crucial because it ensures that your cookies bake evenly and turn out perfectly.
- Cream the butter and sugar: In a large mixing bowl, cream together the softened butter and sugar using a hand mixer or stand mixer. Beat them together until the mixture is light and fluffy, which should take about 2-3 minutes. This step is essential to create those lovely air pockets that give your cookies a delightful texture.
- Add the eggs and vanilla: Crack in the eggs one at a time, mixing well after each addition to fully incorporate. Don’t forget to add the vanilla extract here! It adds that lovely aroma we all associate with holiday baking.
- Mix the dry ingredients: In another bowl, whisk together the flour, baking powder, and salt. This helps to evenly distribute the leavening agent and ensures your cookies rise beautifully.
- Combine wet and dry ingredients: Gradually add the dry mixture to the wet ingredients. I usually do this in three parts, mixing gently until just combined. You don’t want to overmix—just enough that you can’t see any more flour!
- Fold in the chocolate chips: This is my favorite part! Gently fold the chocolate chips into the batter, making sure they’re evenly distributed. Oh, the anticipation of those melty chips!
- Drop spoonfuls onto a baking sheet: Using a tablespoon or cookie scoop, drop generous spoonfuls of the batter onto a lined baking sheet. Leave some space between each cookie, as they will spread a little while baking.
- Bake: Pop the baking sheet into the preheated oven and bake for 10-12 minutes. You’ll know they’re ready when the edges are lightly golden but the centers still look a bit soft—that’s the secret to soft, chewy cookies!
- Cool before serving: Once baked, let the cookies cool on the sheet for about 5 minutes before transferring them to a wire rack. This cooling time lets them set up perfectly. Then, dig in and enjoy!
And there you have it! In just a few simple steps, you’ll have a batch of delicious cookies that will fill your home with the delightful spirit of Christmas. Enjoy making sweet memories as you savor the fruits of your labor!
Why You’ll Love This Recipe
- Quick and Easy Preparation: With just 15 minutes of prep time and only 12 minutes in the oven, you can whip up a batch of these cookies without spending all day in the kitchen. Perfect for those last-minute holiday baking sessions!
- Festive Flavors: The combination of buttery goodness and rich chocolate chips brings a delightful taste that embodies the spirit of Christmas. Each bite is like a warm hug during the chilly holiday season.
- Family-Friendly Fun: Kids love to help out in the kitchen, and this recipe is simple enough for little hands to get involved. From measuring ingredients to dropping spoonfuls of dough, it’s a great way to create lasting memories together.
- Perfect for Sharing: These cookies make wonderful gifts! Pack them in festive tins or boxes for friends, neighbors, or coworkers, and spread the joy of homemade treats during the holidays.
- Versatile Additions: Feel free to customize the recipe! You can swap chocolate chips for dried fruit, nuts, or even candy canes for a seasonal twist. The possibilities are endless!
Tips for Success
To ensure your cookies turn out perfect every time, here are some of my favorite tips and tricks that I’ve learned along the way:
- Room Temperature Ingredients: Make sure your butter and eggs are at room temperature. This helps them blend smoothly, resulting in a better texture. Trust me, it makes a difference!
- Don’t Overmix: When combining your wet and dry ingredients, mix just until you no longer see flour. Overmixing can lead to tough cookies, and we definitely want them soft and chewy!
- Chill the Dough: If you have time, chilling the dough for about 30 minutes can help prevent the cookies from spreading too much while baking, giving you thicker, more bakery-style cookies.
- Use a Cookie Scoop: For evenly sized cookies, a cookie scoop is a game-changer. It not only ensures uniformity but also makes dropping the dough onto the baking sheet super easy!
- Check for Doneness: Remember, cookies will continue to cook a bit after you take them out of the oven, so take them out when they look slightly underdone in the center. They’ll firm up as they cool!
By keeping these tips in mind, you’ll be well on your way to baking up a batch of cookies that not only taste amazing but also bring smiles all around!
Nutritional Information Section
Here’s a quick look at the estimated nutritional values for each cookie, perfect for those who like to keep an eye on their holiday indulgences:
- Serving Size: 1 cookie
- Calories: 150
- Fat: 7g
- Saturated Fat: 4g
- Unsaturated Fat: 2g
- Trans Fat: 0g
- Cholesterol: 30mg
- Sodium: 100mg
- Carbohydrates: 21g
- Fiber: 1g
- Sugar: 10g
- Protein: 2g
Please note that these values are estimates and can vary based on ingredient brands and portion sizes. Enjoy your cookies without worry, as they are made with love and the spirit of Christmas!
FAQ Section
Got questions about this delightful *Christmas baking* recipe? You’re not alone! Here are some common queries I’ve encountered, along with my answers to help you navigate your festive baking journey.
- Can I use different types of chocolate chips?
Absolutely! While semi-sweet chocolate chips are a classic choice, feel free to experiment with dark chocolate, milk chocolate, or even white chocolate chips. You can also mix them for a fun twist! - How do I store leftover cookies?
To keep your cookies fresh, store them in an airtight container at room temperature. They should last about a week. If you want to keep them longer, you can freeze them for up to three months. Just make sure to separate layers with parchment paper to prevent sticking! - Can I add nuts or dried fruit to the recipe?
Yes! Nuts like walnuts or pecans add a nice crunch, and dried fruits like cranberries or raisins bring sweetness. Just make sure to adjust the amount of chocolate chips if you add extra ingredients so the dough doesn’t get too crowded! - What if I don’t have a mixer?
No worries! You can absolutely make these cookies by hand. Just use a sturdy wooden spoon to cream the butter and sugar, and mix everything together. It may take a bit more effort, but the cookies will still turn out delicious! - Can I make this recipe gluten-free?
Yes! You can substitute all-purpose flour with a gluten-free flour blend. Just make sure the blend contains xanthan gum, or add a little to help with the texture. Happy baking!
I hope these answers help you feel more confident as you embark on your *Christmas baking* adventure. Enjoy every moment of it, and may your kitchen be filled with warmth and joy!
Storage & Reheating Instructions
After you’ve enjoyed your delicious cookies, storing them properly is key to keeping them fresh and tasty! Here’s how to make sure your festive treats stay at their best:
Storing Leftovers: Once your cookies have completely cooled, place them in an airtight container. Layer them with parchment paper to prevent sticking, especially if you’re storing multiple layers. This helps maintain their soft, chewy texture! If kept at room temperature, they should stay fresh for about a week. For longer storage, you can freeze them.
Freezing Cookies: To freeze, first, flash freeze the cookies by placing them in a single layer on a baking sheet for about an hour. Once frozen, transfer them to a freezer-safe bag or container. They’ll keep well for up to three months! Just make sure to label the bag with the date so you can keep track of how long they’ve been stored.
Reheating Tips: When you’re ready to enjoy your cookies again, there’s no need to thaw them if you’re in a hurry! Simply pop them in the microwave for about 10-15 seconds to warm them up—this will bring back that fresh-out-of-the-oven feel. If you prefer a crispier texture, you can reheat them in the oven at 350°F (175°C) for about 5-7 minutes. Just keep an eye on them to avoid overbaking!
With these simple storage and reheating tips, you can savor the taste of your holiday baking long after the festivities are over. Enjoy every crumb!
Serving Suggestions
Once you’ve baked up a batch of these scrumptious cookies, it’s time to think about how to elevate the festive experience! Here are a few delightful ideas to pair with your cookies that will have everyone raving:
- Hot Cocoa Bar: Set up a cozy hot cocoa bar alongside your cookies! Offer toppings like whipped cream, marshmallows, and peppermint sticks for a fun twist. The rich chocolatey goodness of the cocoa pairs perfectly with the cookies!
- Festive Milk: What better way to enjoy cookies than with a glass of cold milk? Consider infusing your milk with a splash of vanilla or a sprinkle of cinnamon for a holiday twist that complements the flavors of the cookies.
- Fruit and Nut Platter: Balance the sweetness of the cookies with a platter of fresh fruits like sliced apples, pears, or berries, along with a selection of nuts. The crunchiness and freshness of the fruit add a delightful contrast to the rich cookies.
- Cheese Board: For a more savory option, create a cheese board with a variety of cheeses, crackers, and some sweet jams. The combination of sweet and savory will tantalize your taste buds and impress your guests.
- Holiday Ice Cream Sundaes: Take your cookies to the next level by turning them into delicious ice cream sundaes! Crumble a cookie on top of a scoop of vanilla or peppermint ice cream, drizzle with chocolate sauce, and finish with a cherry on top.
These serving suggestions will not only enhance your cookie experience but also create a warm, inviting atmosphere for your holiday gatherings. So gather your loved ones, serve up those cookies, and enjoy every delicious moment together!
Call to Action
Now that you’ve whipped up these delightful cookies and filled your home with the sweet spirit of *Christmas baking*, I’d love to hear all about your baking adventures! Did you tweak the recipe a bit, or maybe try a fun variation? Leave a comment below and share your thoughts or any tips you discovered along the way. Your experiences might inspire someone else to create their own holiday magic!
If you enjoyed this recipe, please take a moment to rate it. Your feedback means the world to me and helps others find this festive treat! And don’t forget to share your creations on social media—tag me so I can see all the deliciousness you’ve baked up. Let’s spread the joy of *Christmas baking* together!
Print
Christmas Baking: 7 Sweet Ways to Create Fond Memories
- Total Time: 27 minutes
- Yield: 24 cookies 1x
- Diet: Vegetarian
Description
A festive baking recipe perfect for Christmas celebrations.
Ingredients
- 2 cups all-purpose flour
- 1 cup sugar
- 1/2 cup butter
- 2 eggs
- 1 teaspoon vanilla extract
- 1 teaspoon baking powder
- 1/2 teaspoon salt
- 1 cup chocolate chips
Instructions
- Preheat the oven to 350°F (175°C).
- Cream together the butter and sugar in a bowl.
- Add the eggs and vanilla, mixing well.
- In another bowl, combine flour, baking powder, and salt.
- Gradually add dry ingredients to the wet mixture.
- Fold in the chocolate chips.
- Drop spoonfuls of batter onto a baking sheet.
- Bake for 10-12 minutes.
- Let cool before serving.
Notes
- Store in an airtight container.
- Can be frozen for up to three months.
- Prep Time: 15 minutes
- Cook Time: 12 minutes
- Category: Dessert
- Method: Baking
- Cuisine: American
Nutrition
- Serving Size: 1 cookie
- Calories: 150
- Sugar: 10g
- Sodium: 100mg
- Fat: 7g
- Saturated Fat: 4g
- Unsaturated Fat: 2g
- Trans Fat: 0g
- Carbohydrates: 21g
- Fiber: 1g
- Protein: 2g
- Cholesterol: 30mg
Keywords: christmas baking


