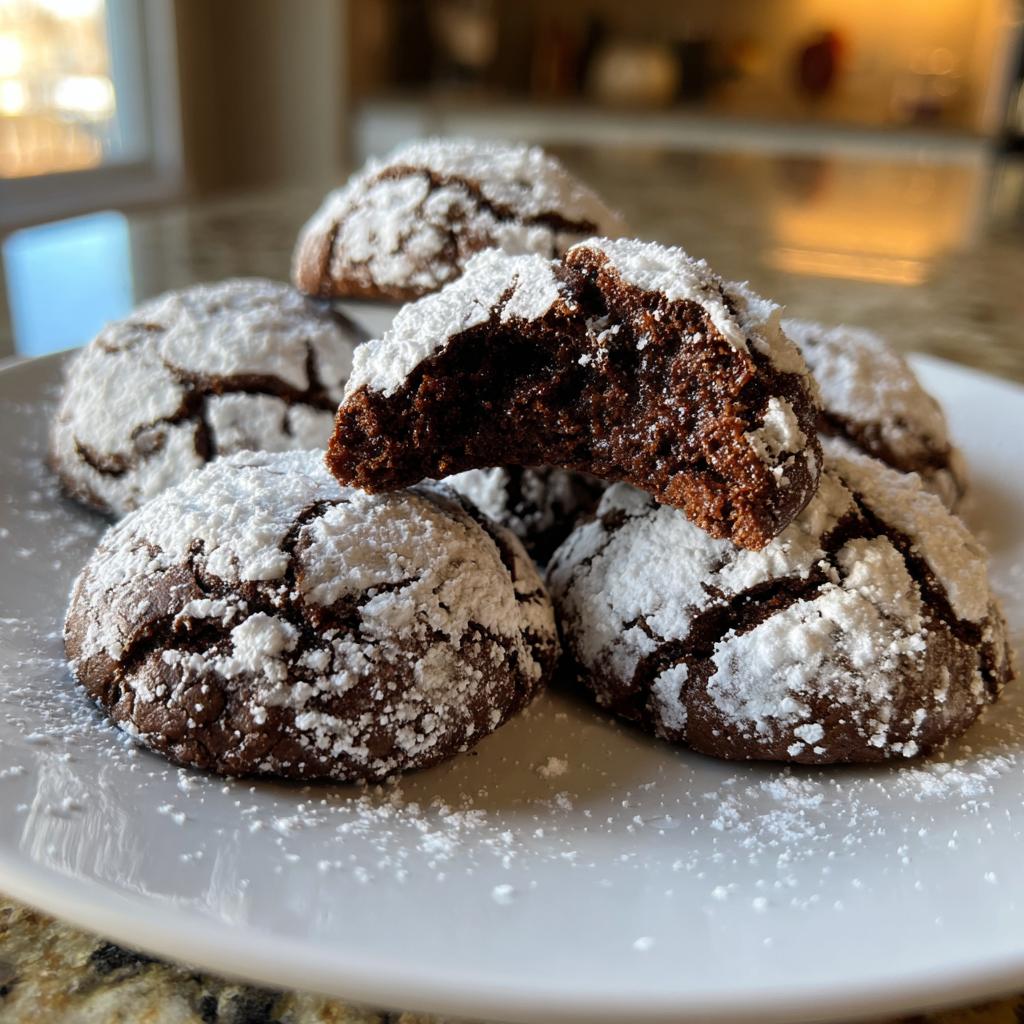
Oh, let me tell you about chocolate snowball cookies! These little bites of joy are the epitome of rich, buttery goodness, and they just melt in your mouth. I first discovered them during a cozy holiday gathering, when my aunt brought a plate piled high with these snowy delights. The moment I took a bite, I was hooked! The powdered sugar coating made them look like a winter wonderland, and they tasted like pure bliss. It’s like a chocolatey hug right when you need it most!
These cookies have a special place in my heart, and I love making them for family gatherings and cozy nights in. They’re so easy to whip up, and the best part? You can enjoy them fresh out of the oven or save some for later. Trust me, you’ll want to share these with everyone. Get ready to embrace the deliciousness and bring a bit of magic into your kitchen with these lovely cookies!
Ingredients for Chocolate Snowball Cookies
Gathering the right ingredients is key to making these delightful chocolate snowball cookies. Here’s what you’ll need:
- 1 cup unsalted butter, softened: Make sure your butter is at room temperature for easy creaming. This will help create that rich, buttery flavor that’s so essential!
- 1/2 cup powdered sugar: This sweet addition will not only sweeten the dough but will also be used later for that beautiful snowy coating.
- 1 teaspoon vanilla extract: Pure vanilla extract enhances the flavor, making your cookies taste like a warm hug!
- 2 cups all-purpose flour: This is the backbone of your cookies. Make sure to spoon and level it for accurate measuring.
- 1/2 cup cocoa powder: Choose a good-quality cocoa powder for that deep, rich chocolate flavor that shines through.
- 1/4 teaspoon salt: A little salt balances the sweetness and enhances all the other flavors.
- 1 cup chopped nuts (optional): I love adding chopped walnuts or pecans for a delightful crunch, but feel free to skip this if you prefer a nut-free version!
- 1/2 cup powdered sugar for coating: This is the finishing touch that gives your cookies their signature snowy look.
Having all these ingredients ready will set you up for success. Let’s dive into making these delicious treats!
How to Prepare Chocolate Snowball Cookies
Now that you’ve gathered all those delicious ingredients, it’s time to bring them together into something magical! Follow these steps, and you’ll have a batch of chocolate snowball cookies that will impress everyone.
Prepping the Oven and Dough
First things first, let’s get that oven preheated! Set it to 350°F (175°C) so it’s nice and ready to bake those cookies to perfection. While that’s warming up, grab a large mixing bowl and start creaming the softened butter with 1/2 cup of powdered sugar. You want to mix until it’s nice and fluffy—think whipped honey! This usually takes about 2-3 minutes with a hand mixer or a sturdy wooden spoon if you’re feeling adventurous.
Once your butter and sugar are looking fabulous, add in that teaspoon of vanilla extract and mix well. Now, in a separate bowl, whisk together the all-purpose flour, cocoa powder, and salt. This step is crucial because it ensures that the cocoa and flour are evenly distributed, giving you a consistent cookie texture. Gradually add this dry mixture to your buttery goodness. It’s best to do this in two or three additions, gently folding it in until everything is just combined. If you’re adding chopped nuts, now’s the time to fold them in carefully!
At this stage, your dough should feel soft but not sticky—if it’s too soft, don’t worry! Just pop it in the fridge for about 30 minutes to chill. This makes it easier to handle and shapes those beautiful little balls of dough.
Baking the Cookies
Now that your dough is ready, grab a baking sheet and line it with parchment paper. This helps keep your cookies from sticking and makes cleanup a breeze! Use a tablespoon or a small cookie scoop to form your dough into small balls, about 1 inch in diameter. Place them on the baking sheet, giving them a little space to spread out while baking.
Slide your baking sheet into the preheated oven and bake those beauties for 10-12 minutes. You’ll know they’re done when the edges are set, and the centers look a little soft. Don’t worry, they’ll firm up as they cool! Let them cool on the baking sheet for a few minutes before transferring them to a wire rack. This helps them hold their shape while still being warm and delicious.
Coating with Powdered Sugar
Once your cookies have cooled slightly, it’s time for the fun part—rolling them in powdered sugar! Grab a shallow bowl and fill it with 1/2 cup of powdered sugar. When the cookies are still warm (but not too hot), take them one by one and gently roll them in the sugar, ensuring they’re completely coated. This gives them that signature snowy finish!
After they’re coated, place them back on the wire rack to cool completely. And just like that, you’ve made a batch of chocolate snowball cookies that look as good as they taste! Get ready to enjoy these delightful treats, or share them with friends and family (if you can resist the temptation!).
Why You’ll Love Chocolate Snowball Cookies
- Quick Prep Time: With just 15 minutes of prep, you can whip up these delightful cookies in no time!
- Simple Ingredients: You probably have most of these ingredients in your pantry already, making it super convenient.
- Rich Flavor: The combination of buttery goodness and rich cocoa creates a melt-in-your-mouth experience that’s simply irresistible.
- Versatile: Whether you enjoy them plain or with nuts, these cookies can cater to different tastes and preferences.
- Perfect for Any Occasion: They’re not just for the holidays—enjoy them anytime you crave something sweet!
- Fun to Make: Rolling them in powdered sugar feels like a mini celebration, adding that festive touch!
Trust me, once you try these chocolate snowball cookies, they’ll become a favorite in your home!
Tips for Success with Chocolate Snowball Cookies
To ensure your chocolate snowball cookies turn out perfectly every time, here are some tried-and-true tips that I swear by:
- Chill the Dough: If you find your dough a bit too soft to handle, don’t panic! Just pop it in the fridge for about 30 minutes. This chilling time makes it easier to scoop and shape those lovely little balls.
- Use Quality Cocoa Powder: For that rich chocolate flavor, opt for high-quality cocoa powder. Dark cocoa powder is an excellent choice if you want a deeper taste—trust me, it’s worth it!
- Measure Accurately: Baking is a science, so be precise with your ingredient measurements. Spoon and level your flour for accuracy; this prevents your cookies from being too dry or dense.
- Watch the Baking Time: Keep an eye on your cookies as they bake. They should have set edges but soft centers. Remember, they’ll continue to firm up as they cool, so don’t overbake!
- Experiment with Flavors: Feel free to mix it up! Add a pinch of espresso powder to enhance the chocolate flavor, or use flavored extracts like almond for a unique twist. You could even throw in some mini chocolate chips for extra gooeyness!
- Store Properly: Keep your cookies in an airtight container at room temperature. They stay fresh for several days, though I doubt they’ll last that long once you start munching!
These tips will help you achieve cookie perfection, making each batch a delightful treat for you and your loved ones. Happy baking!
Nutritional Information Disclaimer
As much as I love sharing these chocolate snowball cookies with you, it’s important to note that nutritional values can vary based on the specific ingredients and brands you choose. The calorie counts and nutrient details can shift depending on factors like the type of butter used or whether you opt for regular or dark cocoa powder. So, while I’ve provided some general estimates, I can’t guarantee that the exact nutrition data will match what you see on your kitchen scale. Always feel free to adjust ingredients to suit your dietary needs, and remember, the joy of baking is as much about enjoying the process as it is about the numbers! Happy baking and indulging!
FAQ about Chocolate Snowball Cookies
Here are some common questions I get about chocolate snowball cookies, along with my trusty answers to help you out!
Can I store these cookies? How long do they last?
Absolutely! You can store chocolate snowball cookies in an airtight container at room temperature. They’ll stay fresh for about 5-7 days. If you’d like them to last longer, you can pop them in the fridge for up to two weeks. Just make sure to let them come back to room temperature before enjoying for the best taste!
What can I use instead of butter?
If you’re looking for a dairy-free option, you can substitute unsalted butter with a plant-based butter or coconut oil. Just keep in mind that the flavor and texture might vary slightly, but they’ll still be delicious!
Can I use a different kind of sugar for coating?
Sure thing! While powdered sugar gives that classic snowy look, you can use granulated sugar for a crunchier finish if you prefer. Just know it won’t have that soft, snowy effect we love about these cookies!
What if I don’t have cocoa powder?
If you find yourself without cocoa powder, you can substitute it with a similar amount of carob powder for a different flavor profile. Alternatively, you could use all-purpose flour and turn these into vanilla snowball cookies, but they’ll be a different experience entirely!
Can I freeze the dough?
Yes, you can freeze the cookie dough! Just shape it into balls, place them on a baking sheet to freeze individually, and then transfer them to an airtight container or freezer bag. They’ll keep well for about 2-3 months. When you’re ready to bake, there’s no need to thaw—just pop them in the oven and add a minute or two to the baking time!
Are there any fun variations I can try?
Oh, absolutely! You can experiment with adding mini chocolate chips, different nuts, or even a splash of flavored extract like almond or peppermint for a twist. If you want a little crunch, try rolling the cookies in crushed nuts before the powdered sugar! The possibilities are endless, and that’s what makes baking so much fun!
Storage & Reheating Instructions
Storing your chocolate snowball cookies properly is key to keeping them fresh and delicious! After they’ve cooled completely, transfer them to an airtight container. This will help maintain their soft texture and rich flavor. You can keep them at room temperature for about 5-7 days, but trust me, they probably won’t last that long!
If you want to extend their life a bit, you can store them in the fridge. Just be sure to let them come back to room temperature before indulging, as they taste best when they’re soft and a little warm. If you find yourself with extras (which is unlikely, but just in case!), you can also freeze them. Lay the cookies in a single layer on a baking sheet to freeze individually, then transfer them into a freezer-safe bag or container. They’ll stay good for about 2-3 months.
When you’re ready to enjoy those frozen gems, there’s no need to thaw them first! Just pop them directly into a preheated oven at 350°F (175°C) for about 5-7 minutes. This will bring back their delightful warmth and softness, making them taste as good as fresh out of the oven. Enjoy every bite!
Call to Action
I’d love to hear about your adventures in making these chocolate snowball cookies! Have you tried the recipe? What do you think? Any fun variations you’ve come up with? Your feedback means the world to me, and I can’t wait to know how they turned out for you!
If you enjoyed this recipe, please take a moment to rate it and share your thoughts in the comments below. And don’t forget to share the love on social media! Snap a picture of your delicious creations and tag me—I’d be thrilled to see your beautiful cookies in action. Let’s spread the joy of baking together!
Print
Chocolate Snowball Cookies: 7 Delightful Bites of Joy
- Total Time: 27 minutes
- Yield: 24 cookies 1x
- Diet: Vegetarian
Description
Chocolate snowball cookies are rich, buttery treats rolled in powdered sugar.
Ingredients
- 1 cup unsalted butter, softened
- 1/2 cup powdered sugar
- 1 teaspoon vanilla extract
- 2 cups all-purpose flour
- 1/2 cup cocoa powder
- 1/4 teaspoon salt
- 1 cup chopped nuts (optional)
- 1/2 cup powdered sugar for coating
Instructions
- Preheat the oven to 350°F (175°C).
- In a bowl, cream together butter and 1/2 cup powdered sugar.
- Add vanilla and mix well.
- In another bowl, combine flour, cocoa powder, and salt.
- Gradually add dry ingredients to the butter mixture.
- If using, fold in chopped nuts.
- Form dough into small balls and place on a baking sheet.
- Bake for 10-12 minutes.
- Allow to cool slightly, then roll in powdered sugar.
Notes
- Store cookies in an airtight container.
- For a richer flavor, use dark cocoa powder.
- Chill the dough for 30 minutes for easier handling.
- Prep Time: 15 minutes
- Cook Time: 12 minutes
- Category: Dessert
- Method: Baking
- Cuisine: American
Nutrition
- Serving Size: 1 cookie
- Calories: 120
- Sugar: 6g
- Sodium: 50mg
- Fat: 8g
- Saturated Fat: 5g
- Unsaturated Fat: 3g
- Trans Fat: 0g
- Carbohydrates: 12g
- Fiber: 1g
- Protein: 2g
- Cholesterol: 30mg
Keywords: chocolate snowball cookies


