There’s something incredibly satisfying about making a basic chili recipe, isn’t there? It’s like a warm hug on a chilly day! I remember my first time making chili—it was a bit of a chaotic adventure in the kitchen, with spices flying and beans rolling off the counter. But that’s the beauty of chili; it’s forgiving and adaptable, which makes it perfect for new cooks and seasoned chefs alike. You can throw in whatever you have on hand, and it’ll still turn out delicious!
This recipe is all about simplicity and flavor, making it a go-to for weeknight dinners or lazy Sundays. You’ll love how quickly it comes together, and the aromas that fill your kitchen will have everyone gathering around for a taste. Plus, it’s versatile—serve it over rice, pile it high on nachos, or just enjoy it on its own with a slice of cornbread on the side. Trust me, once you get a taste of this basic chili, it’ll become a staple in your home, too! So, let’s dive into the ingredients and get started on this comforting dish!
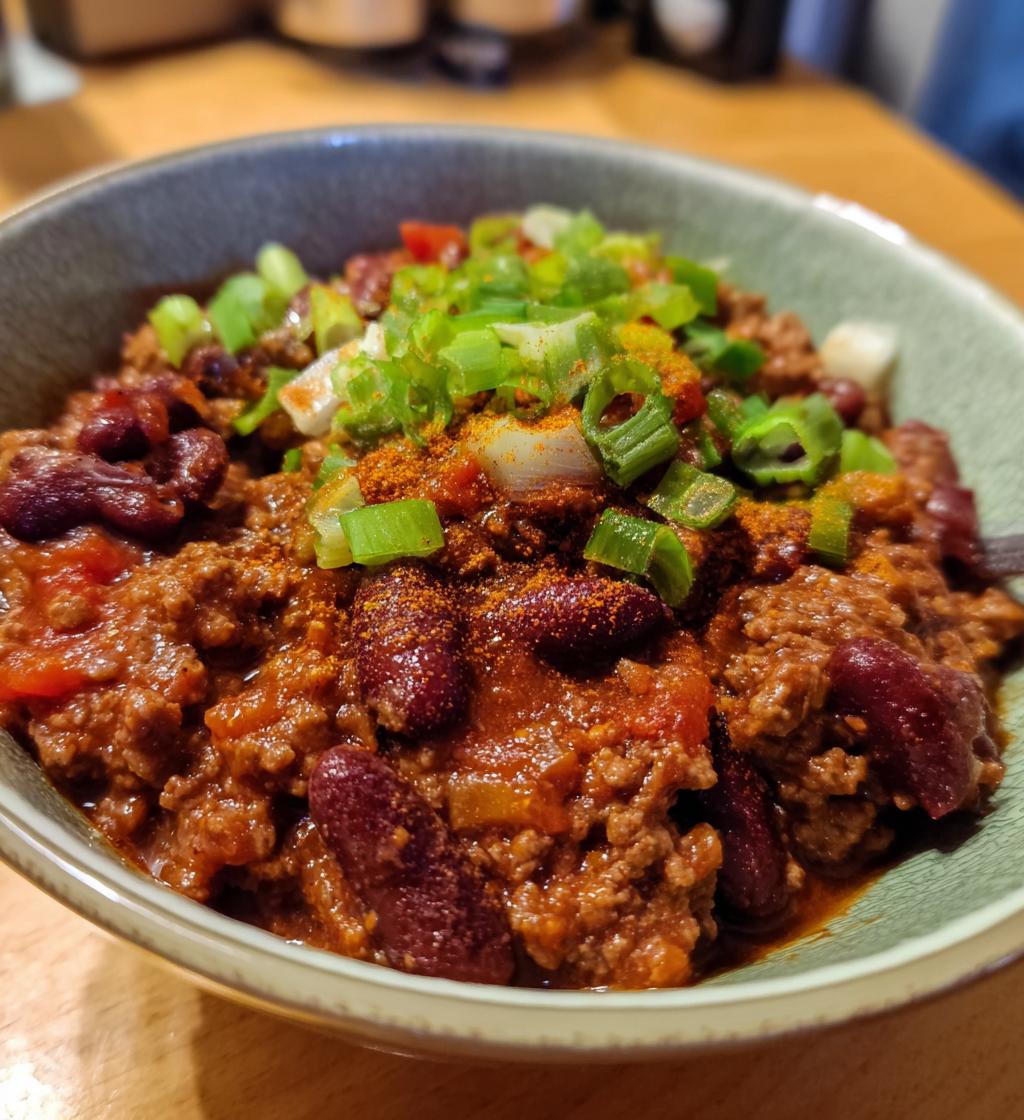
Ingredients List
Let’s gather our ingredients for this delightful basic chili recipe. You’ll see that everything is super straightforward, and you might already have most of these items in your pantry!
- 1 lb ground beef, preferably lean – This gives your chili that hearty base. Feel free to use turkey or a meat substitute if you want to make it lighter!
- 1 can (15 oz) kidney beans, drained – These beans add a lovely texture and protein. If you’re feeling adventurous, try using pinto or navy beans instead!
- 1 can (15 oz) black beans, drained – I love the flavor and color they bring to the pot. Plus, they’re packed with nutrients!
- 1 can (28 oz) diced tomatoes – The star of the show! They provide the perfect balance of acidity and sweetness. You can use fire-roasted for a smoky kick!
- 1 medium onion, chopped – This aromatic adds depth to the flavor. Don’t fret if you cry a little while chopping—it’s worth it!
- 2 cloves garlic, minced – Garlic makes everything better, right? It brings a wonderful aroma and flavor that just can’t be beaten.
- 2 tablespoons chili powder – This is where the magic happens! Adjust the quantity if you like it spicier or milder.
- 1 teaspoon cumin – This earthy spice enhances the chili’s flavor profile wonderfully. You might want to add a little more if you’re a cumin lover like me!
- Salt to taste – Salt is essential to bring out all the flavors. Start with a little, and add more if you need it!
- Black pepper to taste – A dash of black pepper can really elevate the dish. Give it a sprinkle as you go!
Now that we have everything we need, let’s move on to the fun part—cooking up this delicious chili!
How to Prepare Instructions
Alright, let’s get cooking! Follow these step-by-step instructions to whip up your basic chili recipe. Trust me, it’s easier than you think, and I promise the results will be worth it!
Step 1: Brown the Ground Beef
First things first—grab a large pot and heat it over medium heat. Once it’s warm, add your ground beef and break it up with a spatula. You’ll want to cook it for about 5-7 minutes, stirring occasionally, until it’s nicely browned and no longer pink. This step really builds that meaty flavor!
Step 2: Cook the Onion and Garlic
Now, let’s add some aromatics! Toss in the chopped onion and minced garlic to the pot. Cook them together for around 3-5 minutes, stirring until the onion becomes translucent. You’ll love the smell wafting through your kitchen at this point—it’s the best!
Step 3: Add Spices
Next up, it’s time to spice things up! Stir in the chili powder and cumin. Cook everything for about 2 minutes to let those spices bloom and enhance the flavors. You’ll notice the aroma changing, and that’s when you know you’re on the right track!
Step 4: Add Beans and Tomatoes
Now, it’s bean time! Add the drained kidney beans, black beans, and the can of diced tomatoes to the pot. Give it a good stir to combine everything evenly. This mixture is where the magic truly happens, with all those beautiful colors coming together!
Step 5: Bring to a Boil
Time to crank up the heat! Bring the chili mixture to a boil, letting it bubble for a minute or so. This step is crucial because it brings all the flavors together. Once you see those bubbles, reduce the heat to low and let it simmer gently.
Step 6: Season and Serve
After about 30 minutes of simmering (you can use this time to prep your cornbread!), it’s time to season your chili. Taste it and adjust with salt and black pepper as needed. Serve it hot, and enjoy the cozy warmth of your homemade chili!
Nutritional Information Section
Now that you’ve whipped up this comforting basic chili recipe, let’s take a moment to talk about the nutrition. This is just an estimate, but it gives you a good idea of what you’re serving up!
- Calories: 300
- Fat: 15g
- Protein: 20g
- Carbohydrates: 30g
- Sugar: 2g
- Sodium: 600mg
- Fiber: 8g
- Cholesterol: 50mg
This chili is not only delicious but also packed with protein and fiber, making it a filling meal! Enjoy each hearty bowl knowing it’s a great choice for a weeknight dinner.
Why You’ll Love This Recipe
- Quick and Easy: With just 10 minutes of prep and 40 minutes of cooking, this chili comes together faster than you can say “dinner’s ready!”
- Flavorful: The combination of spices, beans, and tomatoes creates a rich and satisfying flavor profile that will have your taste buds dancing.
- Versatile: Serve it as is, over rice, or as a topping for nachos. This basic chili recipe adapts to whatever you’re craving!
- Gluten-Free: Great for those with dietary restrictions! You can enjoy this hearty dish without worrying about gluten.
- Freezes Well: Make a big batch and freeze the leftovers for a quick meal later. It’s like having a delicious homemade meal on standby!
Tips for Success
Before you dive into making this basic chili recipe, let me share some of my favorite tips to ensure it turns out absolutely perfect every time!
- Adjust the Spice Level: If you love heat, don’t hesitate to kick it up a notch! You can add jalapeños or a pinch of cayenne pepper to the mix. Start with a little and taste as you go—it’s easier to add than to take away!
- Make It Ahead: Chili tastes even better the next day! Make a big batch and let it sit in the fridge overnight. The flavors meld beautifully, and you’ll have a quick meal ready to go the next day!
- Experiment with Toppings: Don’t be shy when it comes to toppings! Sour cream, shredded cheese, diced avocado, or fresh cilantro can elevate your chili to the next level. Everyone loves a little customization!
- Beans or No Beans? This is a classic debate! If you prefer a meatier chili, feel free to skip the beans or reduce the amount. You can also swap in other beans like chickpeas for a twist!
- Use Quality Ingredients: Since this dish has so few components, using high-quality canned tomatoes and spices makes a noticeable difference. Trust me, it’s worth it for that extra burst of flavor!
With these tips in your back pocket, you’re all set to create a chili that everyone will rave about. Happy cooking!
Storage & Reheating Instructions
Alright, let’s talk about how to store those delicious leftovers from your basic chili recipe! You’ll want to keep that amazing flavor intact, so here’s how I do it:
First, let the chili cool down a bit before transferring it to storage containers. I recommend using airtight containers to keep it fresh. You can portion it out into smaller containers if you want to grab a quick meal later. Just make sure to leave a little space at the top, as the chili can expand a bit when it freezes!
Speaking of freezing, this chili freezes beautifully! If you’re planning to store it for more than a few days, just pop those containers in the freezer. It will last up to 3 months, so you can have a comforting meal waiting for you anytime you need it!
When it’s time to reheat, you’ve got a couple of options. For the quickest method, just microwave it! Place your portion in a microwave-safe bowl, cover it loosely (to avoid splatters), and heat for about 2-3 minutes, stirring halfway through. You might need to add a splash of water or broth if it looks a bit thick.
If you prefer a stovetop method, transfer the chili to a saucepan and heat it over medium heat. Stir occasionally until it’s warmed through, which usually takes about 5-10 minutes. This method helps to retain that lovely texture and flavor!
And remember, always taste it again after reheating! You might want to adjust the seasoning a bit, especially if it’s been sitting in the fridge for a while. Enjoy your chili all over again!
FAQ Section
Got questions about this basic chili recipe? No worries, I’ve got you covered! Here are some of the most common inquiries I hear, along with my trusty answers to help you out.
Can I use ground turkey or chicken instead of beef?
Absolutely! Ground turkey or chicken are great alternatives if you’re looking for a leaner option. Just keep in mind that the flavor might be a bit lighter, so you might want to add an extra pinch of spices to compensate!
What if I don’t have canned tomatoes?
No problem! You can swap in fresh diced tomatoes if you have them on hand. Just peel and chop them, and you’ll want to use about 2-3 cups. If you’re really in a pinch, a little tomato sauce or even salsa can work too!
Can I make this chili vegetarian or vegan?
You bet! For a vegetarian version, simply replace the ground beef with a plant-based meat substitute or extra beans. To make it vegan, ensure your substitute is vegan-friendly and skip any dairy toppings at serving. Trust me, it’ll still be hearty and delicious!
How can I make the chili spicier?
If you like it hot, there are so many ways to bring the heat! Add diced jalapeños, a splash of hot sauce, or some crushed red pepper flakes. Just start with a little and taste as you go—nobody wants to set their mouth on fire!
What can I serve with chili besides cornbread?
You can get creative here! Serve it over rice, pile it onto nachos, or even use it as a topping for baked potatoes. Some folks love it with a side of crusty bread or a fresh salad for a nice balance. The sky’s the limit!
How long can I store leftovers?
Leftovers can be stored in the fridge for about 3-4 days. Just make sure to keep it in airtight containers. If you want to keep it longer, freeze it for up to 3 months. Just remember to label and date your containers so you know what you’ve got waiting for you!
Feel free to reach out if you have any other questions or if something pops into your mind while cooking. Happy chili-making!
Print
basic chili recipe that warms your heart in 30 minutes
- Total Time: 50 minutes
- Yield: 4 servings 1x
- Diet: Gluten Free
Description
A simple and classic chili recipe that is easy to make.
Ingredients
- 1 lb ground beef
- 1 can (15 oz) kidney beans, drained
- 1 can (15 oz) black beans, drained
- 1 can (28 oz) diced tomatoes
- 1 medium onion, chopped
- 2 cloves garlic, minced
- 2 tablespoons chili powder
- 1 teaspoon cumin
- Salt to taste
- Black pepper to taste
Instructions
- In a large pot, brown the ground beef over medium heat.
- Add chopped onion and minced garlic. Cook until the onion is translucent.
- Stir in chili powder and cumin. Cook for 2 minutes.
- Add kidney beans, black beans, and diced tomatoes. Stir well.
- Bring the mixture to a boil, then reduce heat and simmer for 30 minutes.
- Season with salt and pepper to taste.
- Serve hot and enjoy.
Notes
- You can add more spices to taste.
- This chili freezes well.
- Serve with cornbread or rice.
- Prep Time: 10 minutes
- Cook Time: 40 minutes
- Category: Main Dish
- Method: Stovetop
- Cuisine: American
Nutrition
- Serving Size: 1 cup
- Calories: 300
- Sugar: 2g
- Sodium: 600mg
- Fat: 15g
- Saturated Fat: 6g
- Unsaturated Fat: 8g
- Trans Fat: 0g
- Carbohydrates: 30g
- Fiber: 8g
- Protein: 20g
- Cholesterol: 50mg
Keywords: basic chili recipe


