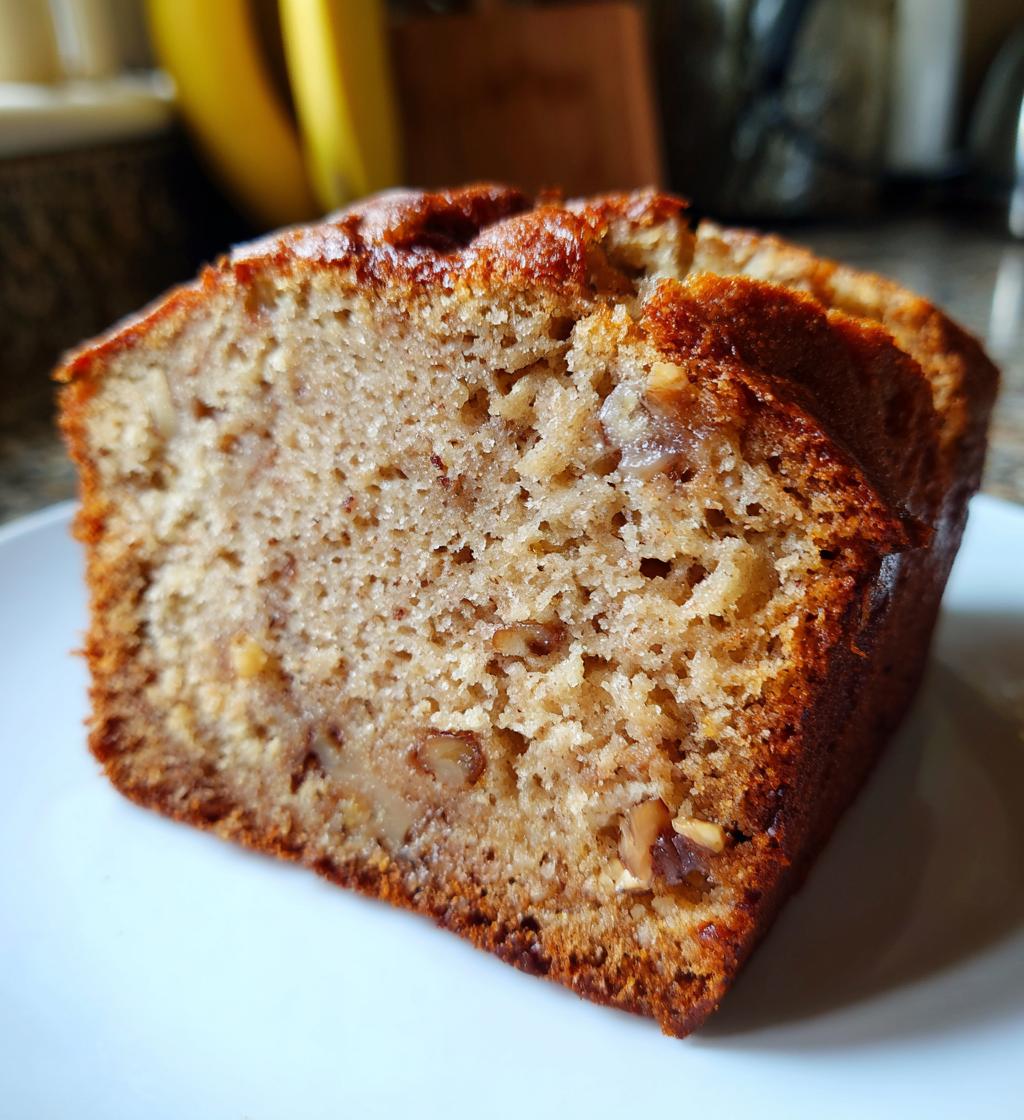
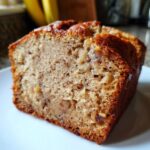
Oh my goodness, let me tell you about the joy of baking banana walnut bread! There’s truly nothing quite like the smell of this delicious treat wafting through your kitchen. It’s one of those recipes that brings back warm memories for me. I remember when I was younger, my mom would whip up a loaf using overripe bananas we’d usually overlook. We’d sit together, waiting impatiently for it to cool just enough to slice. The moment that first piece came out, slathered with a bit of butter? Pure bliss! The thing I love most about banana walnut bread is its moist texture and the delightful crunch from the walnuts. Every bite is like a cozy hug, and I can’t help but feel that nostalgia wash over me. Trust me, if you haven’t tried making this sweet, flavorful bread yet, you’re in for a real treat!
Oh my goodness, let me tell you about the joy of baking banana walnut bread! There’s truly nothing quite like the smell of this delicious treat wafting through your kitchen. It’s one of those recipes that brings back warm memories for me. I remember when I was younger, my mom would whip up a loaf using overripe bananas we’d usually overlook. We’d sit together, waiting impatiently for it to cool just enough to slice. The moment that first piece came out, slathered with a bit of butter? Pure bliss! The thing I love most about banana walnut bread is its moist texture and the delightful crunch from the walnuts. Every bite is like a cozy hug, and I can’t help but feel that nostalgia wash over me. Trust me, if you haven’t tried making this sweet, flavorful bread yet, you’re in for a real treat!
Ingredients List
Let’s gather everything we need to make this scrumptious banana walnut bread! Each ingredient plays a vital role in creating that perfect loaf, so pay close attention to the details. Here’s what you’ll need:
- 3 ripe bananas, mashed – The riper, the better! Look for bananas with plenty of brown spots for maximum sweetness.
- 1/3 cup melted butter – Use unsalted butter for the best flavor. It adds richness and moisture to the bread.
- 1 teaspoon baking soda – This is your leavening agent, helping the bread rise beautifully.
- A pinch of salt – Just a little to enhance all the flavors and balance the sweetness.
- 3/4 cup sugar – Granulated sugar works perfectly here, giving your bread that lovely sweetness.
- 1 large egg – This helps bind everything together and adds to the moist texture.
- 1 teaspoon vanilla extract – A splash of vanilla elevates the flavor profile; trust me, it’s worth it!
- 1 cup all-purpose flour – This is the base of your bread, creating that perfect structure.
- 1/2 cup chopped walnuts – The crunchy, nutty goodness that takes this banana walnut bread to the next level!
Once you have all these ingredients ready, you’re just a few steps away from enjoying a warm slice of nostalgia!
How to Prepare Banana Walnut Bread
Alright, let’s dive into the deliciousness of making banana walnut bread! Follow these simple steps, and you’ll have a loaf that will have everyone begging for more. I promise, it’s easier than you might think!
Step-by-Step Instructions
- Preheat your oven to 350°F (175°C). This is crucial! We want that oven nice and toasty so your bread bakes evenly.
- In a mixing bowl, mash the bananas with a fork. You want them nice and mushy—think baby food consistency. The more you mash, the sweeter your bread will be!
- Stir in the melted butter. Make sure it’s not too hot when you add it, or it might cook the banana. We want everything to mix smoothly!
- Mix in the baking soda and a pinch of salt. This step helps activate the baking soda, which is key for that lovely rise.
- Add the sugar, egg, and vanilla extract. Mix well after adding each ingredient to ensure everything is evenly incorporated.
- Stir in the flour until just combined. Be careful not to overmix; a few lumps are okay! This keeps the bread tender and fluffy.
- Fold in the chopped walnuts. I love the crunch they add! Just gently mix so you don’t break them up too much.
- Pour the batter into a greased loaf pan. Make sure it’s well-greased to avoid any sticking!
- Bake for 60-65 minutes or until a toothpick inserted into the center comes out clean. Your kitchen will smell heavenly by now!
- Cool in the pan for a few minutes, then transfer to a wire rack. Let it cool completely before slicing for the best texture.
Prepping the Ingredients
Before you start mixing, it’s essential to prep your ingredients. Start by peeling and mashing those ripe bananas—remember, the riper, the better! Next, chop your walnuts into small pieces; this helps distribute them evenly throughout the bread. And don’t forget to measure out your melted butter, sugar, and flour! Having everything ready to go makes the whole process so much smoother. Trust me, it’s worth taking a moment to prep before diving in!
Nutritional Information
Now, let’s talk about what you can expect in terms of nutrition from this delightful banana walnut bread! Keep in mind that these values are estimates and can vary based on the specific ingredients you use, but here’s a good idea of what a slice offers:
- Serving Size: 1 slice
- Calories: 200
- Fat: 9g
- Saturated Fat: 2g
- Unsaturated Fat: 7g
- Trans Fat: 0g
- Cholesterol: 30mg
- Sodium: 150mg
- Carbohydrates: 30g
- Fiber: 1g
- Sugar: 10g
- Protein: 3g
This banana walnut bread is not only delicious but also provides a decent amount of energy and nutrients. Enjoy each slice guilt-free, knowing you’re indulging in a treat that’s packed with flavor!
Why You’ll Love This Recipe
- Incredible Flavor: The sweetness of ripe bananas paired with crunchy walnuts creates a delightful taste in every bite.
- Easy to Make: With just a few simple steps, you can whip up a delicious loaf without any fuss.
- Perfect for Any Occasion: Whether it’s breakfast, a snack, or dessert, banana walnut bread fits right in!
- Diet-Friendly: This recipe is vegetarian and can easily be adapted for other dietary needs.
- Great for Ripe Bananas: A perfect way to use up those overripe bananas that might otherwise go to waste!
Tips for Success
To make sure your banana walnut bread turns out absolutely perfect, here are some handy tips that I’ve learned along the way!
- Use Overripe Bananas: The riper the bananas, the sweeter and more flavorful your bread will be. Look for bananas with plenty of brown spots – that’s when they’re at their peak!
- Don’t Overmix: When you add the flour, mix just until combined. Overmixing can lead to a dense loaf instead of the lovely light texture we want.
- Grease Your Pan Well: Make sure to grease your loaf pan generously to prevent any sticking. You can use butter or cooking spray – whatever you have on hand!
- Cool Properly: After baking, let the bread cool in the pan for about 10 minutes before transferring it to a wire rack. This helps it set properly.
- Store Correctly: Keep your banana walnut bread in an airtight container at room temperature to maintain its freshness. It can also be frozen for later enjoyment!
Follow these tips, and you’ll be on your way to baking a delicious banana walnut bread that everyone will love!
Variations
One of the best things about banana walnut bread is how versatile it can be! You can easily switch things up to suit your taste. Here are a few fun ideas:
- Chocolate Chips: Add 1/2 cup of chocolate chips to the batter for a decadent twist. The melty chocolate pairs beautifully with the bananas!
- Dried Fruit: Toss in some chopped dried apricots or raisins for a fruity surprise in every bite.
- Different Nuts: If walnuts aren’t your thing, feel free to substitute with pecans or almonds for a different crunch.
- Spices: Try adding a pinch of cinnamon or nutmeg for an aromatic touch that enhances the flavor.
Experimenting with these variations can make your banana walnut bread even more delightful, so don’t be afraid to get creative!
Storage & Reheating Instructions
Once you’ve baked your delicious banana walnut bread, you’ll want to keep it fresh for as long as possible! Here’s how to store it properly:
First, let the bread cool completely on a wire rack. This step is crucial to prevent any condensation from forming in your storage container, which can make your bread soggy. Once it’s cool, wrap the loaf tightly in plastic wrap or aluminum foil. If you want to keep it even fresher, place it in an airtight container. This helps maintain that lovely moisture and flavor!
If you have leftovers (which is rare in my house!), you can store the bread at room temperature for about 3-4 days. For longer storage, you can freeze it! Just slice the bread first, then wrap individual slices in plastic wrap and place them in a freezer-safe bag. This way, you can enjoy a slice whenever the craving hits! To reheat, simply pop a slice in the microwave for about 15-20 seconds or toast it for a warm, comforting treat.
FAQ Section
Q1. Can I use frozen bananas for this banana walnut bread recipe?
Absolutely! Just make sure to thaw them first and drain any excess liquid. Frozen bananas can actually be sweeter since they break down more, which is perfect for baking!
Q2. What can I substitute for walnuts in the recipe?
If walnuts aren’t your favorite, you can easily substitute them with pecans, almonds, or even hazelnuts. Each nut brings its own unique flavor and texture, so feel free to experiment!
Q3. How do I know when my banana walnut bread is done baking?
The best test is to insert a toothpick into the center of the loaf. If it comes out clean or with just a few moist crumbs, your bread is ready! It should also pull away slightly from the edges of the pan.
Q4. Can I make this banana walnut bread gluten-free?
Yes, you can! Just replace the all-purpose flour with a gluten-free flour blend. Make sure to check that your baking soda is gluten-free as well, and you’ll have a delicious gluten-free version!
Q5. How should I store leftover banana walnut bread?
To keep your banana walnut bread fresh, store it in an airtight container at room temperature for up to 3-4 days. You can also freeze it for longer storage by wrapping slices individually in plastic wrap!
Banana Walnut Bread: 7 Steps to Pure Baking Bliss
- Total Time: 75 minutes
- Yield: 1 loaf 1x
- Diet: Vegetarian
Description
A moist and flavorful banana walnut bread.
Ingredients
- 3 ripe bananas
- 1/3 cup melted butter
- 1 teaspoon baking soda
- Pinch of salt
- 3/4 cup sugar
- 1 large egg
- 1 teaspoon vanilla extract
- 1 cup all-purpose flour
- 1/2 cup chopped walnuts
Instructions
- Preheat your oven to 350°F (175°C).
- In a mixing bowl, mash the bananas with a fork.
- Stir in the melted butter.
- Mix in the baking soda and salt.
- Add the sugar, egg, and vanilla extract. Mix well.
- Stir in the flour until just combined.
- Fold in the walnuts.
- Pour the batter into a greased loaf pan.
- Bake for 60-65 minutes or until a toothpick comes out clean.
- Cool in the pan for a few minutes, then transfer to a wire rack.
Notes
- Use overripe bananas for best flavor.
- Store in an airtight container to keep it fresh.
- Can be frozen for later use.
- Prep Time: 15 minutes
- Cook Time: 60 minutes
- Category: Dessert
- Method: Baking
- Cuisine: American
Nutrition
- Serving Size: 1 slice
- Calories: 200
- Sugar: 10g
- Sodium: 150mg
- Fat: 9g
- Saturated Fat: 2g
- Unsaturated Fat: 7g
- Trans Fat: 0g
- Carbohydrates: 30g
- Fiber: 1g
- Protein: 3g
- Cholesterol: 30mg
Keywords: banana walnut bread


