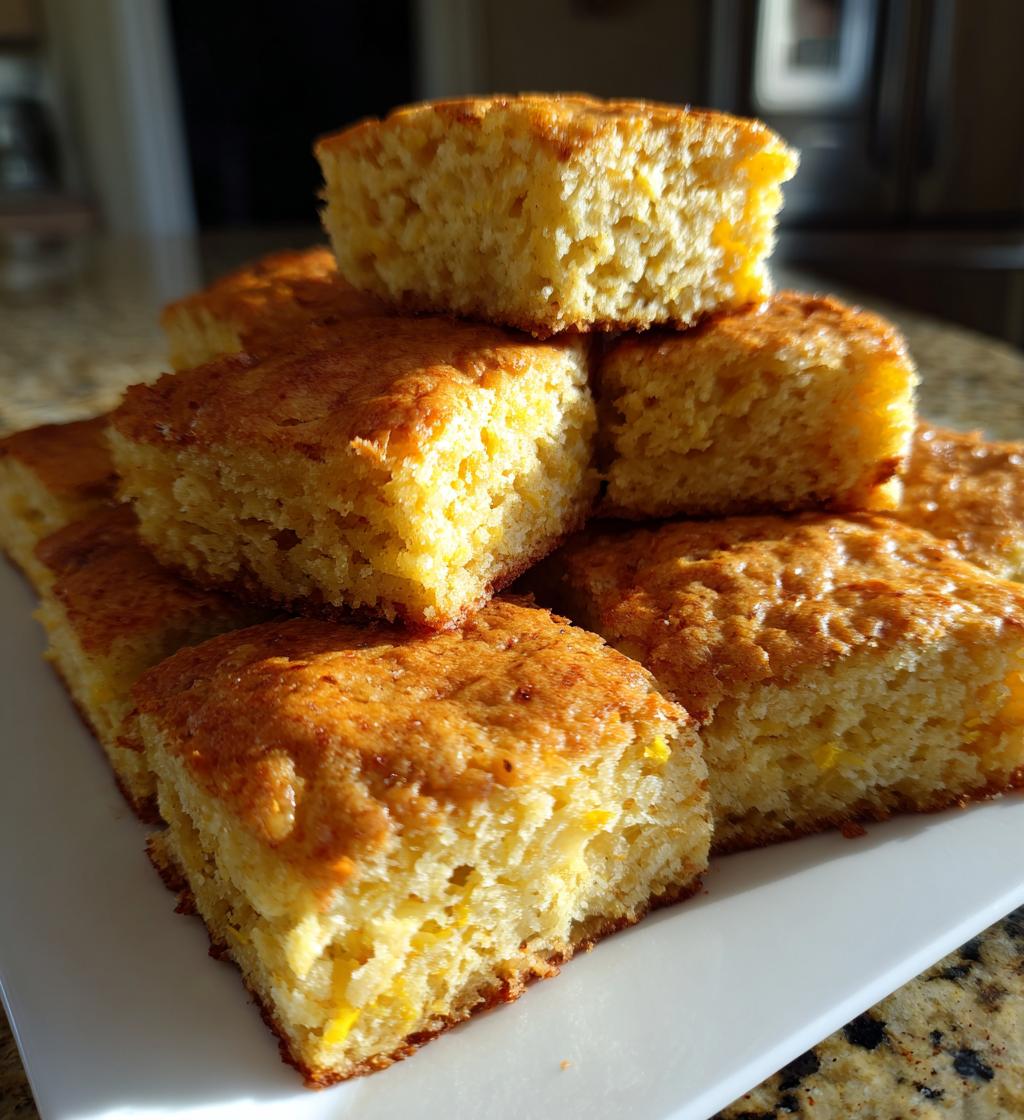
There’s just something so joyful about baking banana bread bars! I remember the first time I made them; the kitchen filled with the sweet aroma of ripe bananas mingling with melted butter, and it felt like a warm hug. These banana bread bars are not just easy to make, they’re the perfect solution for a quick snack or a delightful breakfast treat. Seriously, if you’ve got a few overripe bananas lying around, you’ve got the makings of something truly delicious!
What I love most about these bars is how they transform simple ingredients into a comforting dessert that’s both soft and chewy. You can whip them up in no time, and they disappear just as quickly. Whenever I bake these, I can’t help but think of cozy afternoons spent with family, everyone gathered around the table, reaching for just one more slice. Trust me, once you try these banana bread bars, you’ll be hooked, and they’ll become a staple in your home too!
Ingredients for Banana Bread Bars
Let’s gather everything we need to make these delightful banana bread bars! Here’s what you’ll need:
- 3 ripe bananas, mashed – The riper, the better! Look for bananas with plenty of brown spots; they make the bars extra sweet and flavorful.
- 1/2 cup melted butter – This adds richness and moisture that’s essential for that perfect texture.
- 1 cup granulated sugar – Just the right amount to sweeten up this treat without overpowering the banana flavor.
- 1 large egg, beaten – This helps bind everything together and gives the bars a lovely lift.
- 1 teaspoon pure vanilla extract – A splash of vanilla enhances the overall flavor beautifully.
- 1 teaspoon baking soda – This is our leavening agent, giving the bars that lovely rise.
- 1/4 teaspoon salt – Just a pinch to balance out the sweetness and enhance the flavors.
- 1 1/2 cups all-purpose flour – The backbone of our bars, providing structure and a tender crumb.
Having these ingredients prepped and ready will make your baking experience smooth and enjoyable. Trust me, you’ll want to savor every bite of these mouthwatering banana bread bars!
How to Prepare Banana Bread Bars
Alright, let’s roll up our sleeves and dive into making these delicious banana bread bars! The steps are simple, and I promise you’ll be so proud of the result. Ready? Let’s get started!
Preheat the Oven
First things first, you’ll want to preheat your oven to 350°F (175°C). Preheating is super important because it ensures that your bars bake evenly and rise beautifully. Trust me, a properly heated oven is the secret to achieving that perfect soft texture!
Mix the Ingredients
Now, grab a large mixing bowl and start by mashing those ripe bananas until they’re nice and smooth. I usually use a fork; it’s easy and gets the job done! Once you’ve got your bananas all mashed up, pour in the melted butter. Give them a good mix until it’s all combined! Next, add in the sugar, beaten egg, and vanilla extract. Mix it all together until you have a lovely, smooth mixture. The fragrance at this point is just heavenly!
Combine Dry Ingredients
In a separate bowl, whisk together the baking soda, salt, and flour. This step is key because it helps distribute the baking soda evenly throughout the flour, ensuring a nice rise. Once combined, gently stir the dry ingredients into your banana mixture. Be careful not to overmix – a few lumps are perfectly fine! Overmixing can lead to dense bars, and we want them to be fluffy and light.
Bake the Bars
Now it’s time to pour that luscious batter into a greased 9×13 inch baking pan. Spread it out evenly, and then pop it in the oven! Bake for about 25 to 30 minutes. Here’s a little tip: check for doneness by inserting a toothpick into the center. If it comes out clean or with just a few crumbs, you’re good to go!
Cool and Cut
Once your bars are out of the oven, resist the urge to cut right in! Let them cool in the pan for at least 10 to 15 minutes. This cooling time helps them set up perfectly, making it easier to cut them into bars without falling apart. After they’ve cooled a bit, slice them into squares and enjoy the delightful treat you’ve just created!
And there you have it, my friends! A simple and rewarding process that leads to the most scrumptious banana bread bars. Can’t wait for you to try them!
Why You’ll Love These Banana Bread Bars
These banana bread bars are truly a treat for everyone! Here are just a few reasons why you’ll adore them:
- Quick to Prepare: With just a handful of ingredients and a simple process, you can whip these bars up in no time. Perfect for busy mornings or last-minute snacks!
- Deliciously Moist: The combination of ripe bananas and melted butter creates bars that are wonderfully moist and flavorful. Each bite is like a little piece of heaven!
- Versatile: Feel free to customize these bars! Add in your favorite nuts, chocolate chips, or even a sprinkle of cinnamon for an extra flavor boost. The possibilities are endless!
- Perfect for Any Occasion: Whether it’s breakfast, a snack, or dessert, these bars fit right in. They’re great for sharing at gatherings or simply enjoying at home.
- Freezer-Friendly: Made too much? No worries! These bars freeze beautifully, so you can enjoy them later without losing any flavor or texture.
Trust me, once you make these banana bread bars, you’ll find yourself baking them again and again!
Tips for Success
To make sure your banana bread bars turn out absolutely perfect, here are some of my tried-and-true tips! These little nuggets of wisdom will help you achieve that dreamy texture and irresistible flavor:
- Use the Ripe Bananas: The riper the bananas, the better! Look for bananas with plenty of brown spots or even a few that are starting to turn black. They’re sweeter and mash easily, giving your bars that delicious flavor.
- Don’t Skip the Butter: Real melted butter is key here. While you might be tempted to substitute with oil, the butter adds richness and a nice depth of flavor that oil just can’t match.
- Be Mindful with Mixing: When combining the dry and wet ingredients, remember to mix just until combined. Overmixing can lead to tough bars, and we want them to be light and fluffy!
- Experiment with Add-Ins: Feel free to get creative! Adding chopped nuts, chocolate chips, or even a dash of cinnamon can elevate your bars to a whole new level. Just keep the total mix-ins to around one cup to maintain the right texture.
- Check for Doneness Carefully: Ovens can vary, so keep an eye on your bars as they bake. Besides the toothpick test, look for a golden-brown top and a slight spring back when you gently press the center.
- Let Them Cool: I know it’s tempting, but letting the bars cool in the pan for a bit helps them set properly. This means you’ll get neat cuts without crumbling – and who doesn’t want a beautiful presentation?
- Storage Secrets: Store any leftover bars in an airtight container at room temperature for a few days. If you want to keep them longer, wrap them tightly and freeze for up to three months. They’ll taste just as good when you thaw them!
With these tips, you’ll be well on your way to making the best banana bread bars ever. Happy baking!
Variations of Banana Bread Bars
Ready to mix things up a bit? These banana bread bars are so versatile that you can easily customize them to suit your taste! Here are some fun variations that will keep your baking game exciting:
- Nuts Galore: Add in 1/2 cup of chopped walnuts or pecans for a delightful crunch. The nuts not only complement the banana flavor but also add an extra layer of texture.
- Chocolate Lovers: If you’re a chocolate fanatic like me, toss in 1/2 cup of chocolate chips. They’ll melt into the batter, creating gooey pockets of chocolate goodness that are simply irresistible!
- Cinnamon Swirl: For a warm, spicy twist, sprinkle a mixture of cinnamon and brown sugar over half of the batter before folding it all together. This creates a lovely cinnamon swirl that’s both beautiful and delicious.
- Nut Butter Bliss: Replace half of the melted butter with your favorite nut butter like almond or peanut butter. This will give the bars a rich flavor and a hint of nuttiness that pairs perfectly with the bananas.
- Fruit Fusion: Get creative with add-ins like shredded coconut, dried cranberries, or even fresh blueberries. Just remember to keep the total add-ins around one cup so your bars maintain that perfect texture.
- Spiced Up: If you’re feeling adventurous, add 1/2 teaspoon of ground ginger or cardamom to the batter for a unique flavor profile. These warming spices will elevate your banana bread bars to a whole new level.
- Vegan Twist: For a plant-based version, swap the egg for a flax egg (1 tablespoon of ground flaxseed mixed with 2.5 tablespoons of water) and use coconut oil instead of butter. You’ll still get all the deliciousness without the animal products!
With these variations, you can reinvent your banana bread bars time and time again. The best part? Each version is just as delightful as the last! Enjoy experimenting and finding your favorite combination!
Storage & Reheating Instructions
Now that you’ve baked up a batch of these scrumptious banana bread bars, it’s important to know how to store them properly to keep that fresh flavor and moist texture. Here’s how I do it:
Storing Leftovers
To keep your banana bread bars at their best, let them cool completely in the pan. Once they’re cool, transfer them to an airtight container. This helps lock in moisture and keeps them soft. You can also layer parchment paper between the bars to prevent them from sticking together, which is especially helpful if you’re stacking them.
These bars can be stored at room temperature for up to 3 days. If you find yourself with leftovers after that (which is rare!), you can refrigerate them for up to a week. Just remember that refrigeration can sometimes dry them out a bit, so I recommend enjoying them at room temperature for the best experience.
Freezing for Later
If you want to save some for later, banana bread bars freeze beautifully! Wrap each bar individually in plastic wrap, then place them in a freezer-safe bag or container. Make sure to label them with the date so you know how long they’ve been in there. They’ll stay fresh for about 3 months in the freezer.
When you’re ready to enjoy them, simply take out the desired number of bars and let them thaw at room temperature for a couple of hours. If you’re in a hurry, you can also pop them in the microwave for about 15-20 seconds. Just be careful not to overheat them, or they might dry out!
Reheating Tips
If you like your banana bread bars warm (and who doesn’t?), here’s a little trick: preheat your oven to 350°F (175°C) and place the bars on a baking sheet for about 5-10 minutes. This method brings back that fresh-out-of-the-oven goodness that makes them so irresistible. You can also microwave them for a quick warm-up, but keep it short—about 10-15 seconds should do the trick!
With these storage and reheating tips, you’ll always have delicious banana bread bars ready to enjoy, whenever the craving strikes! Happy baking and snacking!
Nutritional Information for Banana Bread Bars
Now, let’s break down the nutritional goodness of these delightful banana bread bars! This information is based on typical values per serving (one bar) and can vary slightly based on specific ingredients or portion sizes. Here’s what you can expect:
- Calories: 150
- Fat: 6g
- Saturated Fat: 3g
- Unsaturated Fat: 2g
- Trans Fat: 0g
- Cholesterol: 20mg
- Sodium: 50mg
- Carbohydrates: 22g
- Fiber: 1g
- Sugar: 10g
- Protein: 2g
These estimates reflect the wholesome ingredients packed into each bar, making them a delicious choice for a snack or breakfast treat. Whether you’re enjoying them fresh out of the oven or stored for later, you can feel good about indulging in these tasty banana bread bars!
FAQ About Banana Bread Bars
Got questions about banana bread bars? Don’t worry, I’ve got you covered! Here are some of the most common queries I get, along with handy answers to help you out:
Q1. Can I use frozen bananas for this recipe?
Absolutely! Frozen bananas work great in banana bread bars. Just make sure to thaw them completely and drain any excess liquid before mashing. They’ll be just as sweet and flavorful!
Q2. What if I don’t have all-purpose flour?
No problem! You can substitute with whole wheat flour for a nuttier flavor, or even almond flour if you’re looking for a gluten-free option. Just keep in mind that the texture might vary slightly depending on what you choose.
Q3. How can I make these bars vegan?
To make vegan banana bread bars, simply replace the egg with a flax egg (1 tablespoon of ground flaxseed mixed with 2.5 tablespoons of water) and use coconut oil instead of butter. They’ll still be delicious, I promise!
Q4. Can I add spices to the batter?
Definitely! Adding a teaspoon of cinnamon or a pinch of nutmeg can elevate the flavors beautifully. Feel free to experiment with your favorite spices to find your perfect blend!
Q5. How long do these banana bread bars last?
When stored properly, banana bread bars can last up to 3 days at room temperature or up to a week in the fridge. If you freeze them, they’ll stay fresh for about 3 months!
Q6. What’s the best way to reheat banana bread bars?
For a warm treat, I love reheating them in the oven at 350°F (175°C) for about 5-10 minutes. If you’re in a rush, a quick 10-15 seconds in the microwave works too. Just don’t overheat them, or they might dry out!
Hope this clears up any questions you had about banana bread bars! If you have more, feel free to ask. Happy baking!
Print
Banana Bread Bars: 7 Irresistibly Delicious Tips Inside
- Total Time: 40 minutes
- Yield: 12 bars 1x
- Diet: Vegetarian
Description
Delicious banana bread bars that are easy to make and perfect for snacks or breakfast.
Ingredients
- 3 ripe bananas, mashed
- 1/2 cup melted butter
- 1 cup sugar
- 1 egg, beaten
- 1 teaspoon vanilla extract
- 1 teaspoon baking soda
- 1/4 teaspoon salt
- 1 1/2 cups all-purpose flour
Instructions
- Preheat your oven to 350°F (175°C).
- In a large bowl, mix the mashed bananas with melted butter.
- Add sugar, egg, and vanilla extract. Mix well.
- Stir in baking soda and salt.
- Add flour and mix until just combined.
- Pour the batter into a greased 9×13 inch baking pan.
- Bake for 25-30 minutes or until a toothpick comes out clean.
- Let cool before cutting into bars.
Notes
- Store bars in an airtight container.
- These bars can be frozen for later use.
- Add nuts or chocolate chips for extra flavor.
- Prep Time: 10 minutes
- Cook Time: 30 minutes
- Category: Dessert
- Method: Baking
- Cuisine: American
Nutrition
- Serving Size: 1 bar
- Calories: 150
- Sugar: 10g
- Sodium: 50mg
- Fat: 6g
- Saturated Fat: 3g
- Unsaturated Fat: 2g
- Trans Fat: 0g
- Carbohydrates: 22g
- Fiber: 1g
- Protein: 2g
- Cholesterol: 20mg
Keywords: banana bread bars


